For those looking for more technical information, check out the main menu.
This page is an introduction to pinball maintenance and simple repairs for new pinball machine owners. There are many repairs and checks that any pinball owner can do without any expertise. If you are a new owner or thinking about purchasing a pinball machine, then this page on pinball repair tips is for you.
Caution
B. Routine Maintenance
1) Supplies Needed
C. The Playfield
1) Cleaning
2) Flippers
3) Rubber Rings
4) Playfield Switches
D. Batteries
E. Setting Free Play
F. Light Bulbs
1) Convert to LED’s New!
G. The Backglass
H. Lubrication
I. It Does Not Work
J. Advanced
K. Contact Information / Feedback
L. External Links
1) Repair Information
2) Learn How To Solder
3) Pinball Parts Suppliers
4) Where To Play
5) Conventions
6) Game Pricing Info
Pinball machines contain potentially lethal voltage. Dangerous voltage may remain for a period even after it is unplugged. Prior to opening a pinball machine, be certain to unplug it, then turn it on to insure that it was actually unplugged. It is recommended that the machine be allowed to sit several minutes to allow any remaining power to dissipate. Repair should be left to properly trained personnel. If you are not qualified, you should not work on a pinball machine.
Solvents such as isopropyl alcohol are flammable and should be used only in a well ventilated area. Do not operate the pinball machine until the vapor has dissipated. Follow all the warnings on the container. Never use lubricants or WD40 as that can lead to a potentially flammable – explosive situation. Proceed at your own risk!
Getting Started
A glossary of pinball terms Opening the pinball machine Removing the pinballs Fuse locations
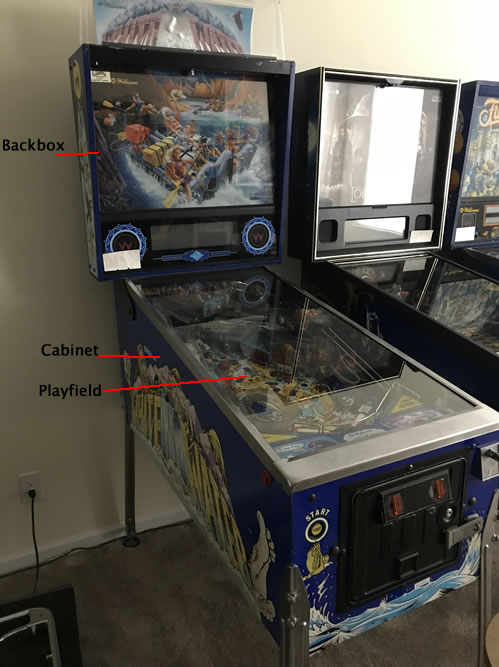
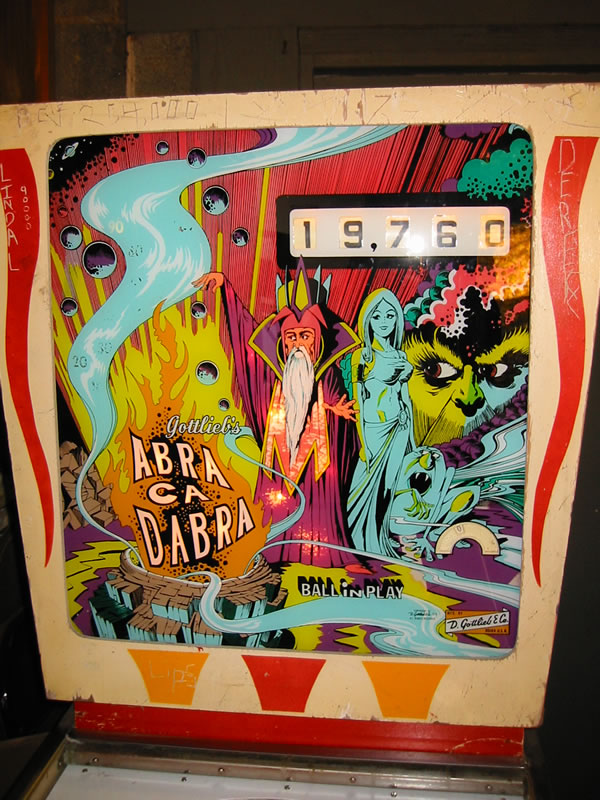
Pinball machine can be divided into two general areas, the playfield / cabinet, and the backbox or head. There are also two general categories of pinball machines, solid state (SS) and electro-mechanical (EM) machines. SS machines have digital displays that power up when the machine is turned on. EM machines use mechanical reels that spin to display the score.
Maintenance of SS and EM playfields are similar. However, the similarity ends there. EM machines use relays, motors and switches to run the game. SS machines rely on electronic circuit boards (PCB) and computers to control the game.
The first step is to identify your pinball machine type and model. An excellent resource is the Internet Pinball Database. Look up your pinball machine on this database to determine what type it is. Find out the manufacturer, the year, and the type: Solid State Electronic (SS) or Electro-mechanical (EM). If your machine is solid state, also note the MPU/CPU type. Keep this information handy for dealing with parts suppliers and repair people.
It is always helpful to have the operating and repair manuals. These manuals can usually be purchased at Steve Young’s The Pinball Resource, Marco Specialties, or Mayfair Amusements. If your machine was manufactured by Stern, Sega or Data East, the manuals may be available from Stern Pinball, Inc.
Before Turning it On!
If you are buying a used game, the chances are pretty good that a wrong fuse was installed at some point. If it is large difference, then a problem could cause severe damage to your new pinball machine or even a fire. It is very important to check that the proper values are installed. For more information on locating the fuses, see “Fuse locations“.
Routine Maintenance
Regular maintenance of a pinball machine can keep it running smoothly and maintain its resale value. Prior to starting, see the Caution above. The supplies suggested below are available from companies that supply pinball parts.
Supplies Needed
Most maintenance can be accomplished with supplies found in local stores. Some materials may have to be ordered from pinball parts suppliers. The following parts may be needed (will vary depending on the machine):
- Q-tips.

Needle Nose Pliers - Isopropyl alcohol (91%). Do not use rubbing alcohol.
- Screwdriver (Phillips and standard).
- Needle-nose pliers.
- Wire cutter. Small size for cutting wires in tight places.
- Allen wrench set.
- 400 grit sandpaper or flexstone (switch cleaning).
- Nut driver set / socket wrench set – English. Socket set used for some flippers.
- Multimeter / DVM (volt ohm meter). Make sure it has a diode test function.
- Novus #2 or #3 cleaner. #2 is typically used for cleaning playfields.
- Treewax or Meguiar’s Carnauba wax (or Optimum Car Wax®).
- Light bulbs – type varies depending on the pinball machine. Or LED’s.
- New pinball(s)! – replace these once a year. In quantity, they are $1 ea. Get a bunch and replace them every year when you replace the batteries.
- Switch adjustment tool.
- New rubber rings (replace if yours look worn out).
- Replacement batteries – if you are unfortunate to still have them. Or get rid of batteries forever.
- Pencil soldering iron. We prefer 35 watt for under the playfield work. Not for circuit board use!
- Solder. 60/40 (tin/lead) rosin core. Note that newer pinball machines are lead free and use silver solder. That requires higher heat and is much harder to work with, so we stick with tin/lead. 63/37 solder may melt a little better.
- Magnet grabber – for picking that dropped nut or screw. Telescoping and a bendable wire would be nice.
- Fuses – Check out what your machine uses and keep some on hand.
- A good bright light. Getting one on a stand or somehow is held in place is great. Head lamps can work too.
- Digital camera (phone is typical) to take photos of disassembly to help in reassembly.

Nice To Have But Not Required:
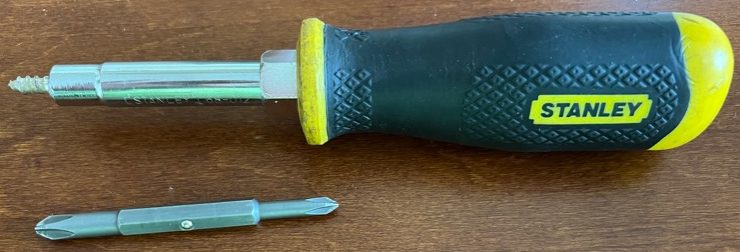
- A Multibit Screwdriver – Screwdriver, plus a nut driver. And can remove or tighten those posts.
- Soldering Iron Station – Required for circuit board work. Solder, also.
- Desoldering Tool – We like hand vacuum pumps (Soldapullt). Desoldering braid can also be used.
-
Digital Logic Probe
Digital Logic Probe (for circuit board repair, this is nice to have for the more sophisticated repair person). - Capacitor tester. Some DVMs have this built in.
- Hand crimpers – for replacing the wire plugs on circuit boards.
- Circuit Board Holder – We love Panavise circuit board holder.
- Table mounted magnifying glass with light.
- Magnetic bowl – to hold parts while disassembly – reassembly.
- Desoldering Station – Almost a necessity for circuit board work.

Parts Suppliers
You will need parts specifically for pinball machines. Pinball parts suppliers are listed here.
Perhaps the most common parts to obtain are a flipper rebuild kit and a rubber ring kit specific to your machine. Bulbs, too, including flashers (if used by your pin).
Learning how to solder
We are a proponent of learning with in-person instruction. The best thing to do is find someone who knows how to solder and desolder. We also have an extensive discussion about learning to solder the right way.
Pinballs
The pinballs wear, get chipped and can contribute significantly to the playfield wear. It is recommended that pinballs be replaced regularly. New pinballs are inexpensive and can be obtained from the parts suppliers listed below. Don’t save a few dollars and ruin a playfield.
The Playfield
The condition of the playfield can determine the resale value of a machine. Additionally, dirt on the playfield can slow the play down. As an owner, a playfield is easy to maintain.
To access the playfield, you will have to open up the machine and remove the cover glass.
If you find it necessary to tilt up the playfield, it is recommended that you remove the pinball(s) first. Otherwise, raising the playfield may eject the pinball, which could damage the playfield or backglass. Removing the pinball can be simple on single ball machines or tricky on multiball games. For single pinball games, you may be able to reach in and remove the ball, or manually press the solenoid ball eject mechanism. For complex SS games, it may be easier to enter the service menu to eject the balls. Consult the repair or operating manual for the specific procedure.
Cleaning
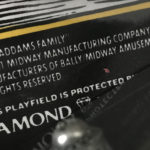
First step is to identify the type of protective coating on the playfield. EMs and early SS used lacquer, which tends to yellow. Later pins used a harder coating sometimes called Diamond Plate, hard coat or just ‘Clear Coat’. It is exceptionally hard, will not yellow, and should not wear through or get ball swirls. If your playfield has a hard ‘Diamond Plate’ finish, it will be marked with that name, usually down near the apron where the ball drains.
For all playfields, generally it is best to start with the least abrasive. Wipe with a moist microfiber cloth. We usually dampen with 91% isopropyl alcohol which does a great job of removing wax. Others recommend a cleaner such as ‘Simple Green’ which does a good job of removing oils. Naphtha is also used, but be sure to follow the cautions on the container.
Novus #2 is the recommended cleaner. Follow the instructions on the containers. On clearcoated playfields, use this sparingly since these cleaners are mild abrasives and remove some of the coating. Novus #2 will remove the old wax and grime, plus a little bit of the outer coat.
For exceptionally dirty playfields that do not have a hard clearcoat, Magic Erasure with 91% isopropyl alcohol works well, but this will remove more of the top protective layer of the playfield. You may need to re-seal the playfield after using Magic Erasure.

Note: On clearcoated playfield, never use Magic Erasure. Magic Erasure will remove the top coat which should be left intact.
Magic Erasure is especially effective when working on older playfields (EM’s and early SS) as it removes the protective but damaged lacquer coating. It is effective in removing ball swirls. If used to excess, it can remove the paint and get to bare wood. Check the erasure regularly and at the first sign of paint – STOP. After using Magic Erasure, the playfield will have to be re-sealed (lacquer, polyurethane or automotive clear), so do not use Magic Erasure unless you are prepared for this complicated step.
Plastic ramps can be cleaned with Novus plastic polish – Novus #1. Another alternative for plastic is Plexus Plastic Cleaner.
The playfield should be waxed regularly. This will help prevent wear and make the game play faster. There are as many opinions about what wax to use as there are waxes. For many, the safest choice is a real wax, a hard or paste wax, such as Treewax and Meguiar’s Carnauba wax are among those recommended.
Others recommend Optimum Car Wax® which is a synthetic. While this could be a superior product to Carnauba, there is less experience among pinball user with synthetic waxes.
Do not use a wax / cleaner as it contains abrasives. Do not get the liquid variety as it contains solvents and water. Purchase a soft cloth like a microfiber towel to reduce surface scratches. A t-shirt works but can leave surface scratches that could be visible in a newer clearcoated playfield. For a complete guide to playfield cleaning and restoration, see the links at the end of this page.
Flippers
Information about rebuilding flippers .
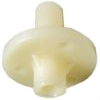
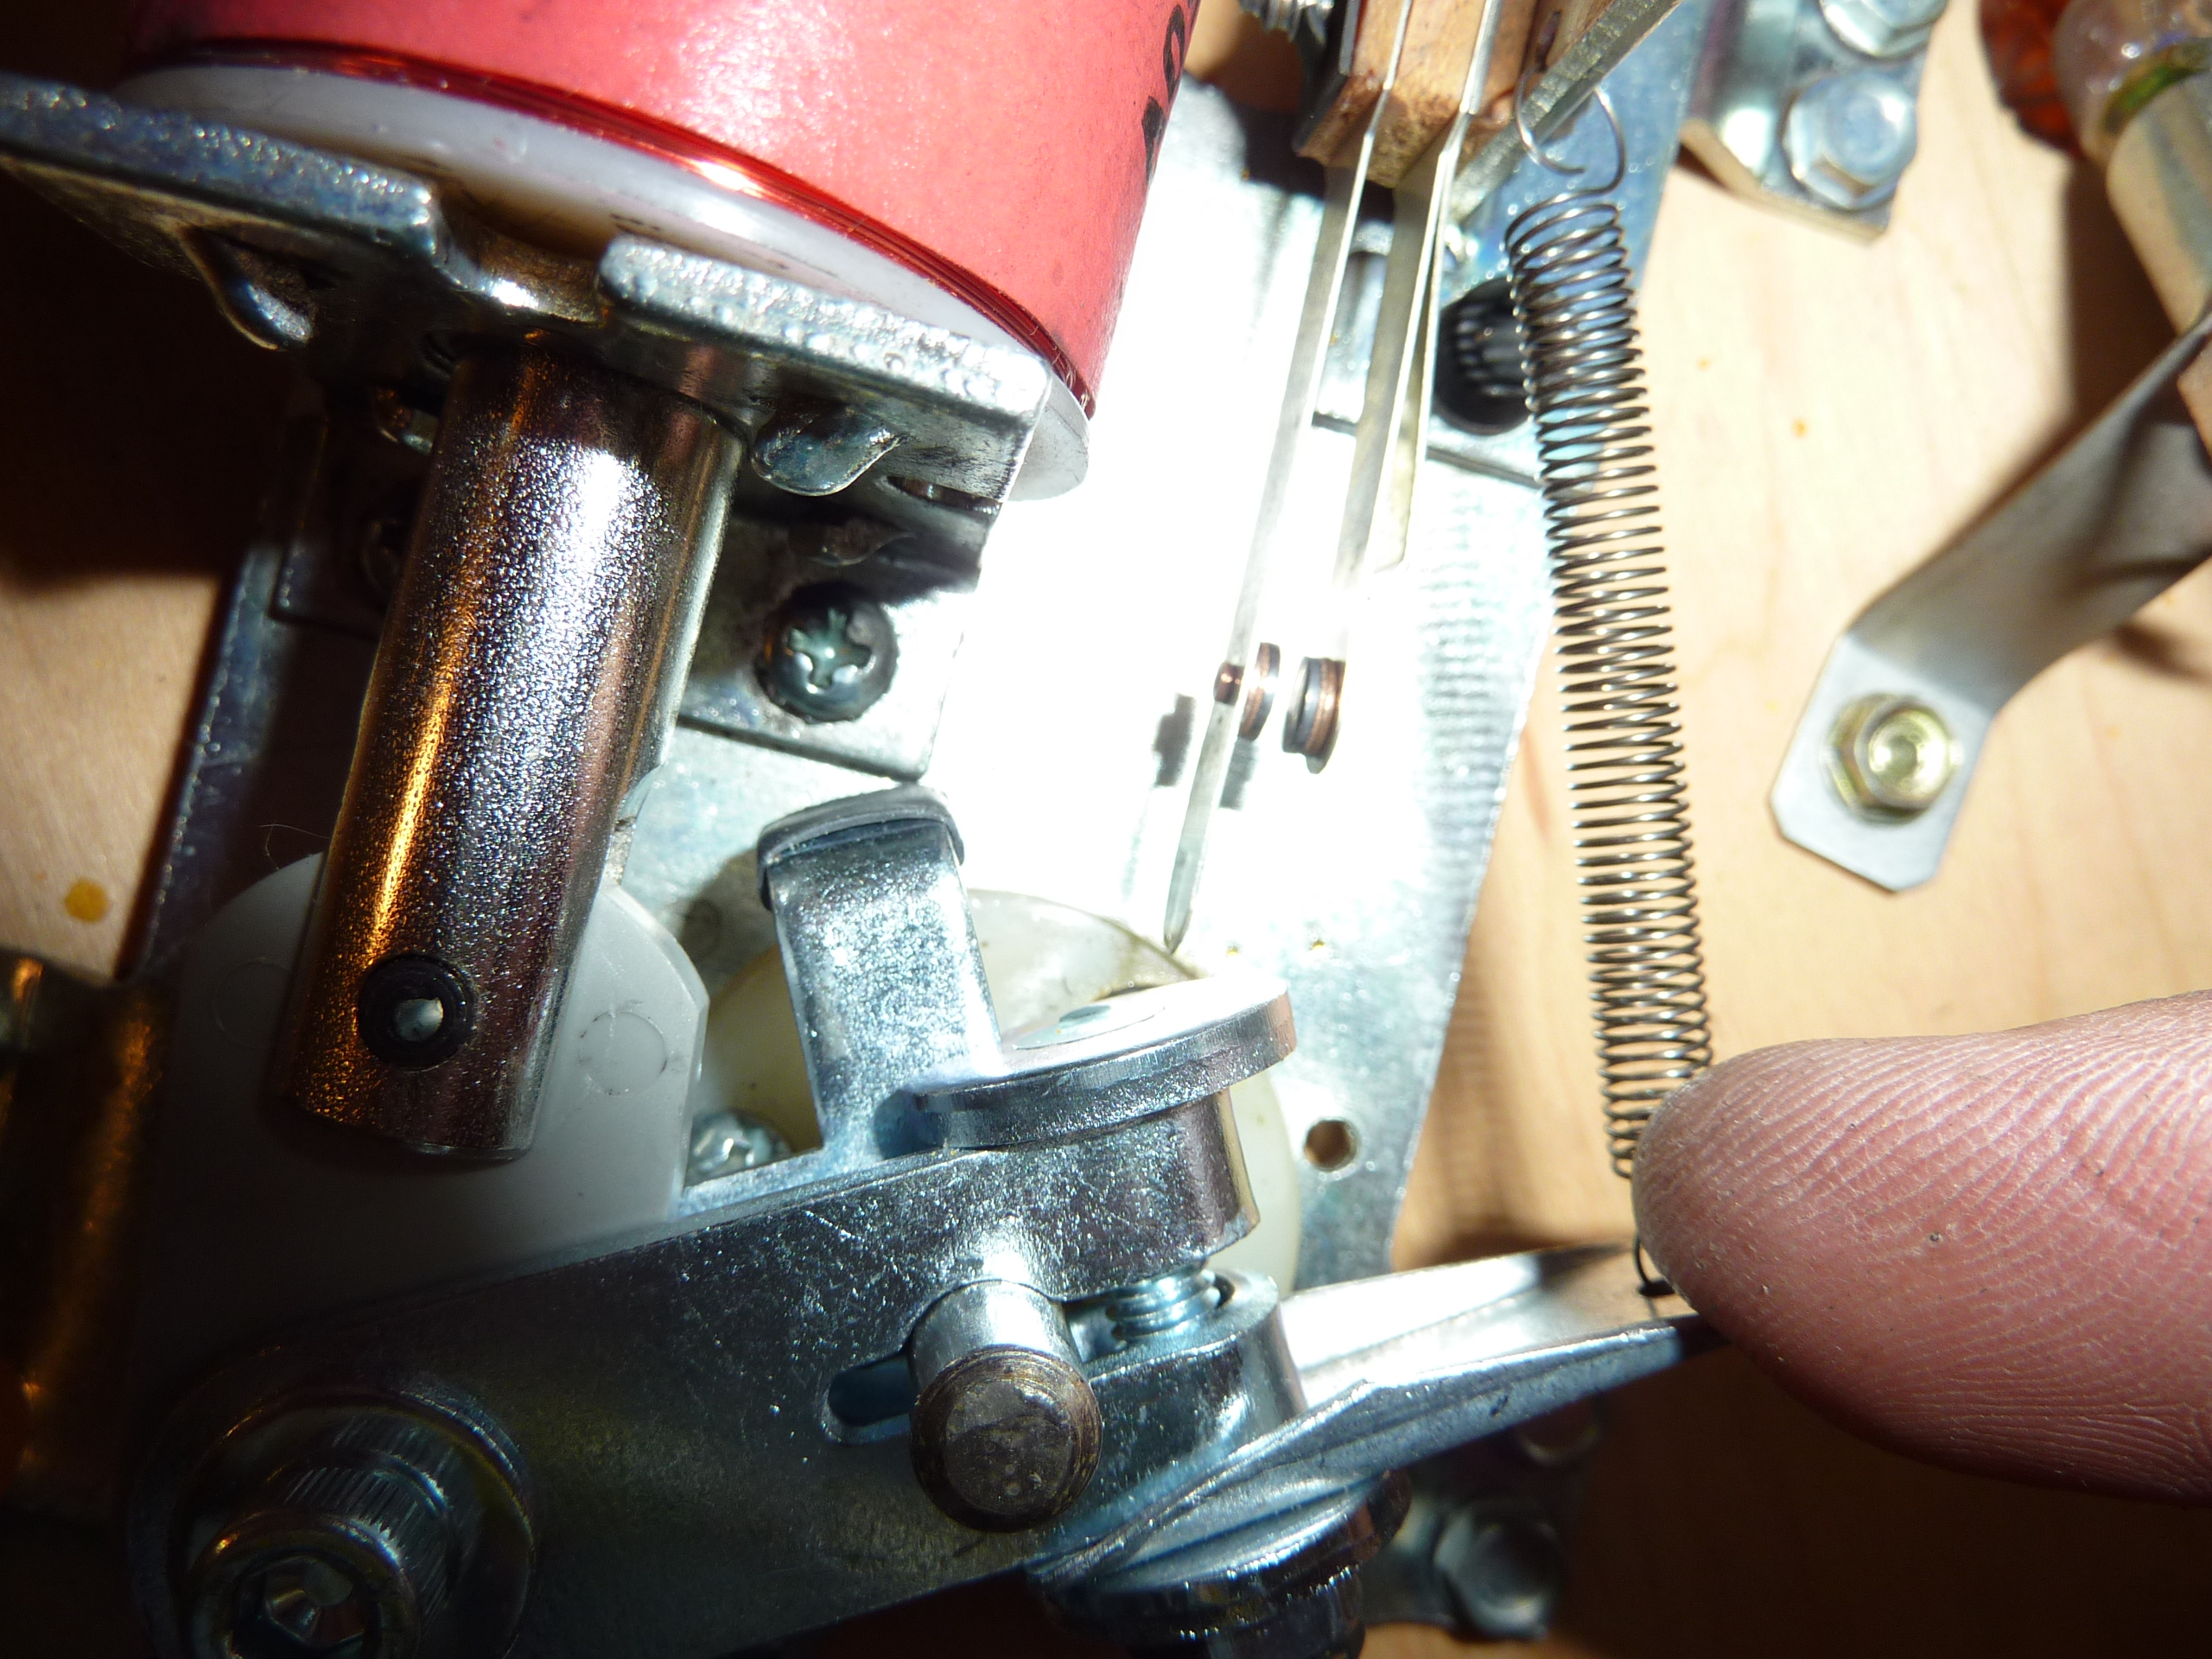
Pinball flipper repair is not difficult. To start, check the flippers and other moving parts. Manually move them and make certain that they do not contact the playfield. If a flipper scrapes along the playfield, it will quickly wear through the surface, which will detract from its appearance and reduce the resale value. The flippers should be held above the playfield by a bushing shown to the left (the flippershaft is inserted through the hole in the bushing). This nylon bushing should protrude above the playfield and prevent the flipper from rubbing against the playfield. If the flipper was rubbing against the playfield, replace this bushing. It is available from the pinball parts suppliers listed below. Removal and replacement is easy for anyone who is handy with a screwdriver, socket wrench and / or Allen wrench. After replacing the bushing, reassemble the flipper mechanism, then tighten the bolts while holding the flipper in the proper position.
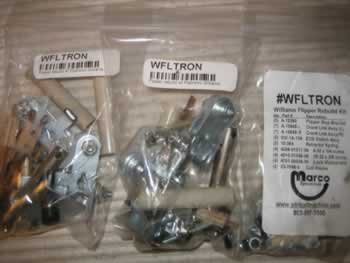
Flipper parts wear with age and the action of the flippers can become sluggish or start to stick. Sometimes it is possible to restore flipper action by disassembling the components, clean them (with isopropyl alcohol) and reassemble. However, it is usually a good idea to rebuild the flippers by ordering a rebuild kit from one of the pinball parts suppliers. These kits come with all the parts needed, with the possible exception of a bushing (shown above). For someone who is handy with a screwdriver, socket and allen wrench’s, this is an easy job. A new end of stroke (EOS) switch will require the use of a soldering iron. Do not make the common mistake of trying to repair a sticky flipper by tightening the spring as that is addressing the symptom and not the problem. Never use any type of lubricants with the flippers.
While you are checking the flippers, be certain that the correct type of coil is installed. Unfortunately, some service personnel just throw in what they have handy. It is not unusual for a game to have a too weak solenoid installed, making difficult shots impossible, or too strong of a solenoid which can lead to broken parts. Consult the operating or service manual for the correct solenoid number. Information about rebuilding flippers .
Important note: Isopropyl alcohol and other solvents are flammable. Use in a well ventilated area. Do not operate the pinball machine until all vapor has dissipated.
Rubber Rings
The rubber rings on the playfield dry out and crack. As they age, they slow down the play and detract from the appearance of the game. New sets can be purchased from pinball parts suppliers.
With older games, all that is generally necessary is to remove the playfield plastics using a nut driver and screwdriver. It is a good idea to take digital photographs of the playfield before you start with additional pictures during the disassembly. These pictures will help with reassembly.
Some parts suppliers will provide pictures with their rubber ring replacement kits. The location and size of the rings are also listed in the pinball manuals. The rings usually have raised mold markings on each which indicate their size the can help with determining their location.

The general rule used to be that you should always replace the rubber rings on your playfield with the same color that the games came with. However, these days, there are other options that maybe better than the original.
EM games should always have white rubber rings. Black rubber is much harder and it could damage the posts of these older machines.
Newer games (1995 or newer) were usually shipped with black rubber rings. The black rubber rings do not show dirt as easily and this could be the real reason for the change. However, the harder black rubber rings have less bounce than the white rubber rings. Replacing the black rings with white ones may speed up game play. It also might (or might not) lead to more breakage with the faster bounces.
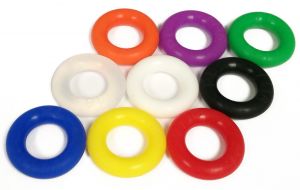
Black rings will contribute to dirt on the playfield. White rubber rings may not cause as much dirt as they age but they will look dirty sooner. We stick with white rubber rings and convert newer games that come with black rubber to white. It keeps the playfield much cleaner. For ‘keeper’ games, we like to use silicon rubber rings. The clear ones let more of the GI light to shine through.
Games with ramps, either wire or plastic, are more complex to disassemble. Some games like White Water have four ramps that intertwine with each other. Disassembly and reassembly requires a great deal of patience and care. While you have the machine apart to replace the rubber rings, it is a good idea to clean and wax the playfield. When reassembling, sometimes wood screw holes are too large or have been ‘stripped’. An easy fix that usually works is to insert a toothpick into the too large hole, then tighten the wood screw. If this does not work, try a mixture of sawdust and wood glue or a toothpick and wood glue. For really tough situations, try Mr. Grip.
More information on replacing rubber rings on pinball machines.
How to disassemble, clean and reassemble a pinball machine.
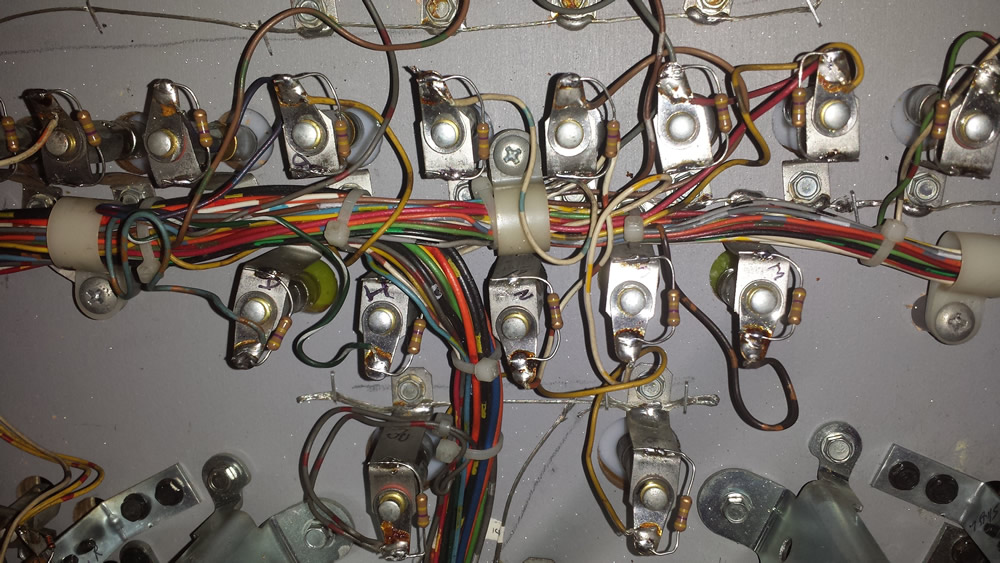
Playfield Switches
Playfield switches control the scoring of the game. They can become dirty or bent and fail to activate scoring.
For a detailed discussion on playfield switches, including cleaning and adjustment, see ‘Pinball Switches – Fixing and Adjusting.’

There are three types of switch points: gold plated, silver, and tungsten (and sometimes copper). Tungsten are designed for high current and are used for pop bumper, flipper and EOS (end of stroke) switches that directly power the pop bumper coil itself on all EM (Electrical Mechanical) and early SS (Solid State – computer controlled) games.
Silver points were typically used in EM’s for relay contacts, are medium to high current (depending on size and shape of point). Silver tarnishes and will cause little to no connection, even when new, so silver contacts are not used in SS games.
Gold plated points were used once games went SS. SS switches require very little current and used low voltage in the switch matrix. The gold flashing will not tarnish like silver, but still needs to be clean of any debris or coatings.
Never use contact cleaner on any switches. Some switches (most in EM games) use high voltages and cleaners are not suitable. Use of these cleaners can lead to switch failures or even fire.
The first step is to test the switches. The easiest method is to open up the game, remove the cover glass and then manually manipulate the switches. This can be accomplished with a pinball or a push with your finger. If it works, leave it alone.
If several switches do not operate and you have a SS game, look at the switch matrix in the operating or repair manual. If the non-operating switches fall in the same row or column, then it may be a problem with the wiring or the circuit board.
Adjusting and Cleaning Playfield Switches
For a detailed discussion about how to adjust playfield switches, including roll over, star, pop bumper and sling shots, see Pinball Switches – Fixing, Adjusting and Cleaning the Right Way.
Tungsten Switches
The only switches in a SS game that may require filing or sanding are the EOS (end of stroke) switches and flipper switches.* The EOS switches are located next to the coil that operates the flipper under the playfield. The flipper switches, located just inside the cabinet from the flipper buttons. For older SS games, the full current flows through these switches just like EM games.
There are two ways to tell if you have full power switches: 1) if they appear pitted or severely worn or 2) if you see a bright electrical arc while operating the flippers; then they are full power and need to be filed with a metal file.
More information on flipper maintenance.
*The exception is machines controlled by Fliptronics (Williams) circuits or similar designs in Data East/Sega/Stern pins. These gold EOS and flipper switches handle low voltages and should never be cleaned with sandpaper or other abrasives. They must be cleaned following the same procedure outlined for SS gold leaf switches, with a Q-tip and isopropyl alcohol . Fliptronics (Williams ~1992 to 1999) switches can be easily identified because they are not touching (normally open) when the flipper is not in use. DE/Sega/Stern also are low current switches but are closed when the flipper is not in use. These also must not be filed. Some cabinet flipper switches have LED optical switches. They can be cleaned with a Q-tip and 91% isopropyl alcohol.
Microswitches
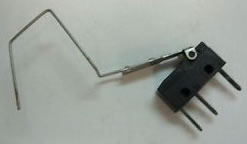 Microswitches are enclosed boxes and cannot be cleaned. If they malfunction, they may need to be physically adjusted or replaced.
Opto Switches
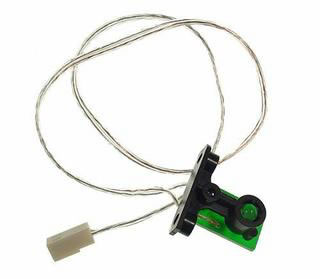
Opto switches have a LED (transmitter) and a receiver. There are many different types: horseshoe shape, on circuit board, etc.
It is possible to physically align opto switches (if on separate boards). They may be cleaned with a q-tip and isopropyl alcohol. However, when they malfunction it is usually a sign that they need to be replaced or there is a problem with the circuitry. It is usually the transmitter that fails, but these should be replaced as matched pairs.
Some opto’s use light of different wavelengths and a certain transmitter and receiver may not work well together. It may be possible to see if a UV transmitter is working by looking at it through a digital camera’s LCD viewfinder, but only if it is possible to see straight on. In a viewfinder, the LED will appear to glow. Other opto switches use visible light.
For a detailed discussion about how to clean and adjust opto switches, see Pinball Switches – Fixing, Adjusting and Cleaning the Right Way.
Reed / Magnetic Switches
Reed or magnetic switches act by sensing the presence of the metal pinball. They are sealed and cannot be cleaned. Malfunction usually means that the switch has failed or there is a problem with the wiring or the circuitry. These are not commonly used.
Capacitors used on Switches

Capacitors were used, primarily, on early Bally and Stern SS pins. Capacitors are there for a purpose. Some switches, such as targets get hit so briefly that the computer does not register them. The capacitor helps to simulate a longer hit so that the computer can register the points.
However, there is a downside. Caps can pick up electrical noise, such as a solenoid firing and send a signal to the computer giving a false switch hit.
Bally especially went overboard installing caps where they are not needed. Some think they are not needed on roll over switches, although it is possible for a ball to fly through a lane and not register. Drop targets never need them. Stationary targets usually need capacitors.
If a switch appears as stuck ‘on’, yet inspection indicates that the switch is not closed and it has a capacitor across the switch, try removing the capacitor. Removing it may fix the short or stuck on switch. Try playing the game. If the switch registers properly, you can leave the capacitor off. However, it may not always register properly. If you find that the ball hits the switch and the points are not always registered (the 8-ball target on Bally Eight Ball is an example), then install a new capacitor. A missing or shorted diode on a switch that also has a capacitor can cause the machine to read an ‘open’ switch as ‘closed’, so it may be necessary to test the diode also.
Diodes used on Switches
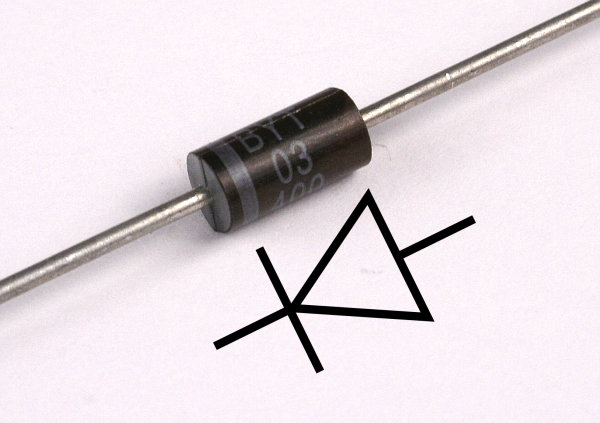
All SS switches are in a switch matrix and must have a diode in order to work properly (note that EM switches do not have diodes). If this diode is missing or shorted, then activating that switch will give wrong information to the computer and tell it that other switches have also been closed. If the diode has failed open, then that switch will never operate.
Troubleshooting a failed open diode is fairly easy – the switch will not work. Troubleshooting a missing diode is done by inspecting switches – a rather tedious but usually necessary process. However, troubleshooting a shorted diode is not easy. To find a shorted diode, one must test a diode using the diode test setting on a DVM one at a time. It is better to do this with the column and row plugs removed from the CPU / MPU board. It is possible, by using the switch test in the pinball machine, to narrow the problem down to 4 or so switches. Doing this involves some pretty involved sluthing. For more detailed information, see this great article on switch matrix troubleshooting and theory.
Setting Free Play
For most pinball machines, setting it to free play is simply a matter of going into the Service Menu and selecting free play. However, for early Bally, Stern and Williams solid state and all EM pins, there is not a free play setting. Learn how to set those pins to free play.
Batteries

All solid state (SS) machines have batteries to maintain the machine memory (find the batteries). The memory retains settings and other information such as the high scores. Batteries will leak with time and when they leak, they can destroy the circuit board (PCB) around and below the location of the batteries. It is important to replace the batteries with fresh ones annually. It is best to pick a time of the year, such as new year’s day, to replace your pinball batteries along with the smoke alarms in your house.
To replace the batteries, it will be necessary to remove the translite or backglass and open the backbox. The batteries are located on the main board in the backbox. After you have replaced the batteries, it is a good idea to mark the date on them with a sharpie. That way, you can tell at a glance how old they are. If you are removing batteries that are only a year old, don’t throw them out! They are most likely still good. Keep them and use them in your remote controls or other applications. You just don’t want them sitting in your pinball machines for years and years.
 The batteries can be replaced with the power on. This will save the settings, the high scores, etc. However, this must be done very carefully and by qualified personnel (see caution). In addition to the standard precautions, care must be taken to install the batteries in the proper direction (+ to the + side) with the power on. While the voltages around the batteries are typically low, there are other much higher voltages nearby. Accidental shorting of those voltages can destroy circuits and be quite hazardous.
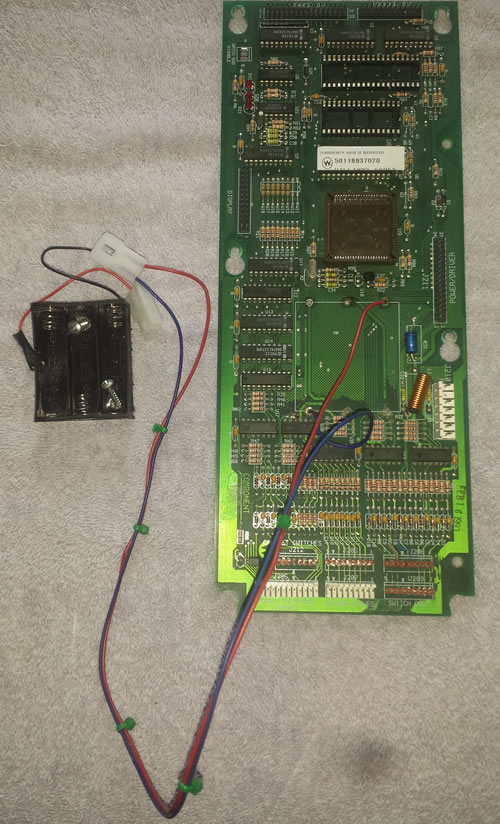
Some pinball machines have been modified so that the battery pack has been moved off the circuit board, usually to the bottom of the back box. Other machines have been modified so that the batteries have been replaced with a large capacitor and these do not require routine maintenance.
The best way to avoid issues with leaking alkaline batteries is to get rid of the batteries altogether.
Electro-mechanical (EM) pinball machines do not have batteries.
Light Bulbs
Instructions on converting light bulbs to LED’s.
Fixing lamps sockets that work some of the time. (New!)
Light bulbs burn out and, for the most part, they are easy to replace. Identify what type of bulbs your machine uses and order a supply from the parts suppliers. If you have a repair manual, the types used are listed. If not, it will be necessary to open your machine and look at the base of the bulbs. Always turn off the power prior to removing or replacing a bulb. If the power is left on, it is possible to short the socket or wiring to other higher power circuits and this can damage / destroy the circuitry.
Prior to tilting up the playfield, be certain to remove the pinballs to prevent damage to the game (see above).
Games use several different types of light bulbs. These are located on and underneath the playfield and behind the backglass. Some of the bulbs are general illumination lights while others are flasher lights. It may be necessary to remove the playfield plastic to access the bulb. The type of bulb can be identified by removing the bulb from the socket and look at the metal base of the bulb where an identification number is stamped.
If your machine uses #44 lamps, #47 lamps can be substituted. #47 lamps use less power and run cooler than #44 lamps. Lower power will put less stress on the circuitry and are less likely to warp the playfield plastics.
LED’s can be substituted for standard light bulbs. LED’s have the advantage of using much less power than standard bulbs. They also run much cooler. LED’s can be brighter. LED’s are not without disadvantages. LED’s can be much brighter and the light can be focused. Some report a strobing or flicking which can be annoying or cause headaches. Also, LED’s run on DC while many bulb circuits run on AC LED’s are much more expensive than standard bulbs, but can last much longer. If considering LED’s, be certain to match the voltage of the current bulb, as well as if the circuit is AC or DC. Some parts suppliers specialize in LED’s and be quite helpful when trying to match LED’s to your pinball machine. If considering converting to LED’s, please read about converting to LED’s.
Some light bulbs are located in the pop bumpers. To access, you will need to remove the pop bumper cap. Some caps are snap-in and care is needed when removing to not break the caps (Eight Ball Deluxe, for example). Others are held in place by small screws. To access others, it may be necessary to remove a ramp or other playfield items.
Cleaning a playfield and replacing the rubber rings involves disassembling the playfield components. That is a great time to replace those hard to reach bulbs. Playfield bulbs are cheap, so just replace those that are covered by playfield plastics or in other hard to reach places. All lamps are referenced by numbers on the metal base and these can be hard to see. Order the same type of lamps from one of the suppliers listed below. The only exception is if your game uses #44 bulbs (see above paragraph).
The sockets that house those bulbs are a constant source of aggravation for owners. The lamps will flicker off leading the owner to think it is burned out only to flicker back on. The source of that problem is usually the socket themselves, especially those for bulbs with a round base. These sockets are not made to last very long. Sometimes the only solution is to replace the socket. However, that can be costly and involves unsoldering and resoldering two wires to every socket. Owners have developed tricks that can sometimes restore these sockets. One is to clean the socket to remove the oxidation that accumulates over the years. Many suppliers have bulb socket cleaners specifically designed for this task. Others use a Dremel at very low speed, with a rough sandstone attachment to accomplish a similar action. Another cause of flickering lights is due to the washer drying out. A small drop of household oil will cause the washer to expand and help insure better electrical contact. Yet others will swear the only fix is to solder directly to the moving parts. That can be tough because the build up of oxide and oils make it difficult for the solder to stick.
Backglass
There are generally two types of backglass. Older games used a backglass that was created through a silkscreen painting process. Newer machines have a backglass that is usually referred to as a translite which is a plastic sheet.
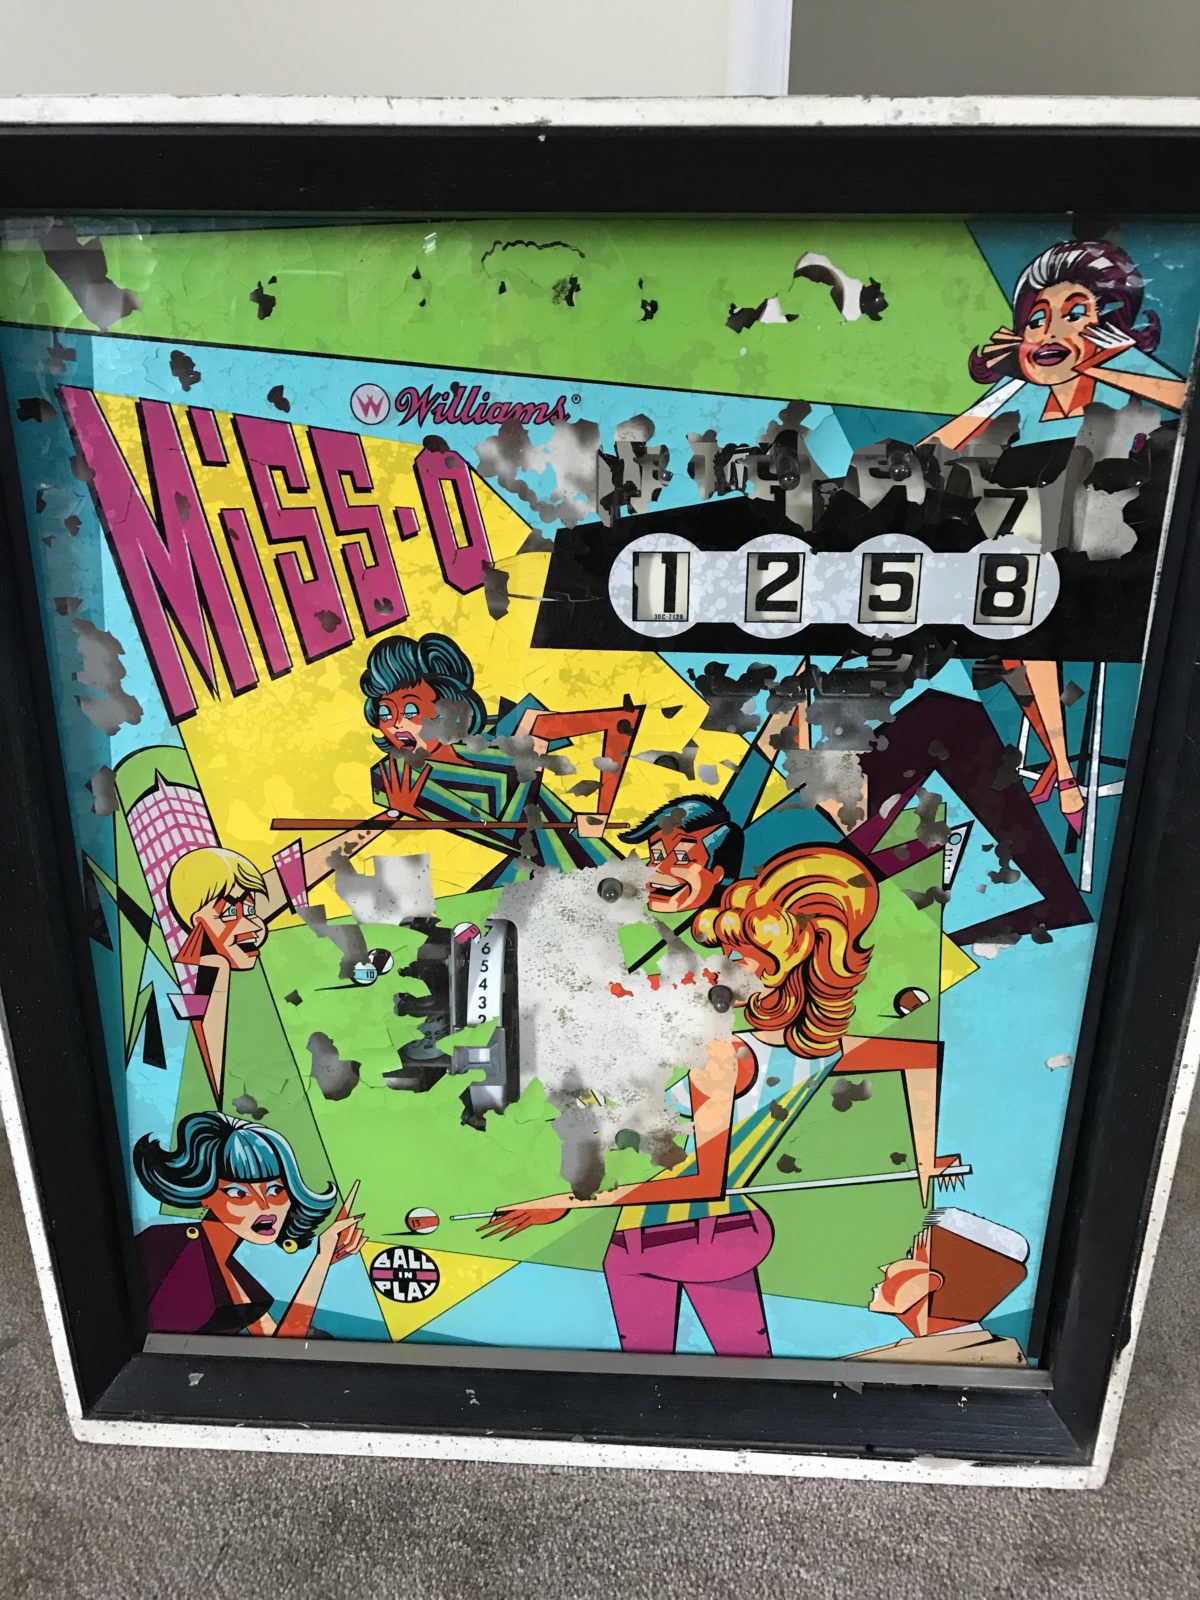
A painted silkscreen backglass can peel, chip, craze or flake. To preserve its beauty, it can be sealed with a Krylon clear coat spray. This is easy to do and will preserve your backglass for years to come. For more information, visit the PinballHQ website. Clean a silkscreen backglass very carefully. Since these are painted on and can become fragile with age, any physical contact can remove paint. If you must clean, use nothing more than a damp cloth and nothing stronger than water.
When restoring a backglass, the general rule is that it is better to leave an imperfect backglass alone. Usually a backglass with some flaking looks better than a poorly touched up backglass.

Translites do not generally suffer from age related damage and should not be treated. NEVER clean a translite with anything other than a damp cloth. Cleaning the translite with a typical glass cleaner may remove the translucent white background and will ruin it. Minor spots where the white has been removed may be carefully touched up with a small dab of white out, but are more often best left alone.
Lubrication
When moving parts start to stick or malfunction, many owners reach for lubrication to solve the problem. In the long run, lubrication causes more problems than it solves. The addition of lubrication leads to gummed up moving parts. Never lubricate any parts unless instructed by the repair manual. Pinball parts, for the most part, are made to run dry. Never ever use common lubricants or WD40**.

Many lubricants and WD40 are flammable and can result in fire. To repair a balky or sticking part, it is best to disassemble the part and clean it with 91% isopropyl alcohol. For solenoids, it may be necessary to replace plastic or metal sleeves and install new springs in order to restore the part. Flippers and their components wear out. The only solution is to order and install a rebuild kit available from pinball parts suppliers. A rebuild kit is easy to install for those who are handy with a screwdriver. For other moving parts, it may be necessary to replace the springs. Springs are cheap and easily obtainable from pinball supply houses. Be certain to allow any flammable liquids to evaporate prior to starting the machine.
Lubrication is required only where metal parts hit metal parts. This is especially common in EM pins. This includes disks that spin and contacts press down on another disk. Use special lubrication available from pinball suppliers. Some report good results using Teflon grease. Others use sewing machine oil. Use sparingly.
Motors with gears and bearings usually require grease. Newer ones may be sealed and cannot be greased. Those with plastic parts generally are not greased.
**WD40 was never designed to be a lubricant. It was designed as a Water Displacement (WD) to prevent rust by keeping water away, and as a degreaser.
Schematics
Learning how to read pinball / electronics schematics is the key to diagnosing problems in pin. There are several external resources that can help you. Here are some of the best:
Reading Pinball Schematics – An excellent YouTube presentation by the pinball expert, John Robertson. John does a great job of graphically outlining the current flow in the schematic.
1975 EM Schematics – The optics are not as well organized, but still quite useful for a beginner.
Of course, you will need to have schematics for your machine before you can learn to use them. If your game did not come with schematics, it maybe possible to download them from IPDB. Or better still, purchase a reproduction of your manual from a pinball parts supplier.
It Does Not Work
Fuses
A common cause of a non-working pinball machine is a blown fuse. Pinball machines have many different fuses. These can be located in the backbox, under the playfield, or in the area below the playfield.
Prior to inspecting the fuses, be certain that the machine is unplugged.
Sometimes it is possible to identify a blow fuse by looking at it. However, the only way to be certain that a fuse is good is to check it with a voltmeter. Set the voltmeter to resistance and set it to the lowest resistance value. Check to insure that your meter is working by connecting the leads together. The value on the voltmeter should read near zero (0.1 – 0.4 ohms is typical). Remove the fuse from the holder and connect a lead from the voltmeter to one end of the fuse and the second voltmeter lead to the other end. If the fuse is good, the meter should read near zero.
The proper value for the fuse will be listed on a small piece of paper attached to the machine box, playfield, or in the manual. Unfortunately, the fuse being replaced may not be the correct value, so be certain to check. There are three basic types of fuses:
*Slow Blow/ Time Lag/ Time Delay/ Slo-blow fuses
*Fast acting fuses
*Very fast acting fuses (not commonly used in pinball)
Fuses are rated by their current (amperage) capability. Be certain to always use the correct value. Never put in a larger current fuse then specified.
Fuses are also rated by voltage. Compare the voltage rating of the fuse with the voltage in the circuit. Never use a lower voltage fuse in a higher voltage circuit.
More detail about locating, checking and replacing fuses is located here.
It Still Does Not Work – I am certain it is not the fuse(s)
If you have a (EM) electro-mechanical machine, it could be the contacts between the relays, a switch that is not closed, a bad tilt switch or, oh hundreds of stuff. Some more help on EM pins can be found here (work in progress).
If you have a solid state (SS) game, it could be a bad connector or one that has just come loose, a connection between boards, an IC loose in its socket, bad solder joint, a blown component or just about a million other things.
It is a good time to ask, “What are my capabilities?” We have seen many fine machines ruined because owners tried to do what they were not capable of doing. At this point, it may be time to do more detailed research, contact a repair facility, or find a very good, competent friend. If looking for help, please see these FAQ. If willing to do some more research, please consult the external links to repair information. Please note that these links assume a basic knowledge of electronics as well as the ability to solder. If you do not have these skills, then these resources may be to advanced.
Comments
Comments, including suggestions, improvements, errors, etc. are welcome (see below).
If you have a specific question about your game that does not directly apply to this page, please see our FAQ section.
External Links
has been moved
Copyright 2005 – 2021, all rights reserved.
I like what you said about not lubricating the parts of a pinball machine unless the instructions say to do so. My brother has been telling me about how he wants to get a pinball machine soon. I’ll share this information with him so that he can look into his options for professionals who can help him with repairs.
Thank you for the nice comment.
As a first time buyer, we would suggest looking at the page on buying pinball machines. There is a downloadable checklist when shopping for a pin. Please let us know what you think of that page and checklist. And how we can improve on it.
https://homepinballrepair.com/index.php/buy-pinball-machine-look/