A. Clearing the Playfield
1. Supplies Needed
2. Preparation
3. Clearing the Playfield
4. Removing the Ramps
5. Removing the Pop Bumpers
– Removing the Sling Shots
B. Cleaning the Playfield
6. Cleaning the Playfield
C. Repairing the Playfield (optional)
7. Playfield Repair
8. Fixing Inserts
9. Sealing Your Work
C. Rebuilding and Adjusting
10. Rebuilding the Mechanicals
11. Switches and Reassembly
12. Final Testing
This is a multipart series on how anyone can do a complete overhaul of your pinball machine and make it work like new.
You are approaching the final steps. We are going to cover cleaning and adjusting of the switches, most of which are covered in another link. Then it will be the reverse of what was done in parts 3 – 5.
Install the Playfield Into the Cabinet
Always have two people. It makes it so much easier.
For simple playfields, this is fairly easy ‘exercise’. But we are in the process of finishing up a Williams Indiana Jones widebody. It is heavy. We need three people to slide that playfield back into place. And we are leaving off some heavy components to make it easier – then will reattach them while the playfield is back in the cabinet. Not ideal, but necessary.
Prior to dropping the playfield back into place the wires from the playfield to the rear of the cabinet. If possible, snake them up into the head (backbox).
Leave the playfield glass and backglass off, safely stored out of the way.
Reconnecting the Wires
EM’s
If installing an EM, this is quick and dirty: just reconnect the Jones Plugs. Then jump down to EM troubleshooting.
SS’s
 For a SS, if you are feeling lucky, reconnect all the wires to the circuit boards. But we take a cautious approach. For your game, using the manual, identify which plug(s) supply the voltage to the flippers and the coils. Those are higher voltages, usually between 28 and 50 V DC. Plug those in. Do not plug in switch matrix nor switched lamp plugs.
Grab your voltmeter and connect one end to the ground. Any ground, like the ground braid, will do.
Turn on your DVM and set it to read volts, DC. Turn on the pinball machine.
We go one by one, quickly to each pin of every plug remaining to be connected and check for voltage. As careful as we are, we are concerned about bending a contact or something, and shorting that higher voltage into something delicate, like the CPU (or MPU) and boom!
This may take only a few minutes. Once, in decades, we found the solenoid voltage shorted to the switch matrix. So now we do this every time.
Turn off the pinball machine and connect the solenoids to the driver board and turn it back on. Check for issues. If a solenoid locks on, immediately turn off the machine and troubleshoot. Something is shorted or there is a shorted transistor on that board.
Turn off the pinball machine and connect the GI lamps. Turn on and troubleshoot.
Turn off and connect the controlled lamps. Turn on and check.
Then turn off and connect everything.
Or just skip all of this, connect everything and turn it on. But at the first sign of problems, a locked on coil or anything, turn it off!
Testing and Troubleshooting
EMs
Switches
Typical issues with EMs are switches that stuck together or not making contact. Switches that are stuck together can damage or burn up coils. So play particular attending when first turning on. Note the sound or movement of any coils that lock on (a ‘thunk’ with no release).
Other problems are switches that are too close, especially scoring switches. These can add extra points during game play and need to be adjusted.
Other switches are those that never make contact. That can cause a pop bumper or slingshot to not work. Or the game to not recognize when ball play is over.
All of these are usually simple adjustments to get it working perfectly.
SS’s – The Service Menu is Your Friend


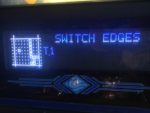
Switches
If you have gotten the game to start up, no coils locked on and no annoying things burning up, you are almost there. Go into the service menu under the switch test.
Remove the pinballs and make sure all drop targets are up.
You will need to carefully read your manual. Each manufacturer had a different service menu system, and that varied with various generations of pinball machines. Early SS pins were the most primitive. Bally had just a single button inside the coin door. Williams had three buttons, but two were for service – and the toggle switch has to be down to start. By the time of DMDs in the early 90’s, the companies built some graphics into the service menu that made them easy to use and helpful.
Perhaps the worst are the early Bally / Stern games. If multiple switches are locked on, only one will show. A number will be displayed. Refer to the manual, locate the switch and fix it. Then another stuck switch will show up until all locked switches are fixed.
Early Williams games will go through the list of on switches, but usually not continually. So write them down, look them up in the manual and fix them.
Later DMD games will display a switch matrix with the ones closed displayed.
Note that with Williams / Bally WPC, optos will show ‘closed’ when a ball is not blocking the opto, but ‘open’ when a ball is blocking (or the opto is not working). This is the opposite of a mechanical switch and takes some weird reverse logic to keep straight.
DE/Sega/Stern display optos like a mechanical switch – closed when blocked (or not working), open when the opto is not blocked.
Fix those switches that are not working.
We sometimes will hit the playfield with our fist to see if any switches ‘bounce’ closed. If so, they are too tight.
Test Them. We go from switch to switch and press each one to see if they register. Adjust as needed. It will be necessary to roll the ball to test some hard to reach switches.
Solenoids
Go into the solenoid test and check to insure that each solenoid works and does what it is supposed to do.
Lamp Test
Enter the lamp test and have each ‘switched’ lamp flash. This is usually an ‘all lamp test’.
Flippers
Check for proper operation of the flippers. Some newer games with computer controlled flippers have a flipper test.
Special Feature Test
On sophisticated games, there maybe a special feature not seen on other games. Those usually have a separate test. Run that and check its operation.
It’s Play Time!
Leave the playfield and backglass off, load the proper number of new (!) pinballs and play away. Check for proper operation.
When Everything Works, You are all Done!
Step back and admire your work.
Your comments are appreciated.
We want to make this series better. It can always be improved. Thank you.