This article was originally posted on PinballRehab.com.
Reproduced with permission from terryb.
Written by terryb
A. Basic Soldering Tutorial
B. Basic Desoldering Tutorial
– Supplies Needed
C. Tools for Advanced Soldering
D. Advanced Soldering Tutorial
E. Advanced Desoldering Tutorial
This is part three of a five part series on soldering. This article is specifically oriented towards the advanced soldering techniques. It covers the tools and supplies needed for soldering circuit board components.
A lot of the frustration felt by those new to soldering is the result of cheap tools and/or supplies. Avoid Walmart, Home Depot or Lowe’s (I’m also no longer much of a Radio Shack fan since they now sell a lot of inferior products). Find yourself a good local electronics store like Fry’s or buy online at Fry’s, MCM Electronics or Amazon.
Soldering Iron
The first thing you need is a good temperature controlled soldering iron. Wattage type irons tend to be too hot (after sitting for a while) or too cold (if you solder several joints in a row). This is because the wattage is fixed and cannot respond to increased demand.
The temperature controlled irons overcome these problems plus you can fine tune the temperature to the job, the tip being used and your personal preferences.
My go to soldering station is a Weller WESD51 Digital Station which costs about $150 at Amazon. [Editors note: That soldering station has been replaced with the Weller WE1010 Digital Soldering Station. We have had great luck with the Tenma Digital Soldering Station. Others prefer the Hakko Digital Soldering Station.]
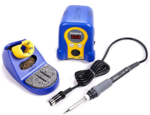
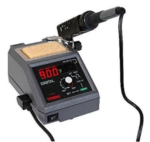

[Note: Photo gallery added by editor.]
It has an analog temp control with a digital display, which many (myself included) prefer. The Weller WES51 Analog Station is also a good choice and sells for about $90 at Amazon. The best bang for the buck is the Hakko FX-888D Soldering Station (the digital replacement for the FX-888).
Never use any station that is not ESD (electro-static discharge) certified, which means it will have a 3-prong AC plug and the soldering tip is connected to ground.
Soldering Iron Tips
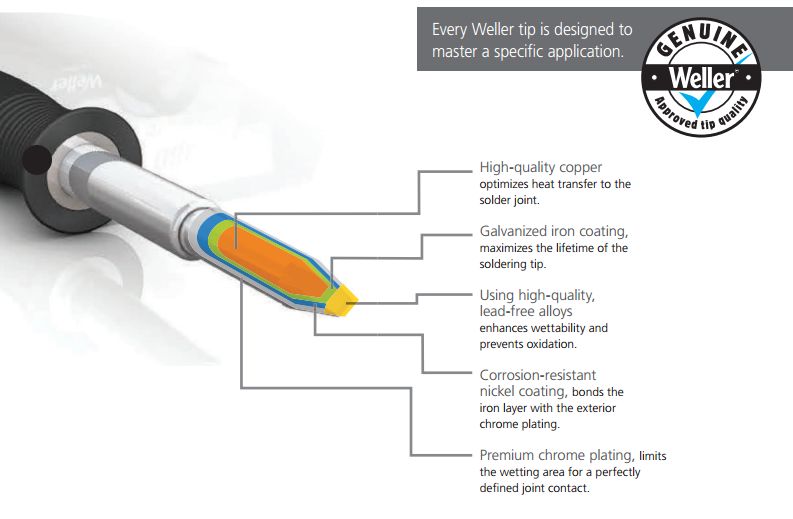 Any high quality soldering station will use tips which consist of four layers.
The inner layer of the tip is copper for heat conduction and next is iron, which is the workhorse of the tip. Next out is nickel which is non-wetting, meaning it won’t wick the solder away from the tip’s working surface. The last layer, chrome, is applied as an additional protective layer.
When selecting a tip you need to consider both shape and size. Many soldering irons come with a conical tip which is just about worthless because it doesn’t provide enough surface area for good heat conduction. A much better choice for general soldering is a chisel, or screwdriver, tip.
 When sizing a tip, the general rule of thumb is the tip should be two-three times wider than the lead you are soldering. This provides the best combination of tip efficiency (temperature drop, heat transfer, working time and heat storage capacity–see this article for more info) and minimizing potential damage to the workpiece.
I typically use chisel tips in the following sizes: .0625″, .125″ and .187″. The smallest tip is for IC’s (it won’t bridge the gap between leads) and small transistors. The next tip is for larger (driver) transistors and the last is for bridge rectifiers and under-playfield work.
You should always size the tip to the job to provide optimum surface contact, good temperature control and avoid overheating sensitive components or traces.
Note: Most soldering stations require re-calibration when tips are changed.
Maintaining Solder Tips
After pre-heating the iron, tin the tip with solder and then wipe off any excess. When done soldering for the day, clean the tip, add solder, wipe off the tip and turn off the iron.
 Note: Do not clean tips with sandpaper or dip them in flux. Abrasives will remove the tips delicate coatings and the temperature shock from dipping in flux will cause early failure of the tip.
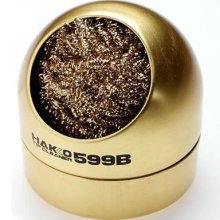
You can use either a wet sponge or the newer type brass tip cleaner (see image to right), which is preferred since it does not thermally shock the tip as a sponge does. Personally I use a sponge for the pre and post cleaning (with the iron at 250 degrees) and use the brass tip cleaner to remove excess solder from the tip as I’m working.
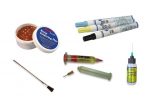
Lead-Free Solder
Manufacturers now use lead-free solder due to environmental and safety regulations. For the hobbyist, leaded solder is still the best choice for a couple of reasons. Lead-free solder melts at a temperature about 40 degrees higher than leaded solder and requires longer dwell times. Lead-free solder also has a dull finish when applied and is harder to inspect than leaded solder.
Solder
Solder comes in a variety of mixes for different purposes. For electronic work you want to use either 60/40 (60% tin and 40% lead) or 63/37. While 60/40 solder melts between 361 and 374 degrees, what is called the plastic range, 63/37 is eutectic since it has a single melting point of 361 degrees. There is some advantage to the latter although it is harder to find and more expensive.
Always use rosin core solder, which removes oil, dirt and oxidation. I use a .031″ diameter (the DoD recommends .031 to .063, the latter to me is way too large) for circuit board work since it provides better control of the solder flow.
Personally I prefer Henkel’s Multicore solder. It has 5 strands of flux instead of one and flows better than single core solder. It can be hard to find though and a quality single core like the one from Kester or MG Chemicals is an acceptable replacement.
Solder Flux and Remover
There are times you will need additional flux in addition to what is provided by the solder. If a joint is heavily oxidized, or you’re having trouble getting the solder to flow, adding a little more flux can help. Always use an acid type flux, since it cleans better, and then use a flux remover on the board after soldering. I recommend the flux remover from MG Chemicals.

Other than quality (I recommend DeoxIT, Kester or MG Chemicals) the main difference in solder flux is the packaging. I use a paste that comes in a syringe, but other choices include a rub-on applicator, liquid or a paste you apply with a brush.
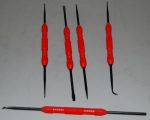
Miscellaneous Tools

You’ll also need a few hand tools that will help greatly when soldering. The first is a fiberglass pen (see image to right), which is the best method of mechanically removing oxidation. You will also need some side-cutters that are made specifically for board work (one side is flat for clipping leads).
While they sell a variety of soldering picks, the only one you really need is the one with the slot. If you need to clean out a through-hole just use a toothpick.

Personally I never use a heat sink unless working on extremely sensitive components.
Depending on your vision, some people (like me) will use a magnifying lens or a headband with lenses when soldering. Some type of magnifier is also a good idea for inspecting solder joints.
Video Notes
- The video is 30 minutes long, but is time well invested if you want to solder circuit board components.
- In the opening the commentator states how easy soldering is, and how it’s almost impossible to screw-up. Firstly he’s an engineer and used to working with brand new boards. In our case we’re attempting to repair twenty some year-old boards that have been abused by heat and vibration. Secondly, soldering is about 50% science and 50% art and a large percentage of hobbyists–and engineers–are thoroughly capable of screwing-up a solder job.
- At 25 minutes into the video he comments that the reason for using a soldering temp higher than the melting point of the solder is due to the thermal capacity of the iron. While this is true, it’s also because solder requires a higher temperature to flow than to melt.
Comments
Comments, including suggestions, improvements, errors, etc. are welcome (see below).
If you have a specific question about your game, please see our FAQ section.