Reproduced with permission from terryb.
Written by terryb
One of the more challenging problems to troubleshoot on a pinball is a blown fuse. The purpose of this article is to provide you with the information to troubleshoot and repair fuse problems. To learn more about fuses, their function and their physical location see Electronics Tutorial Part 1.
Identifying Fuse Problems
For all further discussion I will use Williams Dracula as an example. While your specific game may vary the general theory presented is still applicable. If you want to play along, which you probably should, click here to open some excerpted pages from the Dracula service manual in a new window.
There are three applications of fuses in a pinball machine: the main power fuse (mounted in the metal box in the lower cabinet), the power supply fuses (5 volts, 12 volts, etc.) and circuit fuses (for example a string of GI lighting). Depending on your symptoms you can usually narrow down the problem to one of these areas.
If absolutely nothing happens when you power on the game (including no LED’s on the CPU board), the problem could be either the main fuse or the 5 volt supply. If the game powers on but there is a massive failure (i.e. – none of the solenoids work or none of the lighting works) the problem is most likely one of the supply voltages. When a circuit fuse blows you will typically find multiple, related functions not working (i.e.- a section of GI lighting or the pop bumpers).
NOTE: if only one solenoid or one lamp doesn’t work–it’s probably not a fuse.
IMAGE GALLERY
Following are a few examples of problems that would point to a blown circuit fuse: no audio, no display, multiple solenoids not working, a section of GI lighting out, no flashers, a group of switches not working. Circuit problems can exist in the supply voltage wiring to a device (solenoid, lamp, etc.) or in the logic circuit that controls the switched device. If one of the driver transistors is shorted or one of the logic chips is constantly firing the circuit, the fuse will overload and blow.
Now that you suspect a fuse problem you’ve got a couple of choices. First you could just check all the fuses, get the fuse designator (i.e. – F107) for the blown fuse and look it up in the manual to determine which circuits not working. Some, but not all games will either have a page in the manual listing the fuses (see page 2 in the manual) or a list in the backbox (see Image 1).
On the other hand, if you know what each fuse controls and you know what’s not working you can probably guess which fuse to check. Whichever method you chose, we need to know which fuse is blowing and what it controls.
Examples
One of the flippers on our Dracula doesn’t work and using the fuse list in the backbox we can identify that F901-904 on the Fliptronics board should be checked. That one was too easy, so let’s try another one.
Let’s pretend both the fuse list and the fuse manual page are missing and we have a string of GI not working. In this case we’ll have to do it the hard way. The General Illumination page (see page 3 in the manual) isn’t really much help since it just shows a generic fuse, but we now know the GI fuses are on the Power Driver board between connectors J115 and J120.
At the top right and left of the Power Driver board schematic (page 4 in the manual) are J115 and J120, and in-between five fuses. At this point we could just brute-force it and check them all with an ohmmeter. On the other hand we could find the color of the wire going to our faulty GI circuit, find the pin on the connector with the same color wire and then follow it back to the fuse (visually or with an ohmmeter).
When the Fuse Blows
One other variable that will help point you in the right direction is when the fuse blows. So I know you don’t want to do this, but put in another fuse and turn the game on. NOTE: If you want to save money on fuses, get a circuit breaker of the same value and solder it across the blown fuse.
If the fuse blows immediately you most likely have a dead short someplace. My first suspicion would be one of the supply voltages.
If the fuse takes a minute or so to blow watch closely to see if a solenoid is firing, and staying on when the game is turned on. For example, I’ve seen problems where the kickback, knocker or a bumper would fire and stay energized. It may take up to a minute for the fuse to blow in these cases and points you towards a logic circuit problem. The best way to eliminate any questions about switched, or logic, circuits is to find the connector on the CPU board that switches the ground side of the circuit you suspect and remove it.
If the fuse blows while you are playing the game, and always at the same point (i.e. – when a vertical up kicker should fire) you have a circuit problem.
If the fuse blows at a fairly fixed time after the game is turned on (i.e. – after twenty minutes) you probably have a component that is overheating. If the fuse takes a while to blow, but there is no pattern (time or what is happening in the game at the moment) you most likely have a short that is being caused by vibration. See the Intermittent Problems section for either of these problems.
At this point you should have identified which fuse is blowing and what it controls, so now I’ll introduce you to your two new best friends.
Your Best Friends
When troubleshooting fuse problems your best friends are isolation and an ohmmeter. No you don’t have to move the pinball to a cabin in the mountains, but you do need to methodically isolate the fuse from other circuits. It’s up to you, but you can start with isolation or just jump in with your DMM.
The first thing to know about checking for a short is that 9 times out of 10 the problem will be caused by a diode, bridge rectifier or transistor. And since you’ve read our Tutorial on Diodes and Transistors you know how to check them, right? So if your preference is to start with the ohmmeter, move downstream from the blown fuse (away from the AC plug) and start checking the components I mentioned above.
The classic example of using isolation is troubleshooting a pinball that is blowing the main fuse, which tells us we have a shorted transformer or a short in the cabinet wiring. Get your manual out and begin removing connectors, starting with the cabinet connecters the farthest from the fuse, until the fuse no longer blows. You could also start by removing all of the cabinet connectors and then adding them back one by one, starting with the connector closest to the fuse.
Following is a detailed example of using isolation to troubleshoot a blown fuse.
Example
Let’s say that F116 keeps blowing when you power on the game. By checking the manual, or the label in the backbox, we can identify this is the 12 volt supply fuse (see page 5 in the manual). F116 is on the left side in the middle and you can follow the 12 volt line across the schematic to connectors J116, J117 and J118.
The first step is to put one lead of our ohmmeter on the downstream side of the fuse (the right side on the schematic) and the other lead on ground. If you read a dead short continue with the next paragraph. If you don’t read a short the problem likely lies with the logic circuit on the CPU board.
Now remove the three connectors and test again. If you still have a short the problem is on the Power Driver board. If not add back one connector at a time until you identify the circuit with the short.
Let’s say in our example the fuse does not blow when J116 is removed. If we look at the power driver board layout (pages 6 – 8 in the manual) we can see that J116 goes to the coin door. Now all we have to do is isolate the coin door, the coin door interface board and the wiring going from the Power Driver board to the coin door assembly (see pages 9 and 10 in the manual) and check each for shorts.
Note: It is sometimes necessary to remove individual pins from a connector or unsolder components to isolate circuits until you find the problem.
Intermittent Problems
Intermittent problems are a bitch. No two ways about it.
If you suspect a heat related failure you can use a can of freeze spray to cool down portions of the circuitry and see if it delays the fuse blowing. Or if you’re using a circuit breaker; wait till it trips, use the cold spray and reset the breaker. If it immediately trips again move on to the next section of circuitry and repeat. If you wait to long between tests the component will cool on its own and start working.
When dealing with vibration related problems you should wiggle wires, push down on IC’s that are in sockets and wiggle connectors while you are testing a section of the circuit.
Cascading Failures
It is not uncommon for a component to take out other components when it shorts. I’ve even seen shorted components on the playfield take out logic chips on the CPU board (see the example below). Therefore when you find a shorted component it is best to also test the components around it in the circuit and make sure they’re ok. If you don’t take this step you risk installing a new component and having another bad component immediately blow it.
Common Problems
There are a few common fuse problems that are worth mentioning. The first is an improperly rated fuse installed, which you can check versus the manual or backbox label. I have found higher rated fuses installed, lower rated fuses installed and standard fuses installed where a slo-blo was required. The latter two will cause the fuse to blow when there is no problem with the circuit.
GI Fuses will fatigue over time (these circuits always tend to run hot) and eventually blow even though the circuit is good (thanks to larry at flipnoutpinball). Just throw in a new fuse and if it doesn’t blow in the next few days, you’re set.
The next is flipper fuses blowing when you hold the flipper button down. This indicates the EOS (end-of-stroke) switch is not working. Flippers are fired with a high current and then a low current is used to hold them in the up position. Normally the EOS switch opens (or closes depending on the game) and the current to the flipper coil is reduced. If this doesn’t happen the extended high current draw will blow the fuse.
Real-Life Example
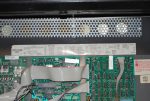
This one kept me going for a couple of days. I’d just picked up a Data East Hook pinball and F1 was blown. The fuse is part of the +12 volt circuit and installed before the bridge rectifier (see Image 2). Ever hopeful, I popped a new fuse in, and it blew. After removing CN6 (the only connector with the 12 volt output from this circuit) and put in another fuse. It blew.
So I knew the problem was on the board.
The first component I checked was the bridge rectifier (DB1) and one of the legs was a dead short (each leg is a diode and can be checked the same way you would check a diode). I checked the remaining components in the circuit and everything else looked good. After replacing the rectifier I ran the machine through diagnostics and found the Lazer Kicker, which runs off this circuit, was not working.
Although I know better, I ran a jumper from the transistor on the CPU that controls the kicker to ground without putting a 1K resistor inline*. If the kicker fired then I knew my problem was on the CPU board since I had already verified my 12 volts was good. And it did fire, but only once. After a little checking my 12 volts was gone again and F1 was blown.
I went back to the Power Supply board and while the rectifier was still good, transistor TR5 was blown. Clearly that didn’t happen on it’s own, especially since I’d just jumpered the CPU board. I replaced TR5 and removed the connector on the CPU board that goes to the transistor that switches ground to the kicker (the one I previously jumpered). I powered on the machine and no fuses blew, but I still wasn’t happy.
Clearly something in the circuit had blown TR5. There wasn’t much left except the solenoid and its diode so I checked them and the diode was shorted. Because of this when the circuit was energized there was a dead short from the 12 volt circuit to ground. I replaced the diode, but the kicker still would not fire.
At this point I was sure (at least fairly sure) the circuit was good, so I hesitantly jumpered the CPU board to ground again. This time the solenoid fired and continued to fire each time I briefly grounded the circuit. Using a 1K resistor this time I might add. I won’t go into all of the details, but the output of the AND chip that controls the Lazer Kicker was not going high even when both inputs where high. I replaced the chip and everything was good.
My best guess is the original failure was the diode on the kicker solenoid. Eventually the circuit was energized enough times the lack of resistance across the solenoid blew the bridge rectifier in the 12 volt circuit. The short in the bridge rectifier blew the fuse, and the transistor, while it may have been weakened, was blown by me. Somewhere in this process a voltage spike got back into the CPU and blew the AND gate.
*Although in this case it might actually have helped me find the problem faster I could have avoided blowing the transistor if I had used a resistor as I normally do.