A. Clearing the Playfield
1. Supplies Needed
2. Preparation
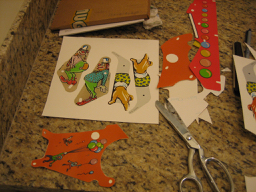
3. Clearing the Playfield
4. Removing the Ramps
5. Removing the Pop Bumpers
– Removing the Sling Shots
B. Cleaning the Playfield
6. Cleaning the Playfield
C. Repairing the Playfield (optional)
7. Playfield Repair
8. Fixing Inserts
9. Sealing Your Work
C. Rebuilding and Adjusting
10. Rebuilding the Mechanicals
11. Switches and Reassembly
12. Final Testing
This is a multipart series on how anyone can do a complete overhaul of your pinball machine and make it work like new.
Note that not all sections may be necessary with all playfields.
If not repairing / restoring the playfield, the touchup and sealing sections (7, 8, & 9) can be skipped.
We are going to cover a few of the playfield restoration techniques here. But there are many resources now posted on the Internet and we will also reference them.
Restoring a playfield correctly maybe the most challenging aspect of restoring a pinball machine. Mechanical and electrical work is exact and mistakes can be corrected. Plus this work is hidden. Restoration work is right up front and in your face. Bad work is obvious every time a game is played.
Restoration Options

If your playfield is worn and you want to fix it, you can:
1) A New Replacement Playfield
2) Replace it with a ‘Hard Top’ reproduction playfield.
3) Install an ‘Overlay’
4) Painstakingly restore it by hand using:
– Airbrush painting.
– Spot decals.
– Inserts – touch up
– Seal when completed.
Note: If PRIOR to any restorations, it is important to remove any remaining wax. Many use Naphtha as a solvent for removal of waxes or oils. Be sure to follow precautions on the label prior to use. Consult preparation recommendations on the container of any sealant prior to using Naphtha or any other solvent.
Playfield Replacement
The best way to restore a playfield is to replace it with a brand new playfield. It will look (nearly) perfect when completed and play like a new machine. No reason to seal it as that is done in the factory. But not every game has a new playfield available for it, so this may not be an option.
New Playfield Manufacturers:
Classic Playfield Reproductions – Or CPR for short. These seem to be the biggest supplier of new playfields.
Mirco Playfields – German producer of high quality playfields.
Buthamburg Playfields – Manufacturer of a small number of reproduction playfield.
Other sources include:
Planetary Pinball – They have a large supply of ‘Hardtops’ and silkscreened playfields.
Marco – Marco distributes playfields from CPR and other sources. If CPR is sold out, Marco may have a supply.
Kruzman Playfield – Kruzman does not seem to manufacture new playfields, but buys and restores old ones, and buys new ones from CPR.
Krause Playfields – He produces a tiny number of playfields. Seems to be a one-person operation.
eBay – Most playfields on eBay are used, but they maybe in far better shape than yours.
Replacing the Playfield

Installing a new playfield involves taking everything off of the top, which was already done in part 3.
But that is the easy part as then everything has to be removed from the bottom of the playfield. This includes all the wiring. We do not unsolder any of the lighter items such as the switches and lamp sockets. But we do unsolder and mark the heavier items. We then lift the entire wiring harness over to the new playfield, then reinstall.
This process is not difficult, but it is time consuming and requires organization plus thorough photography – which is used for reassembly.
Coming Someday – Step-by-step instructions for a playfield transfer. We promise, someday.
Hardtops

Hardtops are a hard plastic covering that sits on top of the playfield. It has artwork underneath the plastic. The plastic layer is held to the original wood by a strong adhesive.
Hardtop playfields are made by Outside Edge and their artwork is exceptionally good. However….
Some people love Hardtops. They look great and are all shiny, looking better than new. But others consider them to be terrible as they destroy a restorable original playfield and they (in their opinion) do not play like a traditional playfield.
We do not have a strong opinion on Hardtops. They do look great. We think they play fine and not any different from a freshly waxed playfield or one with an Auto Clear finish. They are significantly less expensive than new playfields.
However, they are not easy to install and require a tremendous amount of prep time. And once started, the original playfield can never be recovered.
Coming Someday – Step-by-step instructions for installation of a Hardtop.
Install an Overlay

Overlays were all the rage in the pinball world about 20 years ago. We have a Fabulous Fantasies Herb Silvers Eight Ball Deluxe overlay installed in 2002 and it looks brand new.
However, overlays have become less common. They are not easy to install and some manufacturers made inferior quality overlays – poor artwork and lousy material – which lead to a bad reputation. For the most part, Hardtops have replaced overlays. But they are still around and if the product is good and installation done properly, they can look great.
How to install a pinball playfield overlay.
Airbrush Painting

When a playfield cannot be restored with Novus 2 or Magic Erasure, then either give up or paint.
But remember, a poorly painted playfield looks worse than a worn playfield.
Using an airbrush requires practice and patience. Color matching is important unless replacing all of that color (at least in an area). If repainted a large area, then the color needs to be close, but not exact.
Getting the right tools and knowing how to use them is also important.
A re-painted playfield must be re-sealed when completed.
How to use an airbrush on a playfield.
Use of Spot Decals
The use of spot decals allows those of us who are not great artists, to repair a playfield using your computer. This will involve scanning the damaged area, touching up the scan on your computer, then printing out and applying a decal. The results can be dramatic and look original.
Coming Someday – Step-by-step instructions for installation of spot decals.
In the meantime, check out how to repair a cabinet using spot decals.
Repairing Around Inserts

The playfield around inserts take a beating. This is because, with time, the inserts are not exactly level with the rest of the playfield, so the pinball hits that edge especially hard.
If the insert is lifted or sunken (cupped) then it should be repaired (see the next section). But a slight rise can usually be easily re-painted, then sealed.
Many people use a Sharpie to ‘paint’ the missing black around an insert. Unfortunately, a Sharpie is not a true black, but really a very dark blue. To get a true black you need more of an artist pen. The Faber-Castell black pen set is perfect and comes in various pen thicknesses.
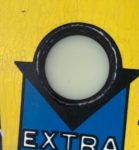
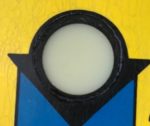
Playfield damage around inserts is easy to identify. It is a white or lighter area in the middle of a dark outline of an insert. While this maybe only mildly annoying, it is very easy to fix. Just pull out the black pen you have and fill it in.
To check your work, pull out your phone or another source that has a bright light and shine it from underneath. You may have to remove the bulb and perhaps bend back the lamp socket. If it is in the wood area only, the repair will look perfect when lit. However, if the black in the insert requires repair, this pen may not be opaque enough to prevent the light from coming through. If that is the case, you may have no alternative to use black paint and carefully brush in the circle of black. Close up, it does not look perfect. But while playing, through the playfield glass, the wear is imperceptible.
If you use this technique, you will need to seal your work in order for it to last. The best way to do that is to fill your insert with polyurethane, which will also level it. Or ‘auto clear’ the entire playfield.