Making your own playfield plastics is not difficult. The hardest part maybe learning the software to repair and edit photos. The rest can be a bit of trial and error. Expect a few failures initially.
If replacing all your playfield plastics, or those next to each other, color accuracy is generally not crucial. However, it will be nearly impossible to match the color density of the originals. Playfield plastics made from decals tend to be brighter and transmit more light than the originals. This can be corrected somewhat by increasing the amount of ink printed. And by thickening the white covering on the back, but it is unlikely to exactly match the original.
Supplies Needed

*Lexan Sheet – Polycarbonate – 0.060″ (or 1/16″) thick, clear. Typically 12″x12″. Sibe Automation on Amazon or equivalent. Get the stuff protected by a plastic sheet on both sides to reduce scratching while handling.
*Clear decal pinter paper. Inkjet or laser – depending on what you print with.
*Color flatbed scanner.
*Computer photo editor such as Photoshop ($$$$) or GIMP (free) or ?
*Tool to cut the polycarbonate such as Rockwell Bladerunner or equivalent (see article).
 *Saw blade for tool intended for plastic cutting.
*Polycrylic spray or Crystal Clear.
*White spray paint (or white decal paper).
*Scissors.
*Optional – White decal paper if using this for the white background. Note that white decal paper is typically used in playfield or cabinet restoration to cover existing artwork. For plastics, clear decal paper is used.
[Note: Click on the image for a larger picture.]
Artwork
Start by scanning the existing playfield plastic. This scanning should be done on a high setting. Most scanners have presets for scanning color artwork – use this setting. 200 to 300 ppi should be fine. Any bigger and it just takes up hard drive space. A lower setting and the pixels might be visible in the playfield plastic.
Take photos using your cell phone as a color reference. Try different settings / conditions (sunlight, room light, flash) to get the truest colors. If the photo colors are accurate, then use the editing software to ‘sample’ those colors and change the scan.
The Software

Since the playfield plastic is damaged, the scan preserves that damage.
Using a scan for the final product easier because most scanners / computers / printers produce the correct size. A camera will not and size plus keystone will have to be corrected using the software which is far more work.
Note: The following is not intended to educate as to how to use the editing software. Whether using Photoshop, Photoshop Express, GIMP, or the large varieties of alternatives, there is far more ‘how to’ information available than can be reproduced here.

Features to Look For in the Software
*Layers. Making changes and saving them in separate layers is crucial.
*Healing brush. Some programs allow the user to create a heal function to repair damage. This can be accomplished by careful copying and pasting, but healing brush is nice to have.
*Printer control. It is important to be able to change the density of the print, as well as communicate color matching between the computer and printer.
*Save file to keep all information (layers, etc.) for future editing, plus ability to export to other formats such as JPG.
*Color sample. The ability to sample the color in one area or another picture to change the damaged artwork. This is where one can easily take the color in the photo and apply it to the color in the scan.
Editing The Artwork
Prior to starting, compare the colors in the scan on your (hopefully accurate) computer screen vs. the original. Some scanners do a terrible job with certain colors, such as yellow. If the colors are off, you could try using a different scanner. Frequently, we use the photos of the artwork with a digital camera such as a phone to correct the scan colors.
Every photo editing software is different. There are websites dedicated to showing users how to edit the scans. For editing with bitmap software. Editing with vector software.
A short discussion follows:
*Import the original photo / scan, then create a new layer and copy the original. That will provide a backup if needed.
*’Hide’ the original photo / scan and use only the duplicate. Do not change anything on the original photo.
*Make a new layer for every edit / paste. That makes it easy to discard editing / pasting that did not work out.
*Import a cell phone photo of the same area. Compare the colors of the scan and the photo. Copy the colors from the photo to the scan as needed – keeping the hidden original layer unchanged.

*Save early and often – the file. Save it as an editable file with all layers intact (Photoshop file, GIMP file or whatever), not as a JPG.
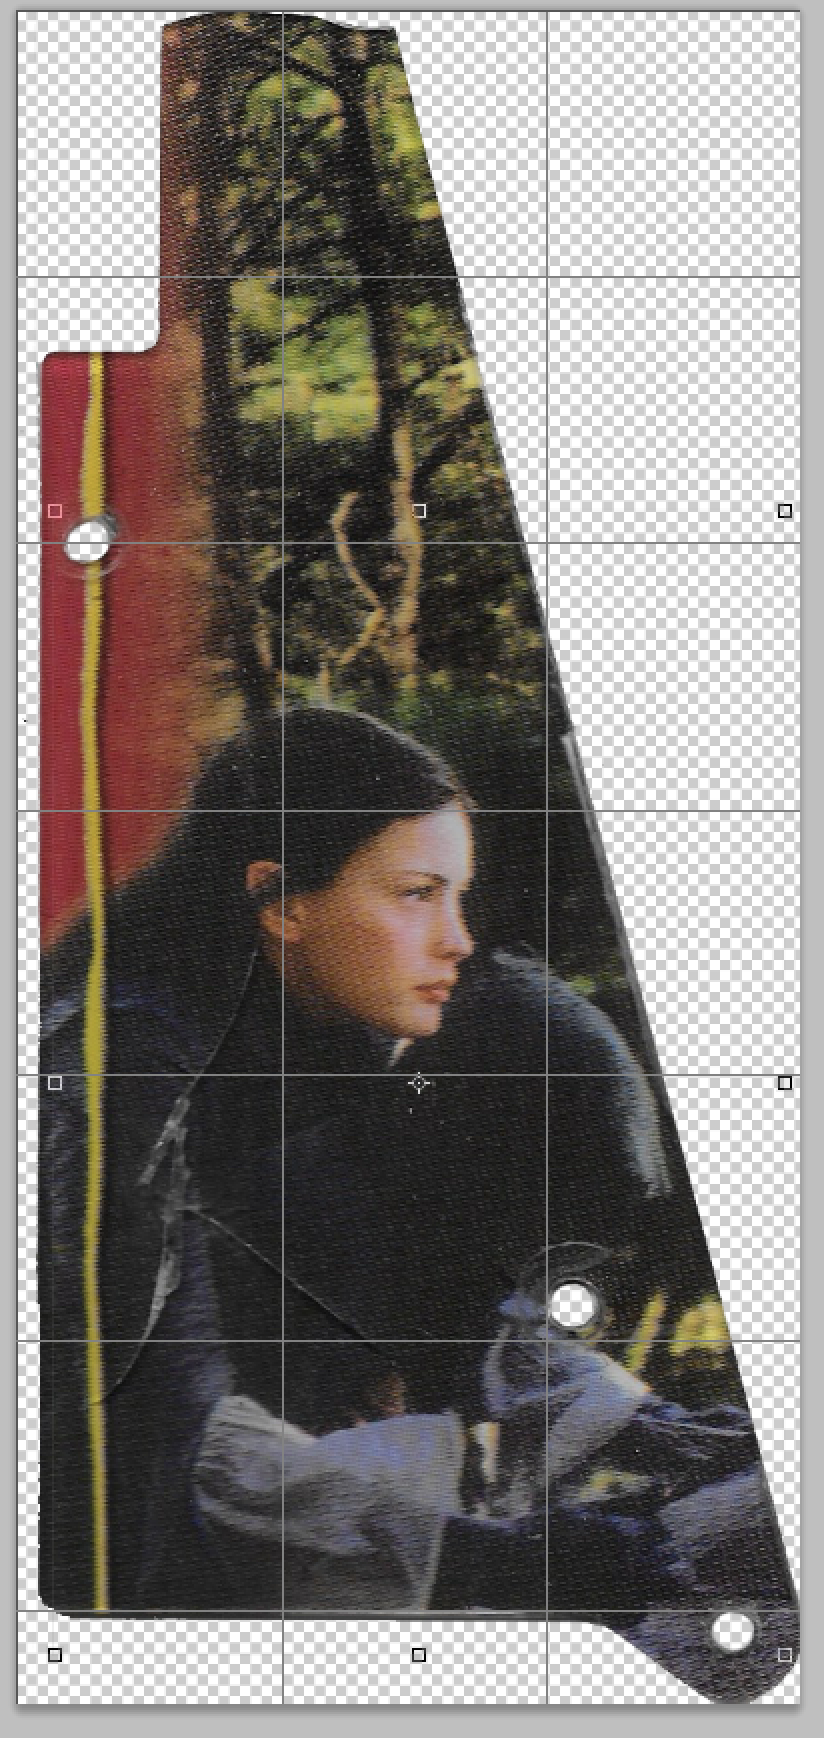
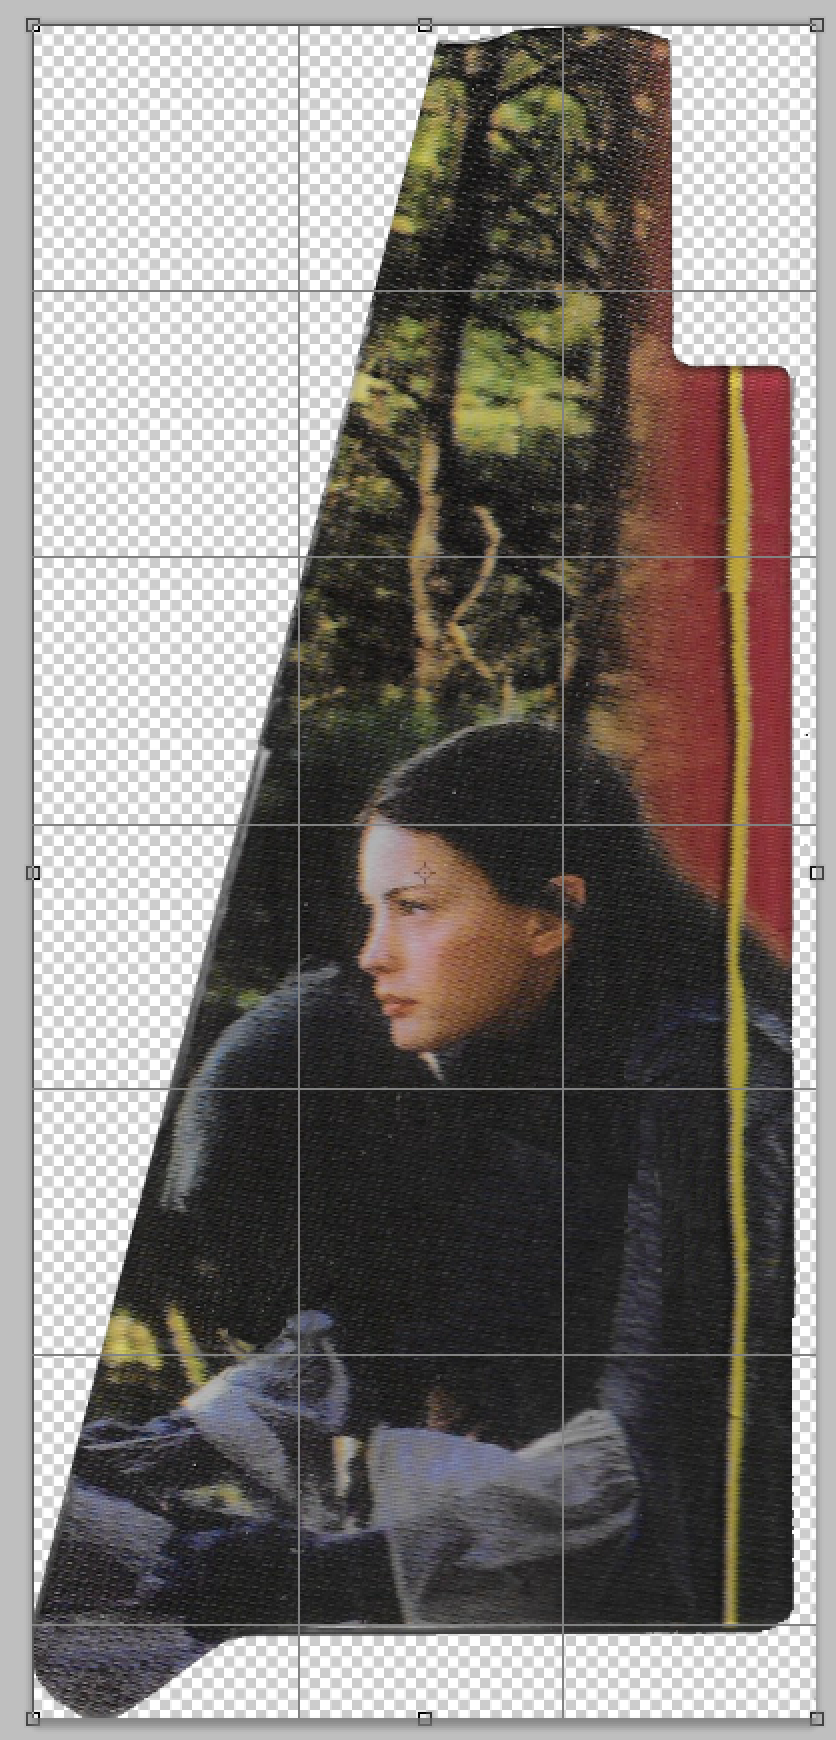
*For playfield plastics, flip the artwork 180 degrees so it is upside down. It will be applied to the plastic upside down with the printed side down. This will make the plastic right side up (two wrongs do make a right!). Flip all layers of this image horizontally.
*When satisfied, print a test on paper. The colors will not match that of the final product, but they may be close. More important, check to insure that the size of the printout is correct.
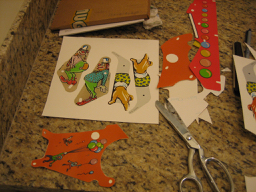
Note the original plastic above. The goal is to cover over the cracked sections with new portions. This is accomplished by:


1) Make a new layer.
2) Find a spot that looks like the damaged area, but is undamaged.
3) Copy that spot and place the copy over the damaged area in the new layer.
4) Continue with additional layers, copies and patches until the area is filled. Each patch must have its own layer.

Note: If the size is not correct, investigate the printer settings, which can frequently be the cause. It is even possible for it to print the right size on paper, but the wrong size on the decal paper, because ‘photo’ setting is used on the decal.
Note: Some plastics are printed to the edge. Those are the easiest to reproduce because the plastic is then cut to the edge of the artwork. Other plastics have a clear edge perimeter. That can be tough to accurately cut. If planning on cutting a clear edge, use the artwork to draw a cutting line along the edge. That will make it easier to cut a consistent clear area outside the artwork. Even more difficult is the white layer underneath.
Note: It is usually a good idea to fill in the drill holes (see repaired example above) in the artwork to cover up the hole location. This is because the holes for the screws frequently do not perfectly match up with the artwork.
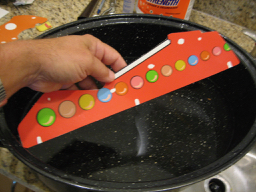
Plastics with a Clear Edge / Boarder
Many plastics have a clear boarder around the perimeter of the plastic (see above). Those are especially difficult to reproduce for several reasons:
1) Cutting the plastic consistently is a challenge. When creating the artwork, create a cutting line to aid in keeping this distance consistent.
2) All plastics have a white back. This can be accomplished by white spray paint (easy), or by making a 2nd blank decal out of white decal paper and a faint outline of the plastic (hard).

The easiest method #1, will not leave a clear outline, but a white outline. This does not look bad, but it does not look original nor blend with the other plastics.
Method #2 will result in an almost original look. But it will be necessary to create a second decal with an outline of the artwork. This outline will also need to be flipped horizontally, and the outline printed out. This ’empty’ white decal paper is then cut along the boarder and sealed with acrylic in order to stiffen the decal paper.
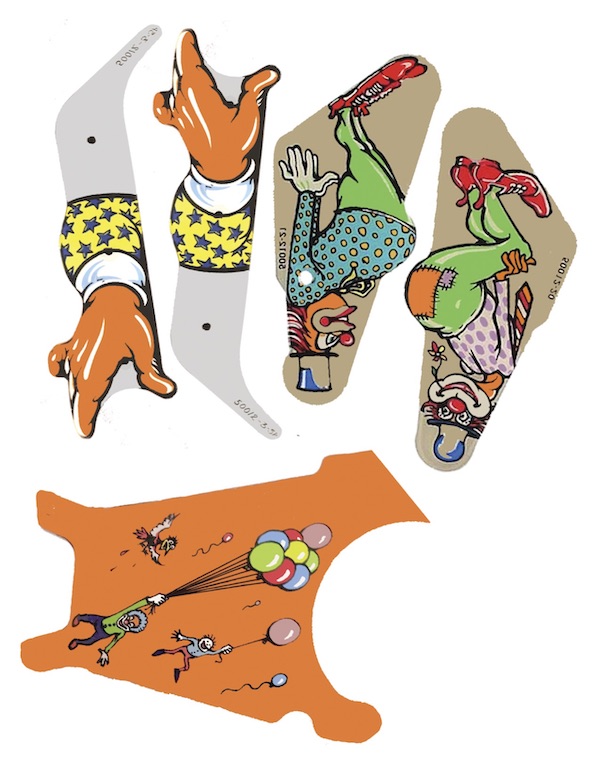
In the above example, several images for decals were fit on one 8.5″ x 11″ page for printing on clear decal paper. Note these images were flipped horizontally since they are applied to the bottom of the plastic.
In the second image, a light gray background was created. Then each artwork was turned white to create an outline. This was printed on one page of white decal paper.
Both the artwork and the outline were cut out and sealed with acrylic.
Printing
Printing the artwork can be a challenge. Color matching, getting the original size, using minimal amounts of the decal paper, etc. could be issues.
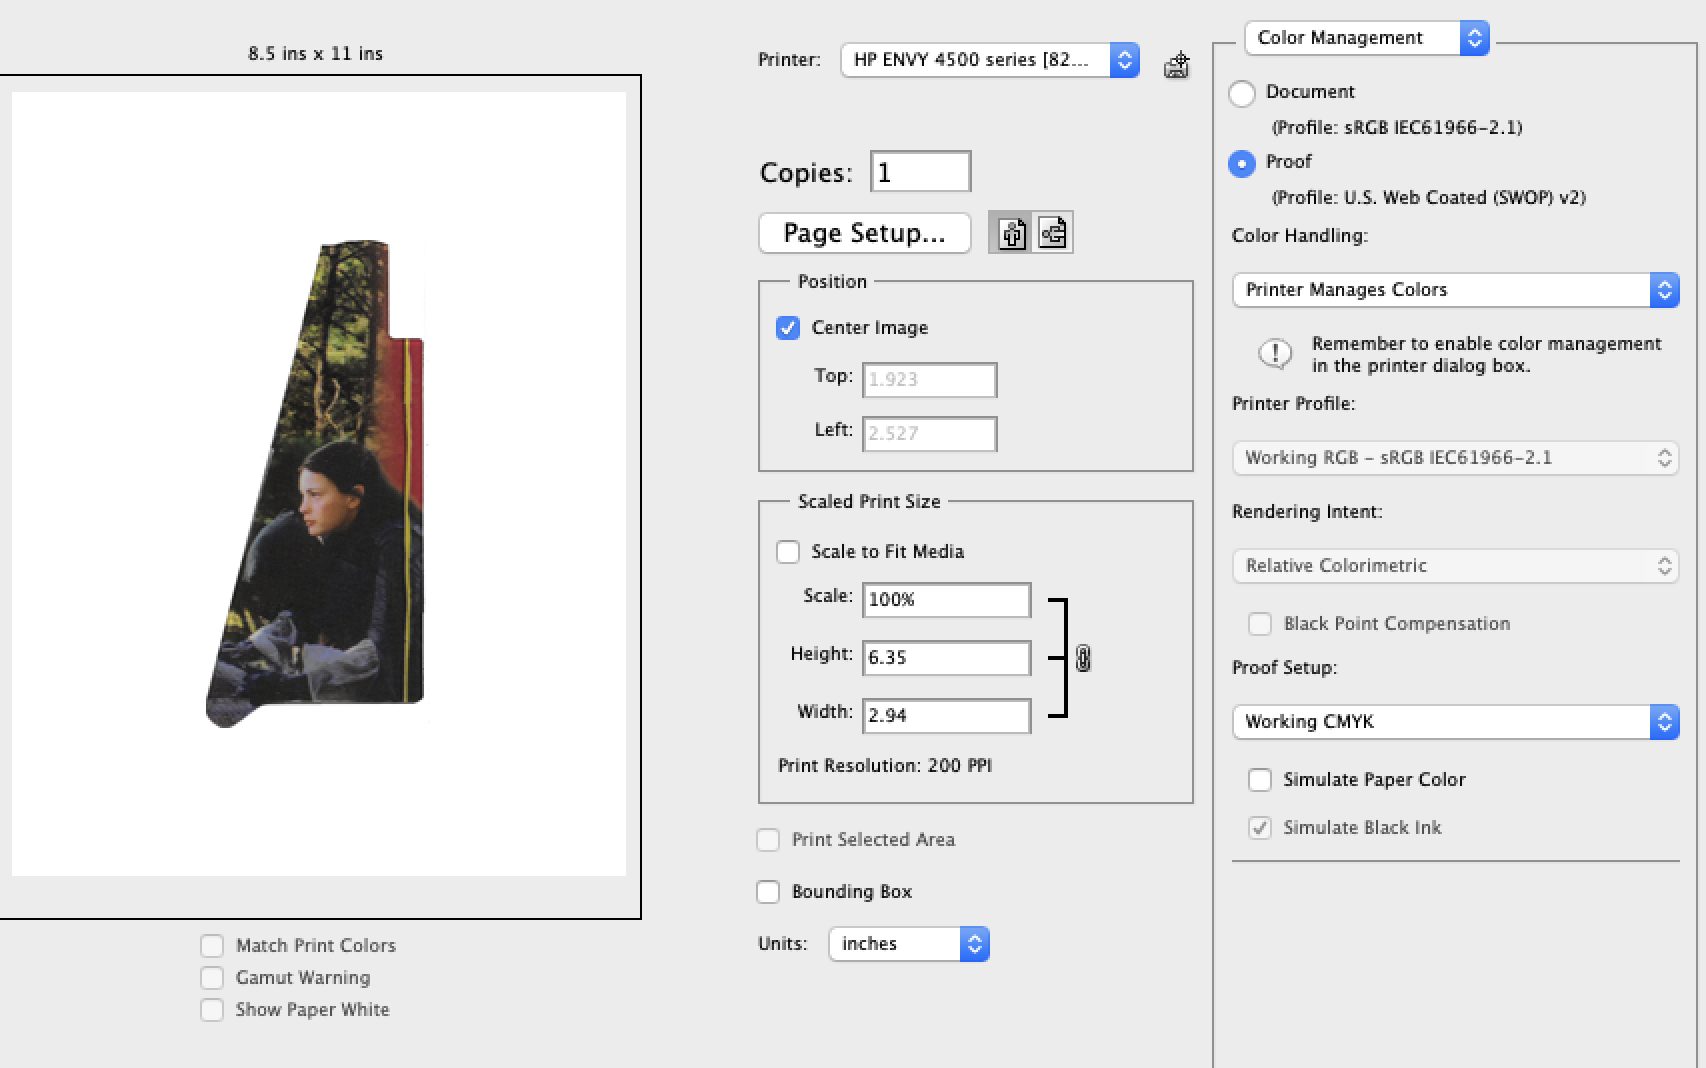
Position The Artwork
Most editing programs will place the artwork in the center of the sheet. That wastes an entire sheet of decal printer for one print. Your computer may handle image location differently, but on ours, there is a ‘Center Image’ option automatically selected. Unselect ‘Center Image’.
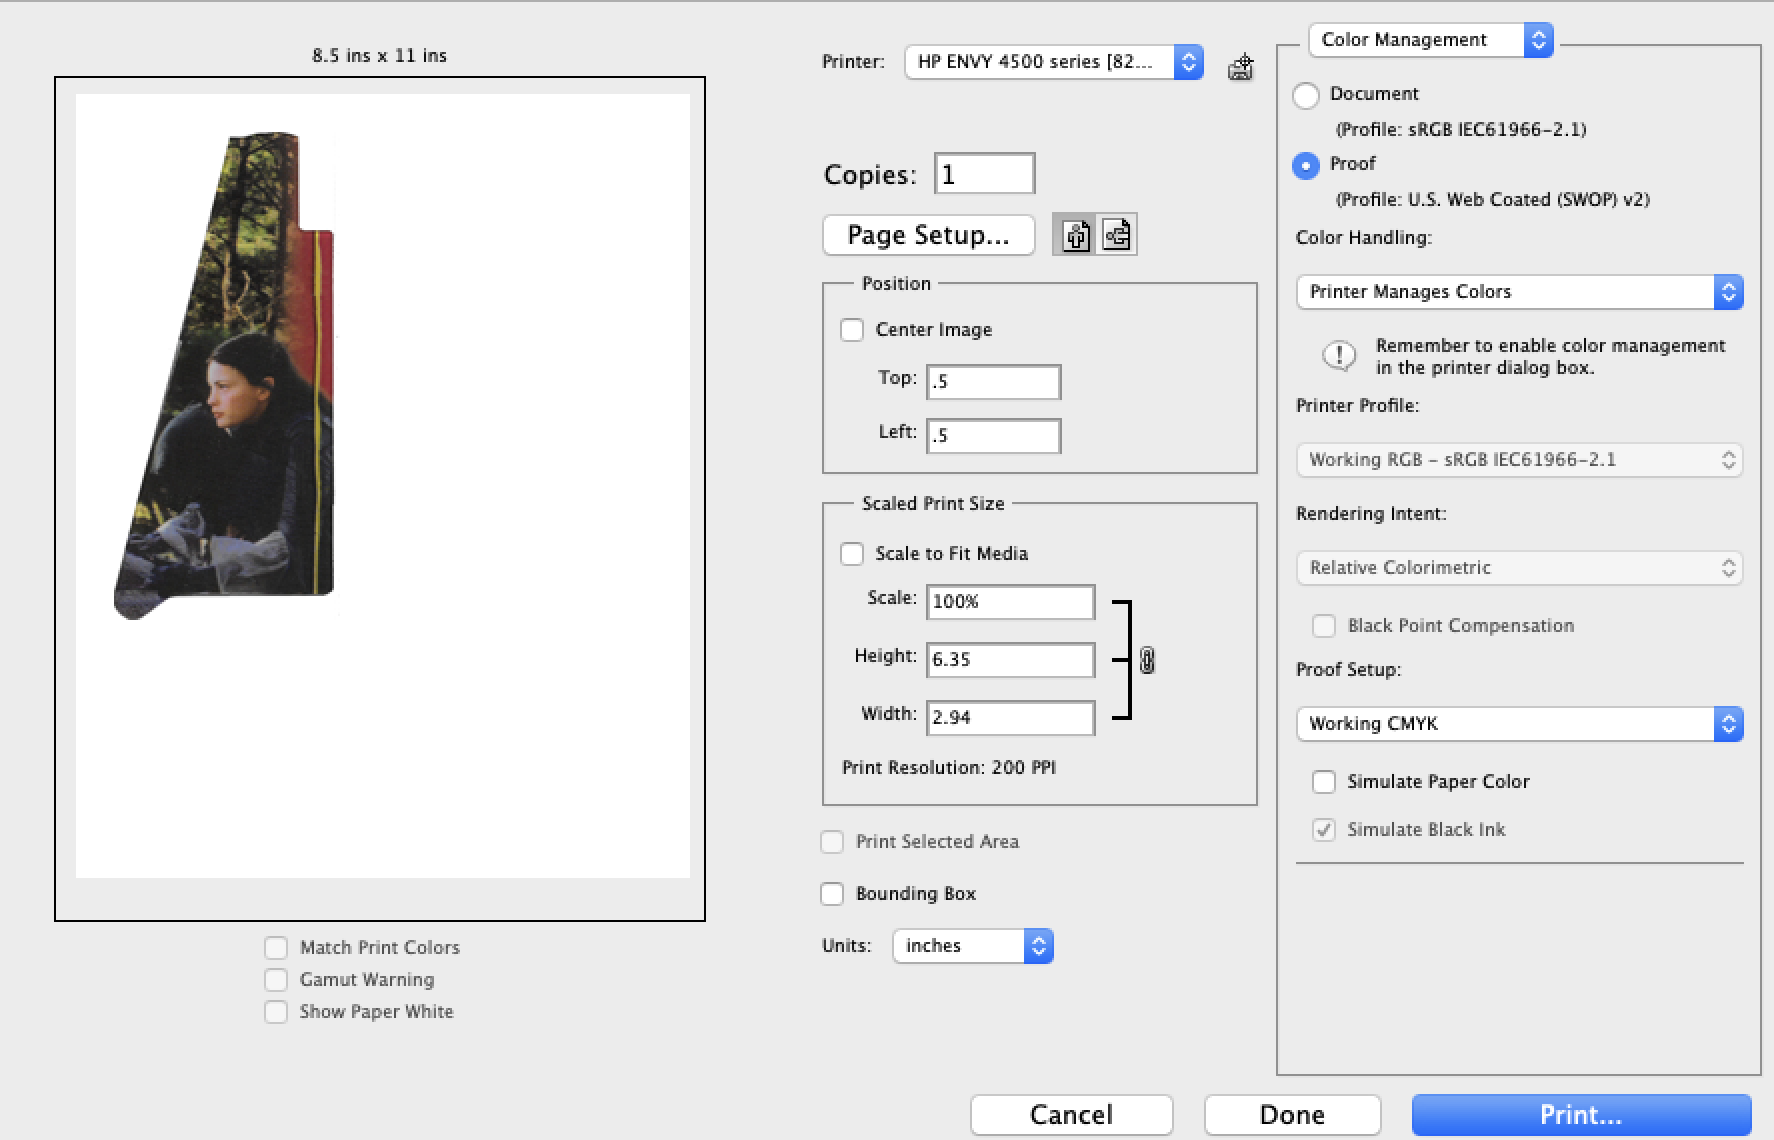
Below that check, there is a ‘Top’ and ‘Left’ spacing. Set that as close as your printer allows without cropping. Note that sometimes selecting the ‘borderless’ printing option will change the image size. We use 0.5 for both values.
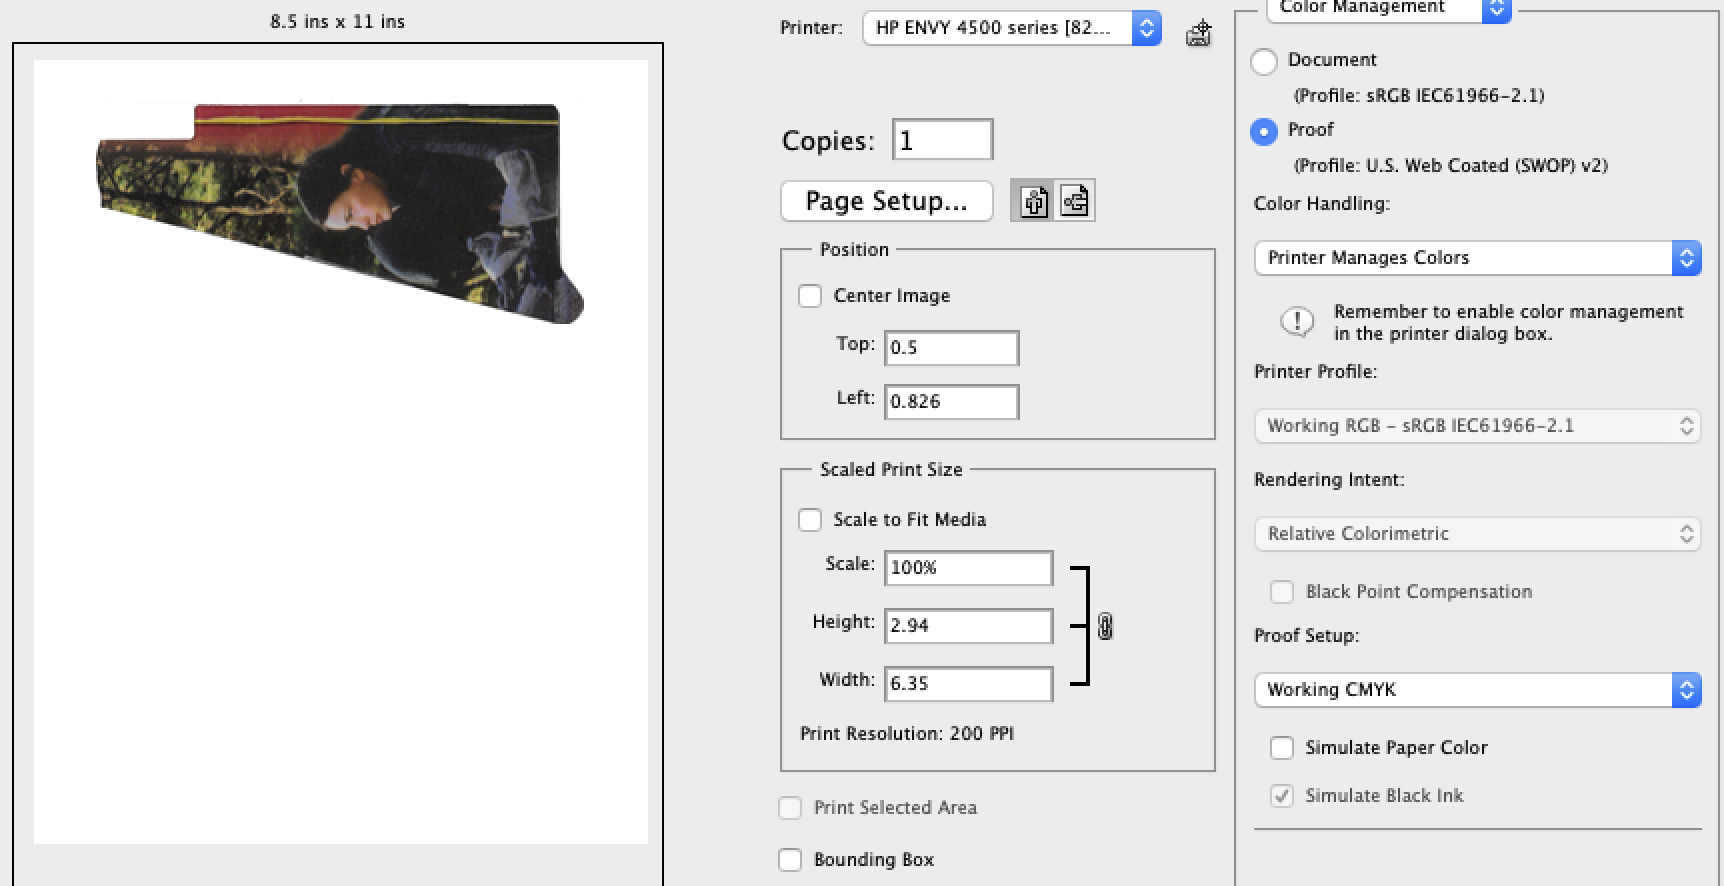
It is also possible to go back into the editing program and rotate the image, in this case, 90 degrees, so that it sits along the top edge of the paper. Or change to landscape mode.
We find that selecting ‘Printer Manages Colors’ works best for us.
If doing several plastics, it may be possible to combine them onto one sheet and print them out together.
Printing Options
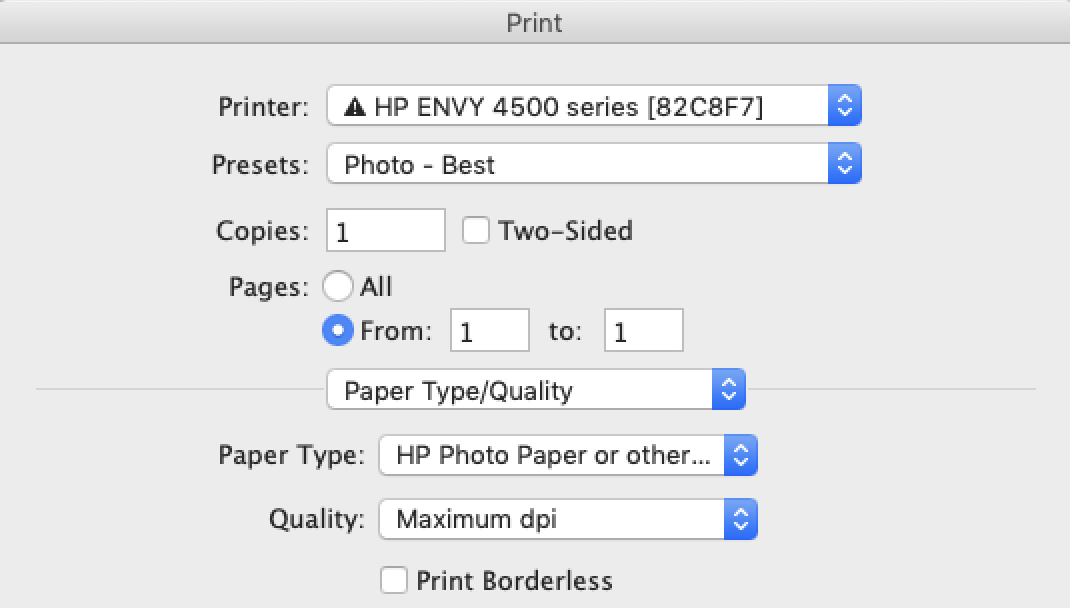
Printing will be like printing a photo. It is important to select the options that give the truest colors and color density. This will initially be trial and error.
We have saved our settings in a custom setting. This includes the dpi (dots per inch), ink settings and paper handling. We use more ink than normal as set by the slider.

Note: It is impossible to get the color saturation and light transmission to be the same as the original plastics using this method. But we can get close by varying the amount of ink used, as well as the brightness / darkness of the image.
Note: On our printer, selecting ‘Photo Borderless’ changed the size of the print. We select ‘Photo’, ‘Photo – Best’ or ‘Photo Paper’. Not ‘Borderless’.
Place the clear decal paper properly in your printer. For most, the print side is placed down – check your printer to see for certain.
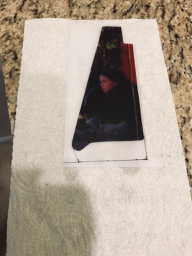
Sealing The Decal
If using an inkjet printer, the decal must be sealed. That is because the ink is water soluble. Note: If using a color laser printer, skip this step as laser printing is water insoluble.
Take the decal and place in an area where polycrylic spray can be used.
Note: Follow all precautions listed on the can.
Prepare the spray as instructed on the can. Be certain to shake it properly. Start with an experimental spray on a test surface to insure an even spray. Check for ‘blobs’ of spray as this will ruin the decal.
Hold the decal vertically. Spray a light layer of polycrylic spray! If this first layer is too thick, the printing will run. Invert the can and spray on a test surface until the spray head is empty to prevent clogging. Let the layer dry as directed by the can instructions.

Repeat with slightly heavier layers. Note, be certain to do a test spray each time. If there is any clogging on the sprayer, drops of acrylic may spray. If this happens just once, the decal maybe ruined.

We have found that it is almost impossible to have too many layers of polycrylic. While a heavy coating is not needed to protect the water soluble ink, it does help to keep the decal stiff so that it does not fold on itself during application. When a decal folds, it not only makes it difficult to apply, but the acrylic and ink starts to be damaged.
If using white decal paper for the bottom layer, also coat this page with many layers of polycrylic.
Application of the Decal
Cut out the printed area of the decal. Note, if your plastic has a clear edge to it, cut on the outline of the edge – leaving the outline intact to aid in cutting. If using a second layer of decal – white – for the backing, cut this out too.

Obtain your sheet of Lexan polycarbonate sheet and remove one side of the paper. This is the side where the decal will be applied. Identify the area to apply the decal. If creating several plastics on one sheet, location is crucial to fitting it all in.
Obtain a bowl of water wide enough to completely wet the largest decal. Slightly warm, but not hot can speed up the process.
Insert the decal in the water. This is to remove the protective backing of the decal. This next step will take a few moments. Be patient, but don’t let it soak too long. Test the decal by trying to slide the back cover off the decal. Once this back cover starts to slide, the decal is ready.

Generally, it is best not to remove the back cover of the decal. Place it in position over the Lexan on the side with the paper removed. Start to slide the back cover from the decal while holding the printed section in place. Press the exposed decal down and steadily slide the decal backing out. Press out any bubbles while proceeding.

As the last of the backing is removed, press the decal down on the plastic.
Repeat for any remaining printed decals.
Let this dry. We like to let it dry overnight at room temperature.

Two steps remain: 1) Cutting the plastic, and 2) Applying the translucent white backing. If using white decal paper for the translucent white backing, repeat the above process of cutting out the white decal, soaking in water and applying over the first clear printed decal. It is best to wait for the first decal to dry completely.

If using white spray paint for the backing, we wait until the plastic is cut.
Cutting the Plastic

Cutting the plastic requires patience and patience. Rushing the process will ruin all the work.
We leave the paper on one side in place and cut with the paper down, to prevent scratches.
We have found that the easiest is either to use a scroll saw, or the Rockwell Bladerunner. A scroll saw is a better option as it has a smaller blade which makes turns easier and can be had new for as little as $155. But at $100, the Bladerunner is hard to beat.
The Rockwell Bladerunner is essentially a jig saw underneath a table. Its only downside is that there is an ‘arm’ on top of the table that can hang up a large object. If that happens, turn off the blade and remove the object and cut from the other side.
Obtain a blade designed to cut plastic. Note that these blades can sometimes get jammed with melted plastic, so the teeth must be kept clean.
If cutting a plastic where the decal goes to the edge, cut right along the decal. If a small amount of clear plastic is leftover, that can be trimmed off later.
In some cases, a sharp corner can be difficult. Make a rough cut and leave the tight part intact. Then return and work into the corner to remove the remaining plastic.
If cutting a plastic leaving a clear edge, cut along that faint line you created when making the decal.
After cutting, clean off the edge with fine sandpaper. We remove any burrs or uneven cutting that way. We also slightly round the corners by sanding lightly along the edge.
If you have applied a white decal to the bottom, the plastic is done. Otherwise, it will be necessary to paint the bottom of the plastic with white spray paint. Note, the bottom of the plastic is the side where the decal is applied. Do not spray paint the top side where there is still paper.
Drilling the Holes

The final step is to drill the screw holes. We place the broken plastic and mark the new plastic for holes. Then hold the plastic over the screws on the playfield and confirm proper location.
When drilling, place the plastic against a block of wood. Select a drill bit the size of the hole to be drilled. Use the drill on high speed and drill the hole. Note, we have found that using a low speed on the drill is more likely to tear the applied decal and ruin the work.
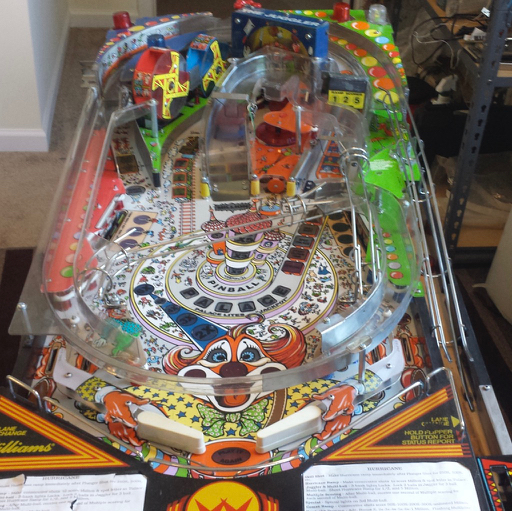
Install the plastic(s) and enjoy. Note that the new Lexan plastics are far less likely to break and crack than the originals.
External Links:
Make your own custom decal sheets
Comments
We are always looking for comments, including suggestions, improvements, errors, etc. for this page (see below).
If you have a specific question about your game that does not directly apply to making playfield plastics, please see our FAQ section.