A. Clearing the Playfield
1. Supplies Needed
2. Preparation
3. Clearing the Playfield
4. Removing the Ramps
5. Removing the Pop Bumpers
– Removing the Sling Shots
B. Cleaning the Playfield
6. Cleaning the Playfield
C. Repairing the Playfield (optional)
7. Playfield Repair
8. Fixing Inserts
9. Sealing Your Work
C. Rebuilding and Adjusting
10. Rebuilding the Mechanicals
11. Switches and Reassembly
12. Final Testing
This is a multipart series on how anyone can do a complete overhaul of your pinball machine and make it work like new.
Initially, this project might appear to be daunting. But if you proceed methodically, being careful to store the pieces as they are removed, and take plenty of photos, this is not difficult.
However, it is time consuming. This process can take anywhere from 10 hours to hundreds, depending on how detailed you are and if you want to restore the playfield.
Note that not all sections may be necessary with all playfields. For example, if there are not any problems with the inserts, you can skip that section. If not repairing the playfield, the touchup and sealing sections can be skipped.
Know Your Pinball Machine
Start by pulling out the manual for the machine. If you are working on a pinball machine from the 90’s, the manuals are typically wonderful stores of helpful information. But SS pins from the ’70’s and 80’s and most EM manuals have very little information.
If you find that your pinball manual lacks complete information, then it maybe worthwhile hunting down parts lists and catalogs put out by the manufacturers. For access to old manufacturers catalogs, check here, here, here and here. Perhaps the best collection is at Planetary Pinball.
It’s Picture Time!
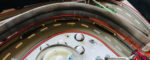
Before removing anything, take a series of photos of the playfield. Take large photos showing the entire playfield, then close in. You should have about 15 or more closeups. Remember, digital photos are free.
It may seem counterintuitive, but when performing a sequence of similar steps, your last photos will be the most important. On reassembly, you will be reviewing the photos in reverse order. So make certain the last photos on a process (removing ramps, reinstalling posts, etc.) are the most detailed and informative.
Begin Dissasembly
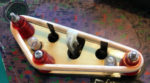
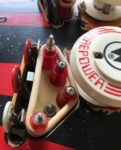
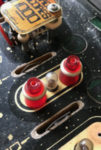
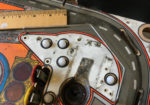
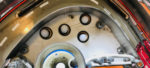
We usually start out with the easy. Take a photo of one of the slingshots. Remove the plastic and take another photo. Remove the rubber ring. If your manual does not indicate the size and location of each rubber ring, you will need to note where this came from.
There are usually three plastic posts. Remove them by removing the screws. Set the screws down on the playfield next to each hole and take a photo. There will be tons of different screws and nuts. Keeping track of which one goes in which hole will require photos.
Place these parts in your first storage spot. For us, that is the bottom left spot in our muffin tin. We label these muffin spots #1 to ?


We fill up each muffin tin position about 1/3 or more, then move on. When moving on, we take a photo of the tin so that we know when reassembling, where the parts should come from. Proceed to the next slingshot.
Note: If your playfield has ramps, the down portion frequently is connected to the slingshot plastic. It is OK to remove the nut holding that ramp in place now.
We then work from the bottom (player’s position) to the top. The top of the playfield is usually the most complex. We save that for last and then first re-assembly so that is is most fresh in our minds.
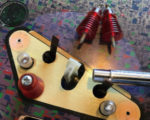
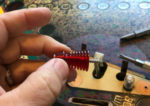
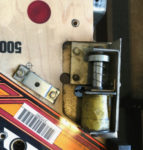
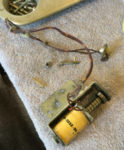
Pick your next section. At some point, this will be the ball trough down at the bottom of the machine. That includes pieces that are above the playfield, but attached from below. There are also coils and mechanisms involved. You could leave those in place, but since we will be rebuilding them, we find it easier to remove them. They can be left hanging by the wires, but it is safer to unsolder them – mark and photograph where the wires go. We also label the wires. Note that if the coil has a diode, it is crucial to know which wire goes on which tab.

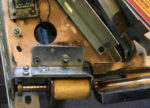


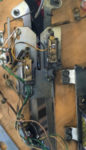
And, of course, another set of screws and parts go into the muffin tin.
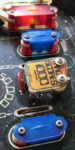
Smaller metal parts can be placed into your metal polisher / shaker to get them nice and shiny. We don’t put screws and posts in there as the media gets stuck in the threads and screw heads. We polish those by hand with a dremel. Plus mixing them in a shaker messes up our system of keeping the parts in our storage tins in order.
Place the plastic posts, plastic pop bumper parts, etc. into a diluted cleaning solution such as Mean Green and let them soak. Note: Do not place painted parts such as some pop bumper caps. The solution may remove the paint.
If You Do Have Ramps
Those darn ramps can get in the way of removing other parts. So you may have to jump ahead to Part 4, to remove the ramps in order to get at the other parts.
If You Don’t Have Ramps
If your pinball machine does not have ramps, then this process is pretty easy. Just keep doing what you did in the previous steps.

In the gallery above, there are examples of taking apart a playfield.
 Note that it is crucial to take additional photos as the screws are removed and lay them next to the hole where they were removed from. Some are wood, others machine, different lengths and some have threads on the top to attach a cap or another object.
 As these parts are removed, place the screws, in order of removal, into your storage device. As it fills, move onto another spot and take a photo at that point. That way, when reassembling, you will know when a spot should be empty.
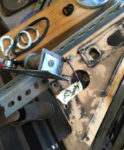
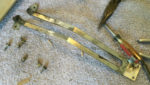
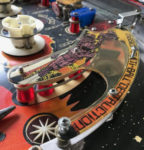
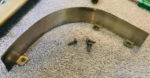
Those Pesky Wire Guides
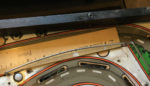

These are not ramps, but the chances are that now that you have removed the ramps, you have stumbled across the wire guides. These are a pain to remove because of the potential damage to the playfield that can occur.
You maybe temped to leave them in place. That will make your cleaning and waxing a little bit more difficult. But unless you are planning on painting and / or clear coating, that can be done.
We have never found a good way to remove these. Some of the wire guides have little marks at the end, like a fish hook. Removing them will damage the area immediately near the wire guide.
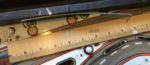
First, measure the span of the wire. Take a photo like above.
We usually have a thin piece of wood to protect the playfield. We then stick a screwdriver underneath the wire guide and put the metal end on this protective piece, then lift the handle.
Some wire guides might be damaged or even missing. If so, it is time to learn how to make your own wire guides.
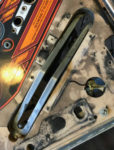
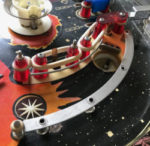
Stainless Metal Guides
These guides are easy to remove. They are held in place by screws above and below the playfield. If along an edge, there maybe small flathead Phillips screws. The only pain is if those are held in place by small twisted nails that are difficult to remove.
Removing these is a must. They need to be cleaned up and the playfield around them gets filthy.
Note: We have a technique for shining these guides to make them look great. We will cover that during reassembly.