Important Information about LEDs
B. What & What Not To Do
C. Where To Purchase
D. General Information
1) Glossary
– ghosting
2) SMD Numbers Understood
E. Game Specific Info
1) EM’s
2) Early Bally & Stern SS
3) Early Williams SS
4) Gottlieb Sys 1 & 80
5) Newer SS
– Williams / Bally WPC
– DE / Sega / Stern
– Gottlieb Sys 3
F. Adding GI Lights
G. Flashers
H. Recommendations
I. External Links
Any pinball machine can be converted from incandescent bulbs to LEDs.
Reasons to convert:
- They are brighter.
- LEDs last much longer, draw less current (connectors don’t burn) and generate a lot less heat.
- Playfield plastics are less likely to warp.
- Less heat behind the backbox / head may mean longer life for the backglass.
- They look great.
Reasons not to convert:
- Expense. It can cost $100 and up to convert a game.
- Not easy. Many of the bulbs are difficult to get to.
- Brighter is not always better. Many people go overboard. Making a 30 year old pinball machine as bright as a new Stern looks silly.
- Not all machines do well with LED’s. May need new boards, extensive modifications, or special bulbs.
- Even with the correct bulbs and adapters in the right machine, LED’s turn on and off faster than incandescent bulbs and it can lead to an undesirable strobe effect. Adapter boards can fix that problem.
Suggestions of what to do and what not to do:
- Always use ‘Warm White’ or possibly ‘Sunlight White‘. ‘Daylight Bright’, ‘Cool White’ or ‘Natural White’ is just, well, unnatural. Other color temperatures are too blue for older pins. Note that the names used to describe color temperature are confusing. The best is to find the color temperature number and compare it to the color scale.
 Stay with frosted. They diffuse the light like regular bulbs. Exceptions would be when you want a ‘hot spot’ LED.
- 5050 SMD (surface mounted device / diodes) – single SMD is a good choice. New pinball games likely use 2 SMD 5050 and are bright. We think that does not look good on classic games. 2 SMD bulbs may work well in dark areas in GI lighting.
- Some companies offer various ‘levels’ of LEDs. Be careful about ‘Economy’ LEDs as they might not be bright enough for some applications. Yet they might be bright enough in older games. Get a few and compare.
- Flashers do not have to be converted. Flasher bulbs are bright, last a very long time and do not use much power. If you want to save some money, skip those. The one exception are Data East (DE) System 3 games. These pins can lock on a flasher and it can burn the playfield. Always change DE System 3 flashers to LED. It is also a good idea to change flashers to LED under the playfield as if they lock on they can burn the playfield. It maybe a good idea to change all flashers under the playfield.
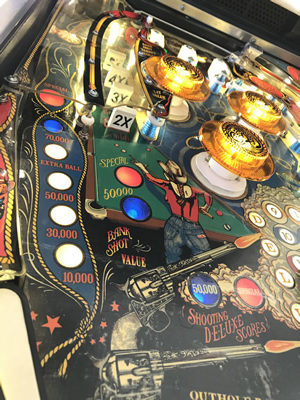
- We color match. It makes color inserts look ‘richer’. Yet orange LED’s are not as bright and we sometimes use white there. An alternative is to use brighter white LED’s (2x 5050 SMD) on darker colored inserts – but they do not look as good as matched colors. Comet reports that pink bulbs work for orange inserts and sunlight works for yellow inserts.
- Spot lights / flood lights can use brighter LED’s and can work out well. Because spot lights usually light up broad areas of a playfield, sometimes brighter is better.
- Kits are great, especially if doing one game. But they are more expensive.
- If the bulb under the insert is not pointed up directly into the insert, a regular LED might not be bright looking. Install a single LED on a flexible wires so it can be pointed into the insert.
- Make sure your LED’s work on AC circuits. DC LED bulbs have become rare, so not much of an issue anymore.
- Use the right boards / adapters for the appropriate machines (see below).
- Don’t listen to the fanatics that love to make their games blinding bright. They are idiots.
- Stay with white for GI’s (any color temperature). Color LEDs for GIs are eye catching, but generally do not work out well.
- A well done brightness comparison.

Enter the service menu to find out.
Answer: Not the star rollover. The pop bumpers the playfield lamps to the left of the ‘2X, 3X…’ are switched.
Where to purchase LED’s:
- Cointaker – A pioneer in pinball LED’s. Perhaps the best selection of kits with exactly the right type and color of LED’s for a specific game.
- Comet – Perhaps the largest selection of LED’s. We have used their lower priced LED’s in non-ghostbuster applications.
- Pinball Life – Great LED’s at slightly lower prices. We use their bulbs extensively. As of 2024, all their bulbs are ‘Ghost Busting’ which may not work well with OCD boards (see below).
- Titan Pinballs – A good selection and good prices. Great non-ghosting LED’s.
- Action Pinball – They look fine but we do not have any experience with them.
- Pinball Blubs – A nice selection. We have no experience with them.
- Yoppsicle – A Pinside marketplace store that sells the revolutionary LEDs for early Bally / Stern SS. These are great for the early Bally / Stern SS games.
Great if converting multiple pins to LED’s.
General Information
Glossary
COB LEDs – COB LEDs are the next generation of LEDs, and may someday replace SMD LEDs. Brighter and cheaper to make. 3rd generation of LED lighting – it is coming.
Color Temperature – When shopping for home LEDs, color temperature is used to describe the color. With most pin LED’s, the color temperature is not specified. Warm white, sunlight white and natural white (or cool white) are frequently used instead. Generally, warm white is closest to the color of incandescent lamps. A color comparison.

DIP – Direct In-line Package . Traditional LED where each LED is clearly separated from others, with two leads attached. Not used in pinball much anymore, except in opto switches. Many of these do not last very long.
Ghosting – This is an LED that may appear as faintly on, even when it is supposed to be off. A pinball machine with ghosting will require the use of non-ghosting LEDs in the switched lamps or a special lamp board add on (OCD).
Non-Ghosting Pinball Machine – A pinball machine that does not exhibit ghosting and can use standard LED bulbs.
Ghostbuster or non-ghosting LED’s are required on newer Bally / Williams (WPC), Sega/DE and Stern pins for the switched lamps only. If using regular LED’s on those pinball machines, the LED’s may glow faintly when they should be off. These have a resistor in series with the LED to keep it from glowing. Even on some EM’s, ghosting might be an issue for switched lamps. GI lamps can use regular (not non-ghosting) LED’s. Note that Williams changed the code for WPC95 pins so most of them should not need non-ghosting.
GI – General Illumination. These are on all the time (some machines may dim or turn them on or off). Any cheap AC LED will work just fine in the GI circuit.
LED’s – Light Emitting Diodes. Diodes are DC and allow current to pass in one direction only.
Lumen – A measure of brightness. The higher the number, the brighter.

SMDs – ‘Surface Mounted Device’ or ‘Surface Mounted Diode’. LEDs are mounted on an aluminum substrate and enveloped in an epoxy resin. Replaced DIP LEDs. Second generation of LED lighting.
Switched lamps – These are lamps that are turned on and off during game play. These may require special circuit changes or non-ghosting LED’s. Or not. See notes on the specific games, below to see if you must use anti-ghosting bulbs.
Most, but not all, inserts are switched lamps. Most of the rest are GI. The best way to tell is to go into your service menu and select testing lamps. Have all switched lamps turn on and off. This will identify which are and are not switched lamps. Or check your manual.
Note that some pins use a relay to turn on and off GI lamps. They are still GI lamps, not switched, and never need special anti-ghosting bulbs. Another way to tell is to look at the wiring. All GI lamps use the same two wires and are ‘daisy chained’ from lamp to lamp. Look at the back of the wood inset in the backbox to see the difference in wiring of GI vs. switched lamps.
It does not hurt to use non-ghosting bulbs in GI lamps. It can be a bit more expensive. But non-ghosting should not be used with most lamp LED aftermarket boards.
Strobing – Incandescent bulbs glow and slowly get brighter and dimmer. LED lamps turn on and off very quickly. This leads to a strobe effect that some find unnerving or even upsetting. If this happens in a game, the only way to get rid of it is to go back to incandescents or put in a lamp board designed for LED’s.
DC vs. AC LEDs – All LEDs run on DC (direct current). GI circuits are AC (alternating current). When hooking up the original LED bulbs, these DC LEDs flickered, like bad fluorescent lights. To solve those problems, manufacturers installed tiny circuits in the bulbs to convert AC to DC so the bulbs would work on AC. Almost all LEDs sold now contain those circuits so DC vs AC is no longer an issue. But always check with the seller to insure you are getting AC compatible LED bulbs.
SMD LEDs – Brightness – What do those numbers mean?
SMD’s may also be referred to by an ID number. The most common are 3528 and 5050. Those numbers refer to the size. A 3528 is 3.5mm x 2.8mm. 3528 contains one 3.5mm by 2.8mm (9.8 sq. mm) LED per chip. 3528 are somewhat comparable in brightness to the traditional LED (although they can be a little brighter).
5050 SMD’s contain a larger LED at 5.0mm by 5.0mm (25 sq mm or 2.5 times larger). Therefore, they are much brighter than 3528 or regular LED bulbs. 5050 SMD’s are quite useful when installing multicolor lights as each LED can be one of the three primary colors.
We used to prefer the single SMD 3528 lights but they are getting harder to find, so we are buying single 5050 SMD’s. Double 5050 SMD’s are also available. These brighter LEDs work exceptionally well in darker inserts or dark areas in GI lighting, but mixing single and double 5050 SMD’s on one playfield can cause problems.
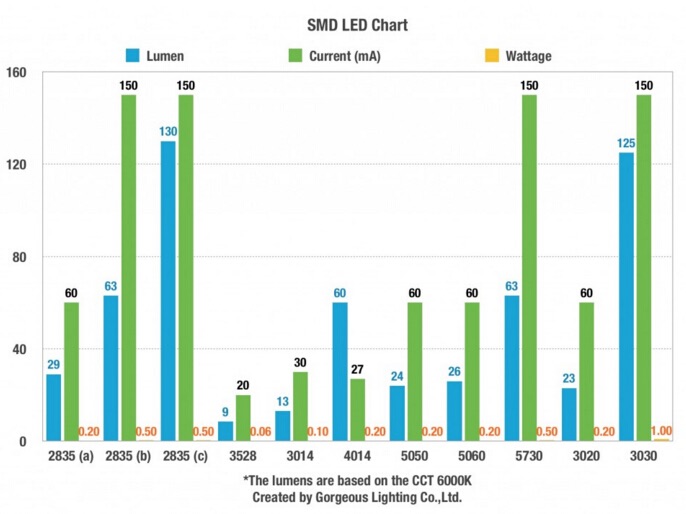
While generally, the larger the SMD the brighter, but that would be too easy. Example of SMD numbers are: 2835, 3528, 3020, 3030, 3535, 3014, 4014, 5050, 5060, 5630 and 5730. With new technology, some newer smaller sizes can take more power and get brighter than just their size would indicate. For example, 3528 can handle just 0.06 watts. But the newer designed 2835 could handle up to 1 watt and be up to 15x brighter. More information from TechnoBlog, LEDlighslighting and saving-star.com.
So which to pick? What to look for is the output in Lumen, which is a measure of brightness similar to wattage as a measure of power. 3528’s output is 6 – 9 Lumen, 5050 output is 18 – 24 Lumen, and 5630 / 5730 is 50 – 63 Lumen. Unfortunately, few pinball LED vendors specify which SMD is in the bulb. At least one, Comet, does spec the power consumption. Generally, the higher the power, the brighter the bulb.
It is also important to look at the light spread and the cap. A clear cap can mean a more focused bright dot, while a frosted cap spreads out the light more. Some bulbs have all the SMD LEDs on the top, while others have them spread around for better dissipation. Which to use depends on where they are mounted. In most cases, the traditional shaped lamp with a frosted dome is the safest choice.
Game / Manufacturer Specific Information:
EMs:
EM (electromechanical) machines can be easily converted. If you feel the need, be sure to use single SMD LED or ‘retro’ LED’s.
Connectors do not burn. And incandescents do not burn out often enough in home use to make conversion of EM’s a priority. Yet we have seen EM’s with subtle LED’s that look great and we have recently converted a Grand Prix EM and love it.
Putting LED’s in the backglass would be smart. The heat from regular incandescents might lead to peeling the backglass. And the brighter LED’s can make the backglass ‘pop’. Whether that is a good thing is up to you.
There are reports that ‘non-ghosting’ LED’s might be required in switched lamps in EM’s – we have noticed a slight flicker if regular LEDs are used. This is curious as, in theory, the lamps are completely disconnected when off. However, enough power could be induced into nearby wires from higher voltage circuits and arcing (electrical noise), enough to light LED’s to a dim level.
Early Bally Solid State and Stern:
 Note: There is a new, rather amazing product that was released in 2021 that makes the requirement of adding a resistor or a new lamp board on early Bally/Stern pins all go away. Simply “remove the old socket and slide the stick under the original braided wire, use the original screw to secure, solder the two wires to the pads and forget about it forever. No more flicker and no more dim bulbs… just bright, solid light! Want to use your original lamp driver board? No problem! These work right out of the box without the need for any adapters, LED driver boards or added resistors.” More information….. |
If you have an early Bally SS pin and it is a AS-2518-17, AS2518-35, AS2513-133, Stern M-100 or M-200 MPU (go here and select the list under ‘MPU’), you have a challenge. The lamp circuit design will not work with LED’s. You have three options:
* Buy a new lamp circuit board such as this, this or this. Or now, this replacement for the corroded old lamps.
* Or, install a special adapter on your current lamp board.

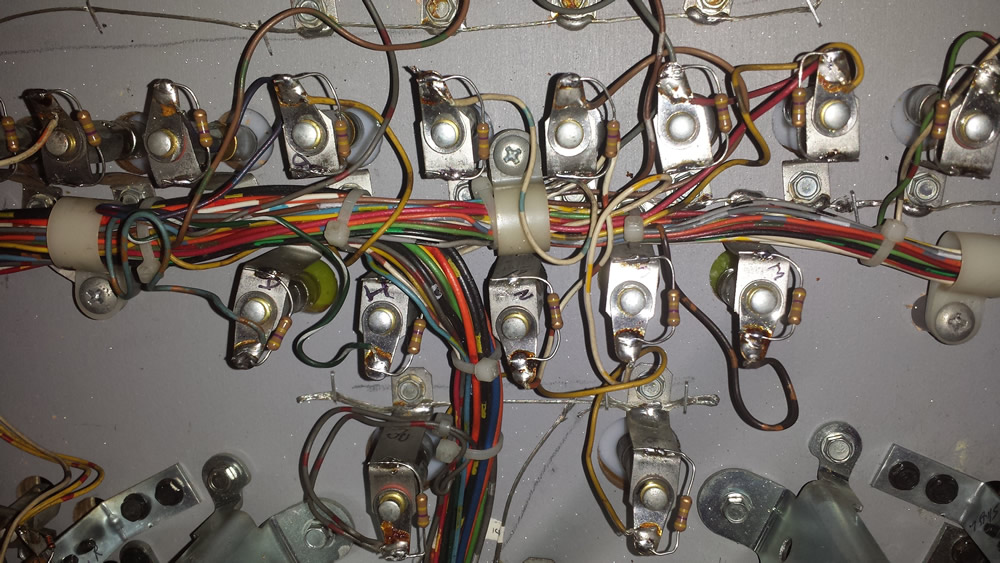
* Or solder a 470 ohm resistor (1/4 or 1/2 watt from GPE, or 1/4 watt from Marco) across every single switched lamp on the pinball machine. Note: switched lamps are those that turn on and off with game play. GI lamps stay on all the time and do not require any special modification.
Once one of these modifications have been made, you can slap in any AC LED in there. They do not need to be ‘Ghostbusters’ or non-ghosting LED’s.
Non-ghosting LED’s, alone, will not work here. One of these three options must be followed for the switched lamps to operate properly. Otherwise, most of the switched lamps will continually flicker when on.
Early Williams and Data East Solid State:
To the best of our knowledge, early Williams solid state – system 3 – 7, 9 and 11, do not require any modifications nor do they have to be ‘Ghostbusters’ non-ghosting LED’s so any AC LED can be used in these games. To soften the ‘strobing’ effect, a special board is available for Williams System 11.
Problems with the GI Relay
Some games use the GI relay during game play for special effects. This is a terrible idea with LEDs. For Data East games, unplug CN7 on the Power Supply and the relay will stay on which prevents headaches.
On Williams, unplug J7 on the power supply to prevent the GI strobe effect.
Gottlieb System 1 and 80:
These early Gottlieb pinball machines can use any AC LED’s. It is not necessary to use non-ghosting LEDs.
Williams WPC, Gottlieb System 3, Sega, Data East and Stern:
We used to have a simple answer for this:
* Williams / Bally WPC89 and WPC-S – you need to use non-ghosting LEDs.***
* Williams / Bally WPC95 – Can use regular bulbs.***
* Gottlieb System 3 – Need non-ghosting.
* Data East/Sega/Stern* or Stern** from 1989 until Stern** started using LEDs, need non-ghosting.
However, it appears that there are many games in the WPC89 category that may not require non-ghosting bulbs. And the information out there may not be reliable. We converted a WPC89 Hurricane which required non-ghosting bulbs. Yet this is listed in some accounts as being able to use standard bulbs. And the terminology can be confusing. A pinball machine labelled ‘ghosting’ requires ghostbuster or non-ghosting bulbs. A pinball machine labelled as ‘not-ghosting’ can use standard bulbs.
All GI lamps can use cheaper regular LED’s. Non-ghosting maybe nearly double the price, so this is quite a cost savings.
Note that many of these games have an auto dimming selection for the GI’s, to turn them down when the game is in standby. Turn off auto dimming (leave GI at full brightness) when using LED’s, or else LED bulbs may flicker.
An alternative to purchasing non-ghosting bulbs is to purchase a newly designed lamp board specifically designed for your model machine. These are available for Bally Williams WPC, and Stern SAM, Stern Sega Whitestar. Those boards are made to work better with regular (NOT non-ghosting) LED’s. The added benefit is that these boards are supposed to ‘soften’ the on / off of the bulbs so that it is not as harsh and does not cause a strobe effect. We converted a Stern Lord of the Rings and found that we just had to use an OCD board or it was irritating.
There is also an unofficial software code update for Bally / Williams WPC machines with code that fixes the ghosting problem. You will need to ‘burn’ new EPROMs or purchase EPROMs to use this code. Note that EPROM burning services are not allowed to offer EPROMs with this code for sale. But they may burn custom EPROMs if you supply the code.
* Data East / Sega pins from 1989 (Version 1 through 3b) plus Sega / Stern Whitestar may require non-ghosting lamps (unless a new lamp board is purchased – for Whitestar pins, not available for DE/Sega V1 – 3b). There are reports that Data East / Sega V1 – 3b might not require non-ghosting.
** Stern ‘SAM’ systems require non-ghosting LEDs in machines that were manufactured with incandescent lamps (unless a new lamp board is purchased).
*** WPC89 includes WPC Alpha Numeric, WPC Dot Matrix, WPC Fliptronics 1, WPC Fliptronics 2, and WPC-DCS. The exception to this should be Williams/ Bally WPC95 pins. Somewhere around 1996, Williams changed their code to get rid of the ghosting problem so later Williams / Bally pins should not require non-ghosting LEDs. Some earlier Williams pins incorporated this change, including: Attack From Mars rev 1.13, Whitewater rev LH-6, and Twilight Zone rev 9.4H. These have the update in their EPROMs and do not require non-ghosting LEDs.
GIs (General Illumination Lights)
Converting Existing GIs
Putting LEDs in for GIs is pretty straight forward. You do not need special bulbs like ‘ghost-busters’. We recommend warm white or daylight color temperature. We don’t like color GIs in the playfield, but that is up to you. Sometimes, in the backglass, they can work, but most of the time they don’t.
The biggest challenge is getting to the GIs. Many of the sockets are stapled in place underneath. In that case, the plastics will usually have to be taken off. Other times, the sockets are held in place by a simple wood screw and those maybe easier to remove underneath the playfield and inset.

lamp holder is not pointed directly into the insert.
(Photo from PinballLife)
All GIs are AC, so insure that your bulbs are AC (almost all are these days).
If the bulbs are pointed straight up, a standard bulb can be used. But if it is turned sideways, use a bulb on flexible wires that can be aimed in the direction where the light is needed.
If a playfield is too dark, it may pay to experiment with 2SMD or brighter LED lights. The problem with using brighter LEDs is it may lead to a localized bright spot on the playfield without making it brighter overall. Experimentation is a must.
Adding GIs and Switched Lamps
Some playfield maybe too dark and the only solution maybe to add GI lights. This is pretty easy.
Switched Lamps
It can be fun to add a second switched lamp to an existing lamp. We have done this to accent a shot in a game, or just to make it look more exciting.
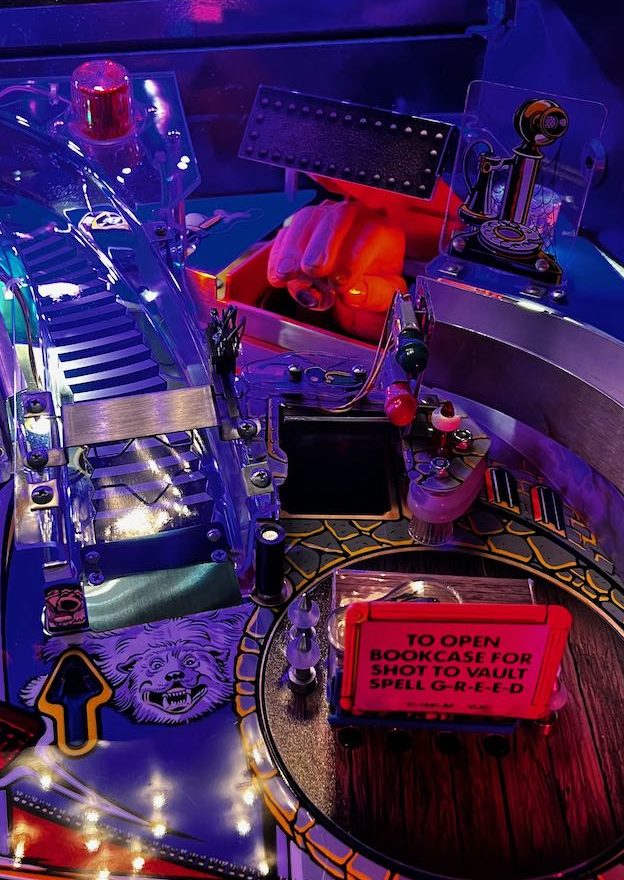
In the first photo, we added two spotlights on The Thing hand. These switch on with the motor. The correct voltage is set using an inexpensive DC to DC converter.

In the second photo, we have taken off the lamps on either side of the ‘electric chair’ on the scoop in The Addams Family and placed them under the playfield. The scoop then lights up dramatically with either the yellow or red color, or no light at all if the shot is not available. The photo is shown with the solenoid and VUK removed.
We have made this addition to several different games (The Getaway, Funhouse, etc.) and plan on doing it more frequently in the future.
Spotlights

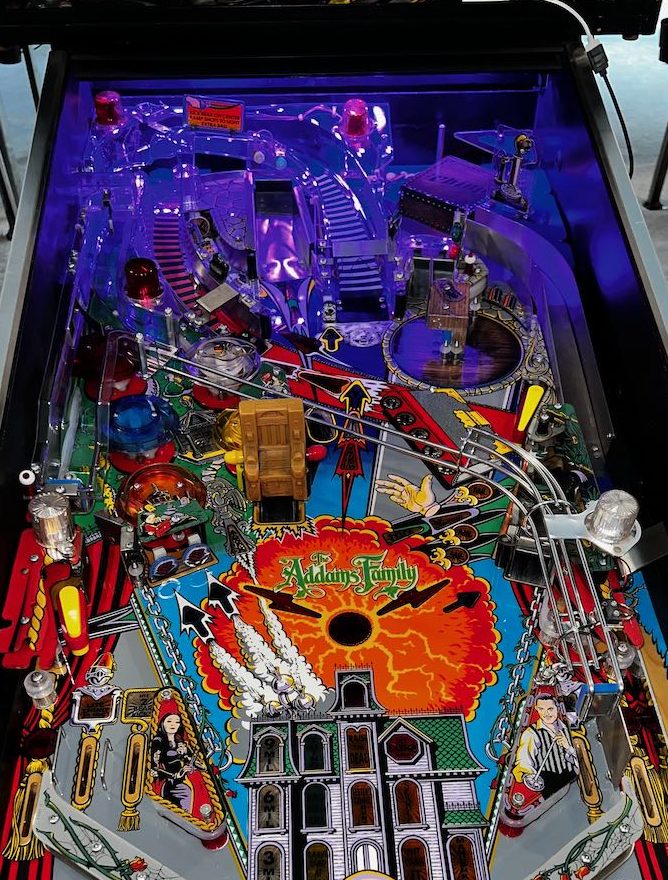
Some playfields already use spotlights. Adding more is easy. Purchase spotlight kits from Comet, Pinball Life, Marco, or other sources. We are in the process of doing an Addams Family playfield transfer and the owner wants a brighter playfield. We are going to add spotlights and will post photos as to how it all comes out.
Star Post Lights

The star post used in places like slingshots can be lighted using these cool little adapters from Marco (has different color LEDs), Pinball Life, Comet and others. Installation is also fairly easy in that it must be wired to any GI socket, then placed under the star post with the screw going through the center. The only issue we have had is if these get turned around at all, they can cause intermittent shorts and blow fuses. Also, they fit only under certain types of posts.
LED Strips
Putting in LED strips can be exciting and difficult. Kits are available for installation in the outhole (bottom of the playfield) and underneath the backbox. Pin Stadium has done a great job of making commercial kits for this application.
For those willing to DIY, there are great video instructions from HurryUpPinball and we are using his instructions on our Addams Family playfield transfer (see photo).
Flashers
As we mentioned above, we don’t always change flashers to LED. Flasher bulbs are bright, last a very long time and do not use much power. This is especially true in ‘naked’ flashers located above the playfield. If you want to save some money, skip those.
There are exceptions:
- Flashers in a topper (top of the backbox) look great with flashers. An example is The Addams Family ‘cloud’.
- Flashers under the playfield. A LED flasher located under an insert can look better. Plus, if an incandescent flasher locks on, it can burn the playfield. Because of the circuit design, the locked on flasher and burned playfield are more likely to happen with Data East (DE) / Sega System 3 games – so at least put LED flashers under the playfield.
Recommendations
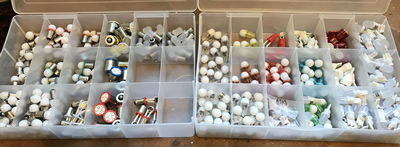
If we were just doing one pin and wanted the least hassle, we would just grab the kit at Cointaker or at Comet and be pleased as heck. If doing several pins, we would buy in bulk and make our own ‘kits’ – and this is exactly what we do.
If willing to work a little more and, perhaps, doing more than one pin, we shop around and buy in bulk to get a discount. We like:
* Comet single LED warm white frosted single 505o SMD domed bulb. A hundred pack is $59 as of 01/2022. We use them in all GI lighting and switched lamps where non-ghosting is NOT required.
* Terry at Pinball Life does a great job of providing quality products at reasonable prices. Their anti-ghosting ‘Ghost Buster’ are great bulbs. They have recently added less expensive standard (not non-ghosting) LEDs that work well. We buy these in bulk and use them extensively.
* For single 5050 SMD LED’s, it is hard to beat Titan Pinball’s frosted dome warm white, but these bulbs are not ‘ghost busting’.
* Cointaker has an extensive selection of different LEDs in bulk.
Color match. It is worth the hassle. Those color inserts will look better – richer colors. Yellow and orange LEDs are not bright. White can be used for those inserts with sometimes a better result.
Comet sent us a very nice note that stated: “If you’re looking for good color saturation and brightness I’d recommend trying pink bulbs for your oranges and sunlight for yellows. I’ve found this way of matching really makes the colors pop and differentiates orange from yellow really nicely. Actually, if you have yellow, light and dark orange I’d use sunlight, warm white, and pink respectively.” [Email from Comet Pinball on 1/26/2022]
The a higher of SMD’s does not necessarily mean brighter. Sometimes 2 SMD bulbs are brighter than 4 SMD bulbs, because the 4 SMD bulbs are smaller SMDs (see “SMD LEDs – Brightness – What do those numbers mean?”, above).
But if we were just doing one pin and wanted the least hassle, we would just grab the kit at Cointaker or, at Comet or Pinball Life and be pleased as heck. If doing several pins, we would buy in bulk and make our own ‘kits’ – and this is exactly what we do.
If you cannot stand the strobe effect, investigate the LED OCD boards. but these are better with standard (not non-ghosting) LED bulbs.
With the changes going on in this high tech market of LEDs, things will change quickly. None of the distributors of these products will steer you in the wrong direction – they are all great people. Make your decision and go with confidence with any of them.
External References
The difference between SMD LEDs -For the geek who wants to know more about the ‘guts’ of SMD’s.
Brightness Comparison – Almost as good as getting samples.
LED Ghosting in WPC Pins & Software Patch – A detailed explanation about LED ghosting in WPC pins.
PinballBulbs.com – A list of pins that do and do not require non-ghosting bulbs. Accurate?
GitHub WPC non-ghosting code – This program will update the lamp matrix driver code for WPC & WPC95 pinball game roms to eliminate ‘ghosting’ when using LEDs.
HurryUpPinball – How to build Playfield Lights
Comments
Comments, including suggestions, improvements, errors, etc. are welcome (see below).
If you have a specific question about your game that does not directly apply to LED’s, please see our FAQ section.
Feel free to add your comments below. We are all learning. Opinions are OK as my notes above include a lot of opinions. But facts are even better.
Game: Cross Town
Having replaced all the bulbs with non-ghosting LEDs, ran into these problems:
Last ball in play, game over and match lights do not work. All other lights work and look great! I figured the problem may be in the ball trough roll over switches, so I gave them a quick clean. I replaced the first two lights with the IC originals that I know work. No luck. Any help would be appreciated! I do have the schematic and am learning the current flow and symbols. What a challenge.
Is this ‘Cross Town’ the 1966 Gottlieb EM pin?
‘I replaced the first two lights with the IC originals that I know work. No luck.’
We are not sure what you mean there. Does this mean that you removed the LEDs and put in the incandescents and those did not work either?
‘Last ball in play, game over and match lights do not work.’
These issues all sound like contact problems in stepper or score reels. Or problems in the sockets, wiring, or the Jones plugs.
We do not have the schematic for this Gottlieb – Gottlieb does not allow free use of their schematics, but there is a ball in play unit that steps up to (usually 5) positions. It is ‘step up, step down’. There is a disk that looks like a primitive circuit board on many of these games. In the last position, two things should happen. The lamp should light up and the game over relay should be activated. Since neither of those lamps are activating, it is likely that it needs to be cleaned. Please see how we did it in: https://homepinballrepair.com/cleaning-and-fixing-your-pinball-em-stepper-unit/
Match light could also be related, if the game over relay is not being activated. Or it could be similar contacts in the score reel. Please see: https://homepinballrepair.com/em-score-reels/
We hope this helps.
-The HomePinballRepairTeam
Thank you for your guide! Converted my Barb Wire to led based on all your information. Best wishes from Brazil.
Thank you for your kind words Eduardo. We are glad that we helped. Enjoy your pinball machine.
Great article! I just converted a Firepower and the only issue I had was that some of the GI sockets are too deep in the play field to add my new LEDs. The kit I got was from Pinbulbz and have a collar on the bulbs which interferes with installation on these locations. Am I missing something?
Thank you for the compliment.
We also recently converted a Firepower. No, you are not ‘missing something’. Getting those short style LED bulbs into the recessed GI sockets can be a pain. Sometimes we remove the screw holding the socket in place below the playfield. These sockets are frequently soldered to a wire, so they cannot be removed but can usually be rotated out of the hole. A bulb can then be inserted, but it is now taller and rotating that socket back in can be tricky.
For a standard height bulb, there are bulb remover ‘grips’.
https://www.pinballlife.com/bulb-replacement-tool.html
One can also use an old rubber shooter tip.
As to the collar being too big, that can especially be a problem with shorter LED bulbs. We like the shorter bulbs in certain situations such as inside the pop bumper. But when installing into a recessed GI, that can be a problem. Having the bulb protrude out, above the hole also allows the light to spread further out on the playfield. The taller LED can be more easily installed from above and the ‘collar’ (hopefully) will not sit inside the hole.
But LED ‘collar’ size from distributor to distributor can vary too.
We would contact Pinbulbz and give them a chance to fix the problem for you.
We have used several LED suppliers including: Cointaker, Titan, Comet and Pinball Life, among others. From Pinball Life, (as of Winter 2022) their ‘Premium’ LEDs tend to be taller, while their ‘Economy’ bulbs tend to be shorter. But distributor’s offerings tend to change with time.
Best of luck to you. Please let us know what you find out.
Greetings;
Your site is absolutely fantastic!
I was hoping that you might have included a fix for Williams System 11 games (in my case it’s High Spped) not liking LED to be used in the flasher/strobe positions. This seems to be a well known issue, but unfortunately there are a bunch of different thoughts/ideas on solving the condition. Maybe you could shed some light on the subject.
Thanks in advance
Thank you for your kind words. We work very hard to keep this site up to date and accurate. Your compliment means a lot to us.
We have to get one thing out of the way: in most cases, we don’t recommend using LED flashers. The original ones are bright enough and they last a very long time. But we understand why some like to convert to 100% LED’s, so here goes.
“…not liking LED to be used in the flasher/strobe positions. This seems to be a well known issue…”. We would be interested in more information. We have seen different problems with different System 11 games. You are lucky in that High Speed does not have a relay to switch from solenoids to flashers. But it does put flashers in series which presents a whole another issue.
You are right, there are all sorts of issues with using LED flashers in Williams System 11 games. The first one to fix is easy – there are two resistors for each set of flashers. They are located under the playfield. One reduces the power to the flasher. The other was intended to keep the flasher warm so that it would last longer. That is called the ‘warming resistor’. If it is in place, the flasher will remain on – likely not at full brightness. It is 330 ohms and 7 watts, so it is big. Clip that off. We remove both ends entirely. Even if you decide to go back to incandescent bulbs, it is not needed.
The other one is just 5 ohms and it is 10 watts. Leave it alone, but make sure it is still connected. They get so hot that they can unsolder themselves.
In many cases, the LED flashers should work properly now. But then again…
In some cases, Williams put the flashers in series and this is true with High Speed. This helped to reduce the voltage across each one in half. This works well, unless one burns out. It does not work well with LEDs, because LEDs do not have anywhere the same resistance as incandescent bulbs. Fixing this is something we have never tackled because we don’t put LEDs into flashers, but those who do solder a resistor across the socket to allow more power to pass the LED. Most seem happy with a 1K ohm 1/2 watt resistor. Others might use 100 ohms, but that seems rather risky to us. If the flashers are not bright enough, try a lower value resistor. We cannot recommend doing any of this, because we have not tried it.
So, if you are up for experimentation, try cutting off the 330 ohm resistor and hope that fixes your problem. If (when?) it does not, try soldering a 1K resistor across the flasher socket and see what happens.
Or take our suggestion, and put the incandescent flashers back in.
If you decide to go with the flashers, please let us know how it goes.
Hi.
I have just converted a Data East Star Trek to LEDs and 99% of the bulbs are fine – it looks awesome! A couple of lights, however, illuminate (dimly) when they shouldn’t – one of the 555 wedges on the crystal matrix, one of the BA9S on the playfield inserts.
I note there appears to be a small diode across the bulb holder terminals (it may be a resistor but the light was failing and my eyes aren’t what they used to be, but the looked like diodes to me) so wonder if these have failed.
Incandescent bulbs work fine, and I tried different LEDs inc non-ghosting, but they still stay illuminated.
Should I simply solder a small resistor across these individual holders or would I need to do the entire playfield? I assume there is a small amount of residual voltage present which the resistor would drop.
TIA.
Jim
That is a small diode, not a resistor, across the one tab to the other. It is likely a 1N4004.
As to the cause of it being dimly lit, we are a bit baffled.
Please try going into the lamp test in the service menu and see if those lights glow dimly all of the time or just when certain other switched lights are lit.
One of the advantages of LEDs is they use very little energy to light. One of the disadvantages is any stray induced current from another source, or a diode on that or another bulb that is leaking could cause it to light.
Hypothetically, it might be possible to put a resistor across the bulb contacts and in series with the diode might drain that leaking current, but we have never tried that and would not know what to recommend. It would be better to find the source and fix that.
Edit: Note that there are three tabs on controlled lamp sockets. A wire comes into one tab where a diode is attached. That diode then goes to another tab. There is a third tab where there is only a wire (or sometimes, the bracket holding the socket acts as a ‘tab’). The bulb is connected to the tabs where only one thing (diode or wire) is connected. The lamp is not directly connected to the tab where there is both a wire and a diode.
The diode is in series with the bulb, meaning that the electricity comes from one wire, through the diode, then through the bulb and out the other wire.
If you were to try a resistor, it has to be from the tab where there is only a wire (not a diode) to the tab where there is only a diode (not a wire).
This sure would be easier with a drawing….
Such a good article to read! Tanks you for that!
Do you know if i can use incandesent bulbs or even flashers in newer Sam games like TWD pro or Star Trek pro? I heard that they are not made for them/ need too much power.
Without an Led board there is no smoothing/fading with leds.
It is our understanding that incandescents cannot be used in any Stern games that were designed for LEDs. There maybe some reference in the manual.
“Without a Led board there is no smoothing/fading with leds.” Stern designed their games that way intentionally. We we got an early Stern SAM LED game, we were struck by the effect – somewhat negatively. But it has grown on us, especially since all of the LED Stern games have a similar effect. Comparing Godzilla to Stern Star Trek, side-by-side, the effect is similar despite SPIKE vs. SAM.
To those of us that grew up on incandescent games, it is a new normal that is tough. But, in the meantime, we convert all games to LED and many of them we don’t use OCD boards and do not mind the effect. An exception is that Lord of the Rings absolutely requires an OCD board in the switched lamps. And games with relays on the GI (looking at DE Tommy for one) must have that relay disconnected – although there maybe an OCD board for that.
We have also converted a few older Bally / Stern pins to DC for the GIs and it removed that 60 Hz (120 Hz?) strobe effect.