A. Clearing the Playfield
1. Supplies Needed
2. Preparation
3. Clearing the Playfield
4. Removing the Ramps
5. Removing the Pop Bumpers
– Removing the Sling Shots
B. Cleaning the Playfield
6. Cleaning the Playfield
C. Repairing the Playfield (optional)
7. Playfield Repair
8. Fixing Inserts
9. Sealing Your Work
C. Rebuilding and Adjusting
10. Rebuilding the Mechanicals
11. Switches and Reassembly
12. Final Testing
This is a multipart series on how anyone can do a complete overhaul of your pinball machine and make it work like new.
You are approaching the final steps. We are going to cover cleaning and adjusting of the switches, most of which are covered in another link. Then it will be the reverse of what was done in parts 3 – 5.
Switches
The first step is to clean and adjust the switches. This is covered in the separate section, Pinball Switches – Fixing And Adjusting. You should perform this task on all switches. This can include:
* Pop bumper switches.
* Roll over stars.
* Roll over switches such as in and out lanes.
* VUK (vertical up kicker) and ball locks.
* Stationary Targets.
* Drop Targets.
* Optos (optical switches).
Flipper EOS switches and flipper switches should have already been done in section 10.
Rebuilding the Pop Bumper Switch
Having lively pop bumpers is one of the more important parts of the game. The key is making certain that the switches are rebuilt, cleaned and correctly adjusted. Prior to adjusting the pop bumper switches, make certain that they are clean and working properly.
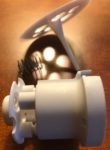
Perhaps the most overlooked part of the pop bumper switch is the plastic pop bumper spoon. Most people clean it and move on. But this part wears out. A divot can form where the pop bumper skirt touches the spoon. This divot can be tiny, but it makes it harder for the skirt to be moved by the pinball. Replace the pop bumper spoon. To do this, remove the two nuts, then the bracket on the back (or bottom) and lift off the spoon.
While the spoon is off is the easiest time to see and clean the switch contacts so they are nice and bright.
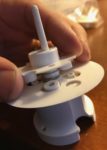
Be sure to set the new spoon with the ‘cup’ side towards you. Replace the bracket so that it faces the same direction and tighten the screws and nuts.
While tightening, the ‘sandwich’ of switch leafs and the spoon can twist or slide. Make certain they are all aligned together and perfectly centered.
Wax?
As 10 pinball experts about waxing and you will get 15 different opinions. We wax our playfields, even the new ones.
If you are going to wax the playfield, now is the time to do it.
Most people use a variation on Carnauba wax. Get the paste and not the liquid.
Apply with a soft applicator, and shine with a microfiber cloth. Linen, such as old t-shirts will leave surface scratches.
Reassembly
Assuming that you took great pictures during sections 3 – 5, this part should be pretty easy.
Organizing and Saving Your Photos

First, insure that you have a backup of your photos. This can be easy or hard. Many of the software programs, like Apple’s iCloud, delete the photos permanents from all of your computers, phones and tablets if you remove them from any one device. They are gone forever.
We recommend that you store your photos on a hard drive, or a permanent cloud storage such as Google Drive or DropBox. That way, as you delete them during reassembly, you can go back and look at them if needed. We are a bit obsessive about our photos and have copies of all the machines that we have ever worked on. In our case, we don’t synchronize our desktop Macs with iCloud. As we delete them off our phones or tablets, they remain on our Macs.
So it is important to back up these photos to your hard drive or another cloud storage.
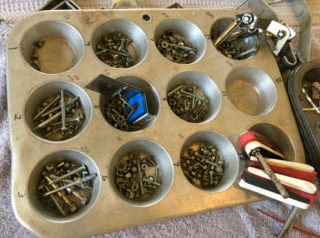
We also use an organization system that uses keywords. As we work on a pinball machine, we insert that machine’s name, frequently an abbreviation, as a keyword for that photo. That makes smart search for that machine quite easy.
Start with the last photo you took of the disassembly, and perform that step. Your hardware will be in your organization trays. Start with the ones you put in there last.
Final Cleaning


Some of your hardware went into the shaker, back in Step 3. Pull those out and clean them up. Be sure to remove any cleaning media from the screw threads.
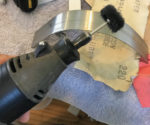
It maybe necessary to brush some up with your Dremel and your buffing / polishing brushes. Use the coarse brushes only on places like screw heads. Use the finer brushes (320 / 400 grit) on visible flat surfaces.
Shining Up the Hardware
We used to put all the screws into a tumbler and shine them up. But the dust from the tumbler fills up the screw heads and each one has to be cleaned out with a sharp knife.
No more. We now use a Dremel and the buffing / polishing brushes and quickly shine up the head of the screw and any small metal parts that are visible.
Plastic Ramps
Plastic ramps should be cleaned with Novus 2, then Novus 1. If it is badly worn, some people fire polish their ramps over an open flame. Just get all the grit off with Novus, clean and reinstall.
Wire Ramps
Wipe clean with Novus 2. Wipe with your playfield wax. Remove any remaining wax.
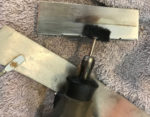
Metal Ramps


Solid metal ramps get wear marks. These ramps are usually manufactured with a mirror finish. It is difficult to remove the ball marks and restore a mirror finish, but we remove the ball marks and leave a ‘matt finish’.
Start by cleaning the ramps of all dirt and goo. Usually, we start with a wipe of isopropyl alcohol , then Novus 2. This will also remove any deposits from the rubber rings.
If you can access the ramps with a Dremel and your buffing / polishing brushes, go at it. Start where the ball mark is the darkest with 120 or 180 grit and work your way up to the 400 grit. Carefully move the Dremel tool with the brush spinning in the same direction as the ball movement. Carefully move the Dremel in a straight line in the same direction as a ball. If you move up and down, marks will be left that will not look clean. For many ramps, the Dremel just cannot access the wear areas.
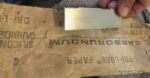
If your horizontal lines are not perfect, then get fine sandpaper, 220 to 400 grit and drag the sandpaper as horizontal, in the direction of the ball travel .
With practice, you will get it to look great. When finished, wax the ramp.
Metal Guides


Metal guides clean up much the same way as metal ramps. Except that access with your Dremel will likely be much easier. We frequently use 220 grit sandpaper. Be sure to move the Dremel tool or sandpaper in the direction that the ball rolls – Not up and down.
Wax when done.
Putting It All Back Together
Wood Screw Holes
If reassembling to the original playfield, the holes for the wood screws are frequently too large to hold the screws securely. This, usually, can be easily fixed. For all wood screw holes, we insert a wood toothpick into the hole and break it off at the surface.
If the wood hole is severely enlarged, we take two wood toothpicks, dip them in white wood glue and stick them into the hold and break them off at the surface. We don’t wait for the glue to dry prior to inserting the screw (but probably should).
For rare severe cases, it maybe necessary to obtain a small wooden dowel, drill a hole just slightly larger than the dowel, cut the dowel off to the thickness of the playfield, dip the dowel in wood glue and then insert the dowel into the drill hole. It is best to let the glue set overnight. Then drill a proper hole for the wood screw.
Using Your Photo Library
 Open up your library of photos that you took as you disassembled everything. Look at the last photo. Put back in what you took out in that photo. Delete the photo from your device (but not from your library!).
When replacing the hardware, use the last storage compartment first. Continue until the that compartment is empty. Your photo should show when the compartment is empty and as you reassemble, that should repeat.
Repeat.
The Pop Bumper
Pop Bumper Parts Above the Playfield

Since the beginning of pinball, pop bumpers have been a feature on the playfield and the parts from generation to generation are nearly identical. In the early to mid-80’s, Bally decided to redesign the pop bumper, cutting a larger hole through the playfield to hold a plastic base. Other than that one design, parts are similar and sometimes interchangeable.
If the pop bumper body above the playfield was removed (which is the best thing to do), reassembly can be a challenge. The following parts need to be assembled in the proper order and orientation:
* Pop bumper body. This is the center part and is almost always white.
* Pop bumper skirt. Usually red or white but sometimes other colors. Always best to install new ones.
* Pop bumper spring (small) – this sits on the base and holds the skirt up, ready for the ball to hit the skirt.
* Pop bumper base – sits on the playfield, and holds the spring.
* Bumper ring assembly – shiny metal ring that moves. Clean this up like the ramps are cleaned.
* Two flathead wood screws – holds the pieces to the playfield.
* Lamp socket – generally with two flat ribbon wires that go through the body.
* Pop bumper cap – Usually worthwhile replacing.
Assembly

Four parts need to be put together, in the proper orientation for this to work: pop bumper skirt, small spring, bumper body, and bumper base. The lamp socket will be installed later
1) Insert the small spring into the bumper base. While holding the spring in place,
2) Insert the skirt with the long center point, through the spring and base. While holding that in place,
3) Insert the white popper body through the skirt and into the base.
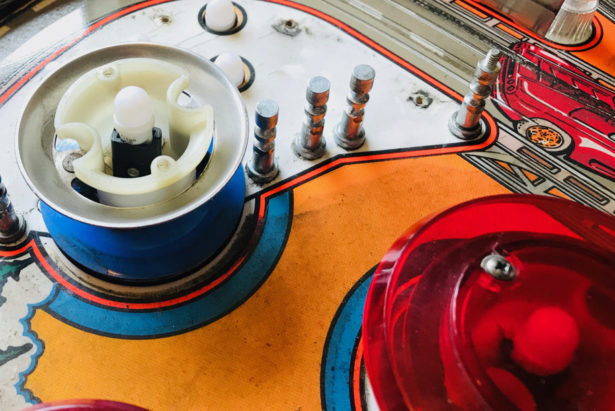
If everything is oriented properly, the body will be held, by friction, snugly to the base, with the spring and skirt in between them. The outer holes in the skirt will be aligned with the indentation in the body, so that the metal ring can fit down in place (last photo).
This may take some practice to get it right.
After everything is together, install the lamp socket into the assembled upper body.
Installing the Upper Pop Bumper body
The upper pop bumper body is attached to the playfield with two flat head wood screws. Inspect the holes first. In most cases we put a toothpick into the hole to make the screws hold. For wood holes see ‘Wood Screw Holes’, above.
Install the upper pop bumper assembly with the two wood screws.
Once the upper body is installed, the wires for the pop bumper lamps must be routed, stapled and soldered into place. This is easier to do now than when the pop bumper solenoids / coils have been reinstalled. We install shrink tubing over the bare wires to prevent shorts.
 We find that we need to use a pneumatic stapler. Manual nor electric staplers seem to penetrate the wood. However, if when you removed the wires, you just raised the staples slightly and left them in place, they should be sufficient to hold the wires.
If everything is aligned properly, the metal pop bumper ring will be able to slide over this assembly with the two rods going through the holes (see ‘notch’ photo above) and into the playfield below. Install the pop bumper cap to keep the metal ring from falling back out.
Adjusting the Pop Bumper Switch
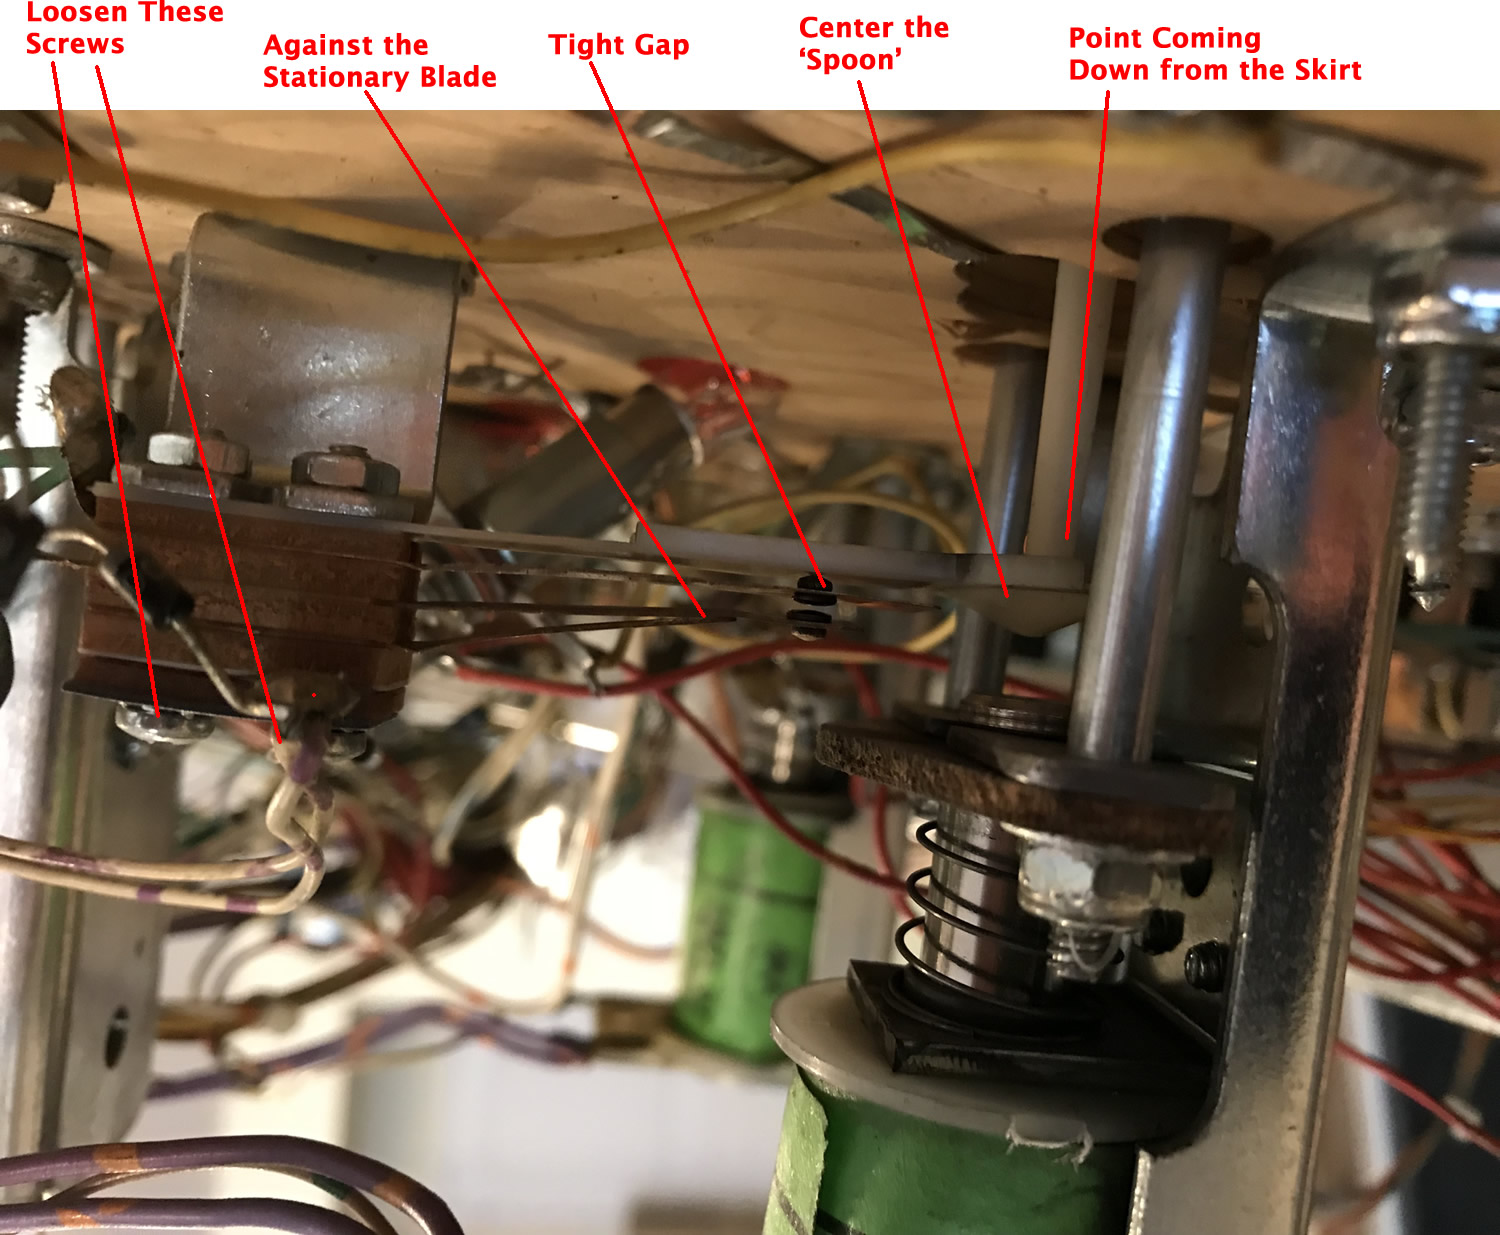
This adjustment can only be done properly, after the pop bumper parts above the playfield have been reinstalled. If they were removed, wait to do this step after reinstallation of the plastic parts (skirt and pop bumper body) with the spring, and they are held in place to the playfield with the two screws.
Getting the pop bumper switch cleaned and adjusted is crucial to fun pinball. Clean the switch contacts with isopropyl alcohol and a Q-tip. That will remove some of the deposits, but it maybe necessary to wipe it clean. Many people put a business card between the contacts, press the switch contacts together and pull the card through several times.
For all SS games, these are gold contacts and must never be filed. EM pins have higher current switches. If they are tungsten, they could be filed. We like using a Dremel 443 brush on the contacts as it is less destructive.
For details on adjusting and positioning the pop bumper switch, please see our section on adjusting switches. Also be certain to read the section on leaf switches.
Installing the Pop Bumper Solenoid (Below the Playfield)
Below the playfield, install those two washers onto the rods, then work these rods into the two holes of the pop bumper solenoid and the metal and wafer yokes. Install the two nuts, the three nuts holding the pop bumper bracket in place, and tighten.
If you removed the wires to the coil, solder them back now. If the pop bumper has a diode, then the wires have to go on in the proper location. Backwards is a short.
Lightbulbs
If you have not repaired your lightbulb sockets, do so now.
Generally, new lightbulbs (LEDs!) should be installed in the sockets first, prior to anything else. This may not be reflected in this order in your photos.
Rubber Rings
 As the playfield parts, especially the plastic posts get put into position, it will be necessary to install the new rubber rings. Your photos will tell you when it is time to perform that step. This will always occur before a playfield plastic is installed.
Leaf Switches Against Rubber Rings
 Prior to putting the playfield plastic over your newly installed posts and rubber rings, use your switch adjusting tool (or carefully, your fingers) to make sure those leaf switches are close, but not touching. If these leaf switches are too close, the game will be prone to ‘phantom’ scoring, when shaking and pop bumper action can cause the switches to activate.
Note that areas such as slingshots have these switches too. If they are too tight, the slingshot will tend to ‘machine gun’, where the slingshot does several rapid pulses instead of just one.
Playfield Plastics
 Except, perhaps for ramps, the last part to be installed are the playfield plastics. These should be clean and, if necessary, flattened.
Attach the plastics with the same nuts you removed at the start.
Pop bumper caps should be installed too. Do not over tighten the screws or the caps may crack.
The Ramps
 If your game has ramps, they should be installed at the point where your photos indicate. They are frequently the last to be installed. Be sure to drape any wire connectors down through the same holes that they came from (your photos from part 4 should show this).
If your ramps screw down to the playfield, there are usually small flat head wood screws. Do not over tighten these screws as that would cause the ramp’s flexible metal flap down flat. When a pinball hits the over tightened flap, the pinball may become airborne.
Flipper Bats
At some point, the flipper bats will need to be reinstalled. These steps need to be carefully followed:
* The flipper bats must be aligned (pointed) properly. Many playfields have a mark to point to or align with. Others, it is to parallel a wire guide.
* The flipper bats must have a small amount of up and down movement so they do not bind. There is a gauge to do this, but we usually just make certain there is a little movement.
* The bat must be tightened underneath the playfield to the linkage. If not tight enough, the flipper will not return to the proper position.
For a more complete explanation, see our flipper rebuilding guide.