Five inch Williams score reels were used in earlier games. The one we are working on today is from a 1957 Williams Baseball pinball machine.
Supplies Needed
You will need the most of the same supplies as outlined in the starting page on EM – Score Reels.
Lubrication
As with all parts of a pinball machine, lubrication should only be used where there are metal to metal contact. There is very little of that here. We use a light coating of teflon lube on the circuit board electrical contacts. The plunger and linkage are nylon, making lubrication not needed. If this is lubricated, it will soon get ‘gunked up’ and cause problems with the reel.
Removal of the Score Reel
 If your backbox can be easily removed and setup on a table, that would make this process easier. Otherwise, this maintenance can be done with the mechanisms still mounted in the backbox cabinet.
Each reel is held into place by two small clips. These clips can be easily removed by hand or pliers. Set them aside into your parts storage.
Disassembly and Cleaning
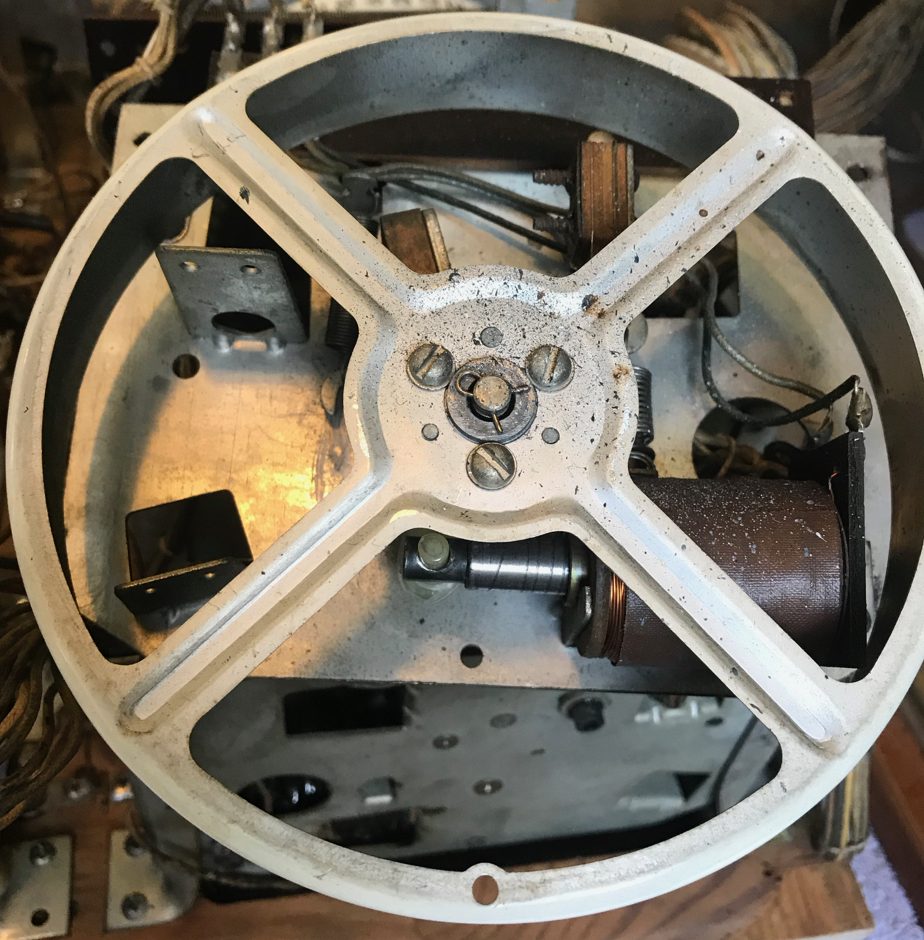 Lift the reel out for access to the parts. The wires will just be long enough to slide out and move to the side.
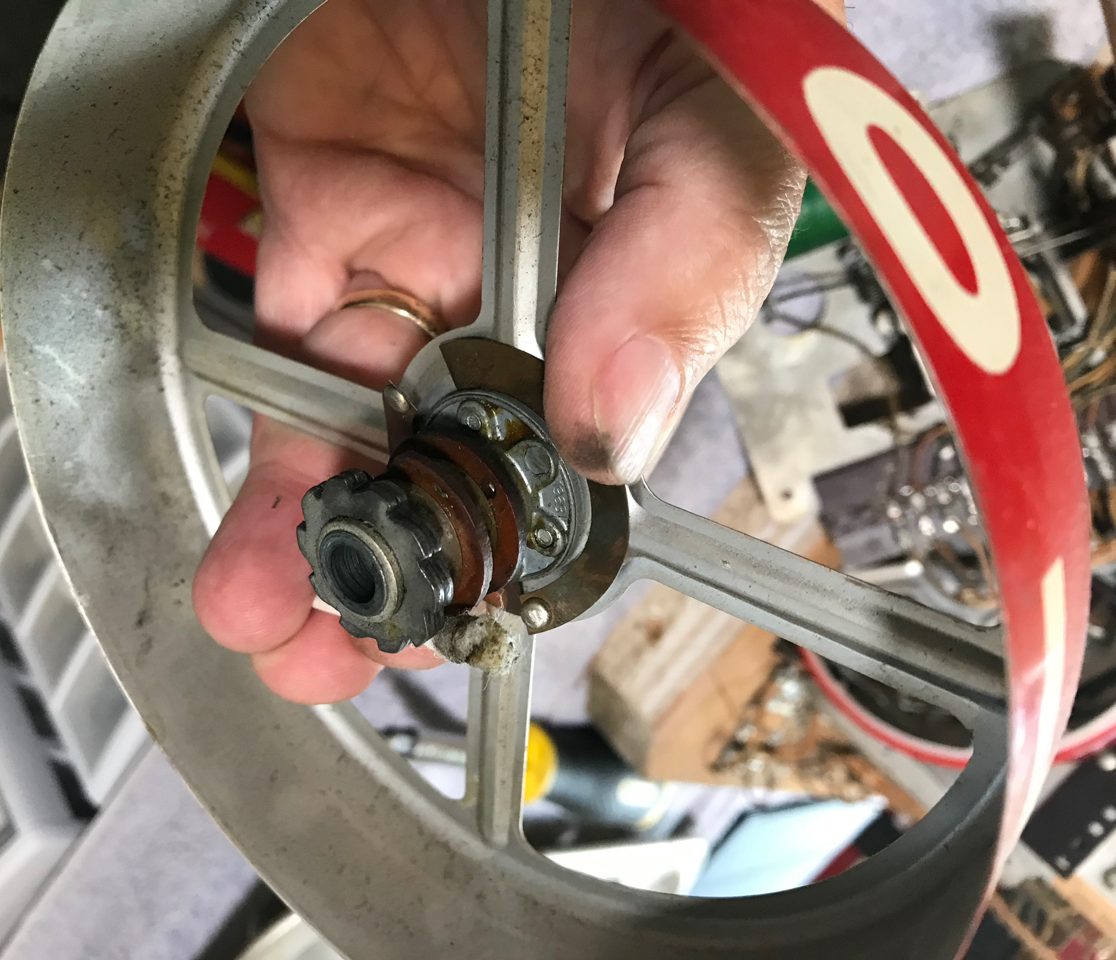
The reel is held in place by a clip. If it is a clip like this in the photo, it will be easy to remove. Some are held in places by a retaining ring. These can be difficult to remove. Remove this clip and the washer underneath. Set these aside in parts storage.
Note: Do NOT remove the three screws on this reel. The screws hold contacts on the other side. If removed, it maybe difficult to get them back into the proper position.
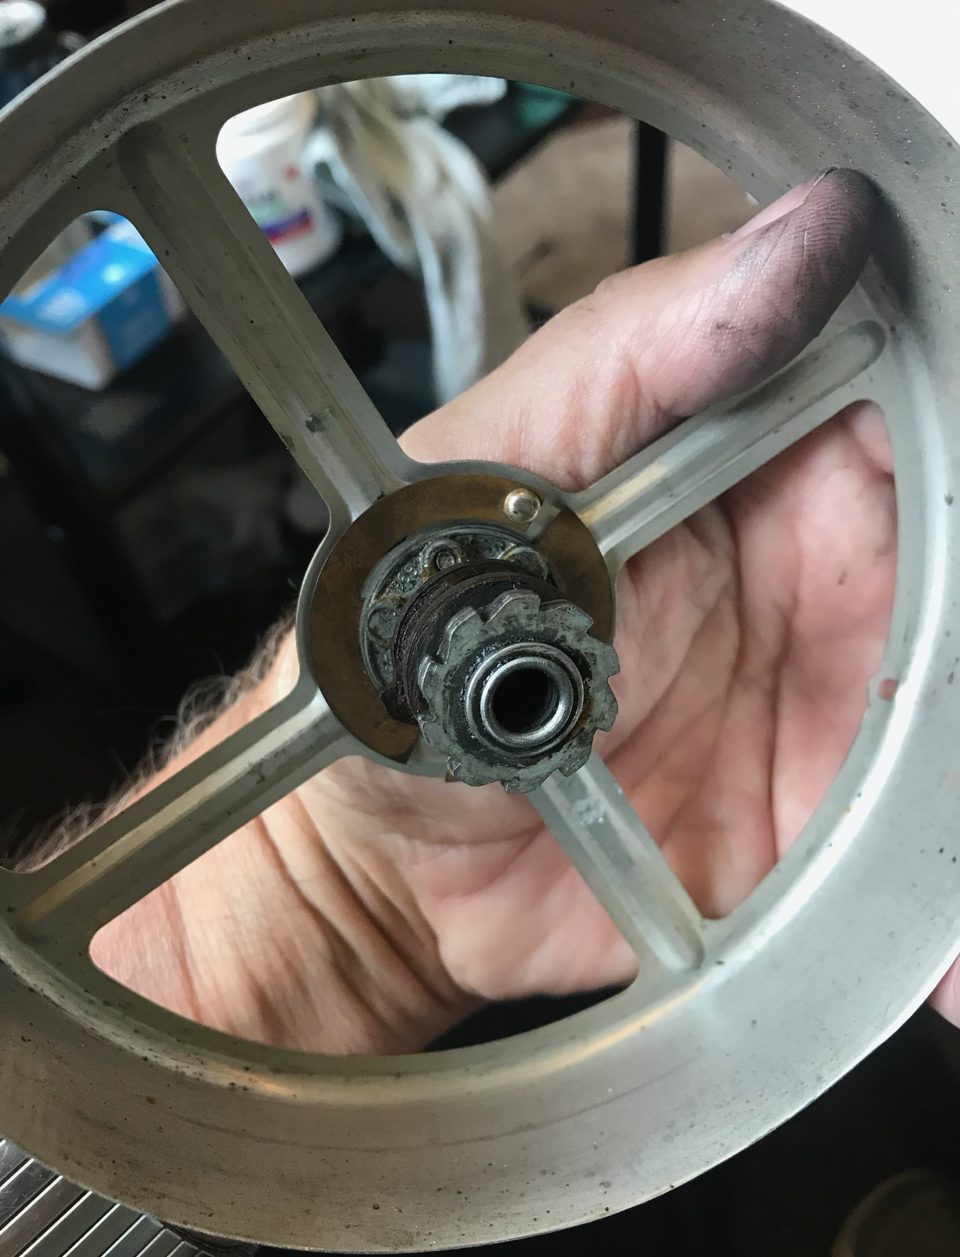
The back of the reel will house a gear plus two wafers. Clean as much of the grease as possible off. This will be re-greased with Teflon Grease or Super Lube.
There maybe a small circuit board. If so, the contacts should be cleaned with Mothers Mag & Aluminum Polish. This can be accomplished with either a rag, or through the use of a Dremel and a buffing wheel.
When cleaned, wipe the board with a rag and isopropyl alcohol (not rubbing alcohol which may contain lanolin). This will removing the remaining polish. The contacts should now be nice and shiny. Squirt a small amount of Finish Line Dry Bicycle Chain Lubricant on a Q-tip and wipe the contacts. There should be a shiny thin film left. Alternately, grease maybe used, but this MUST be just a light thin coating. Extra grease will attract dirt and act as an insulator.
 Remove the two screws holding the board in place and set them aside.
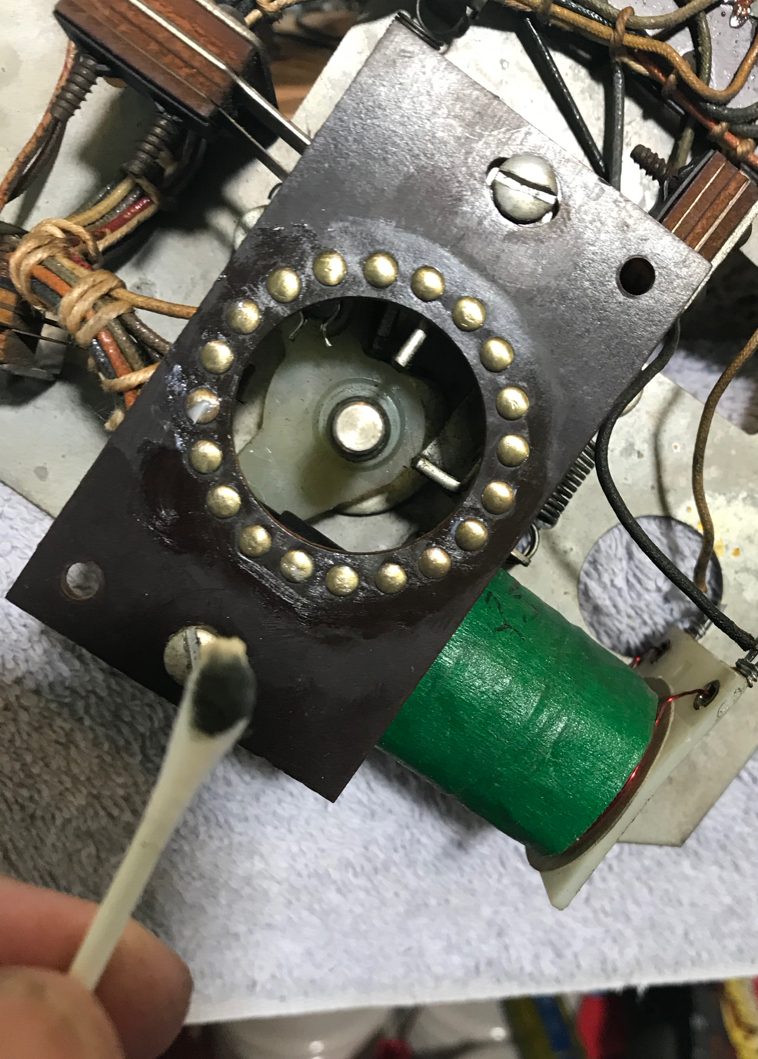
The rest of the mechanism will house a solenoid coil, plus several switches (the number will vary). These will need to be cleaned.
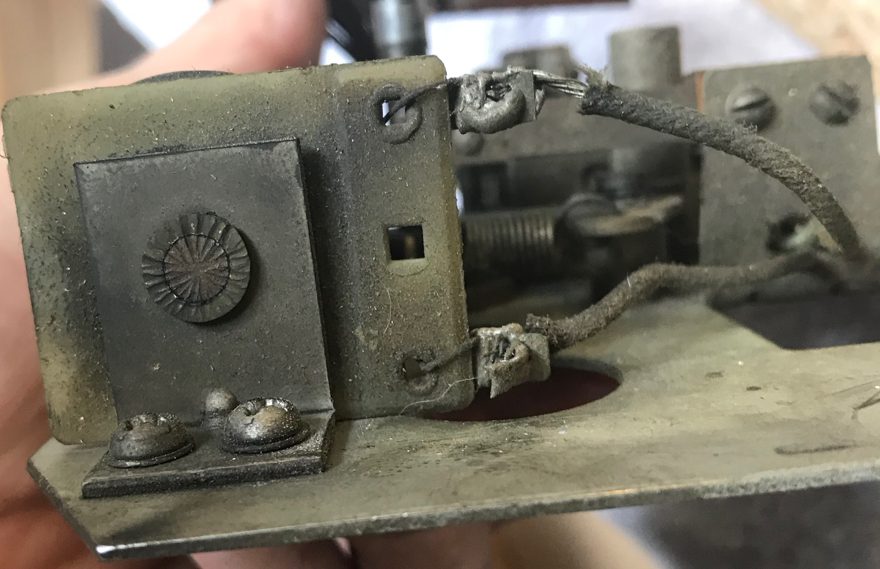
Remove the two nuts (if present) on the back of the bracket holding the coil stop in place. Also remove the two screws holding the coil stop and set the screws and nuts aside. Inspect the wire connections to the coil. If the solder is a cold solder joint, or the wires are partially broken, remove the wires, tin the wires and solenoid tabs with solder, then reconnect the wires. A poor connection here will result in poor power to the coil.
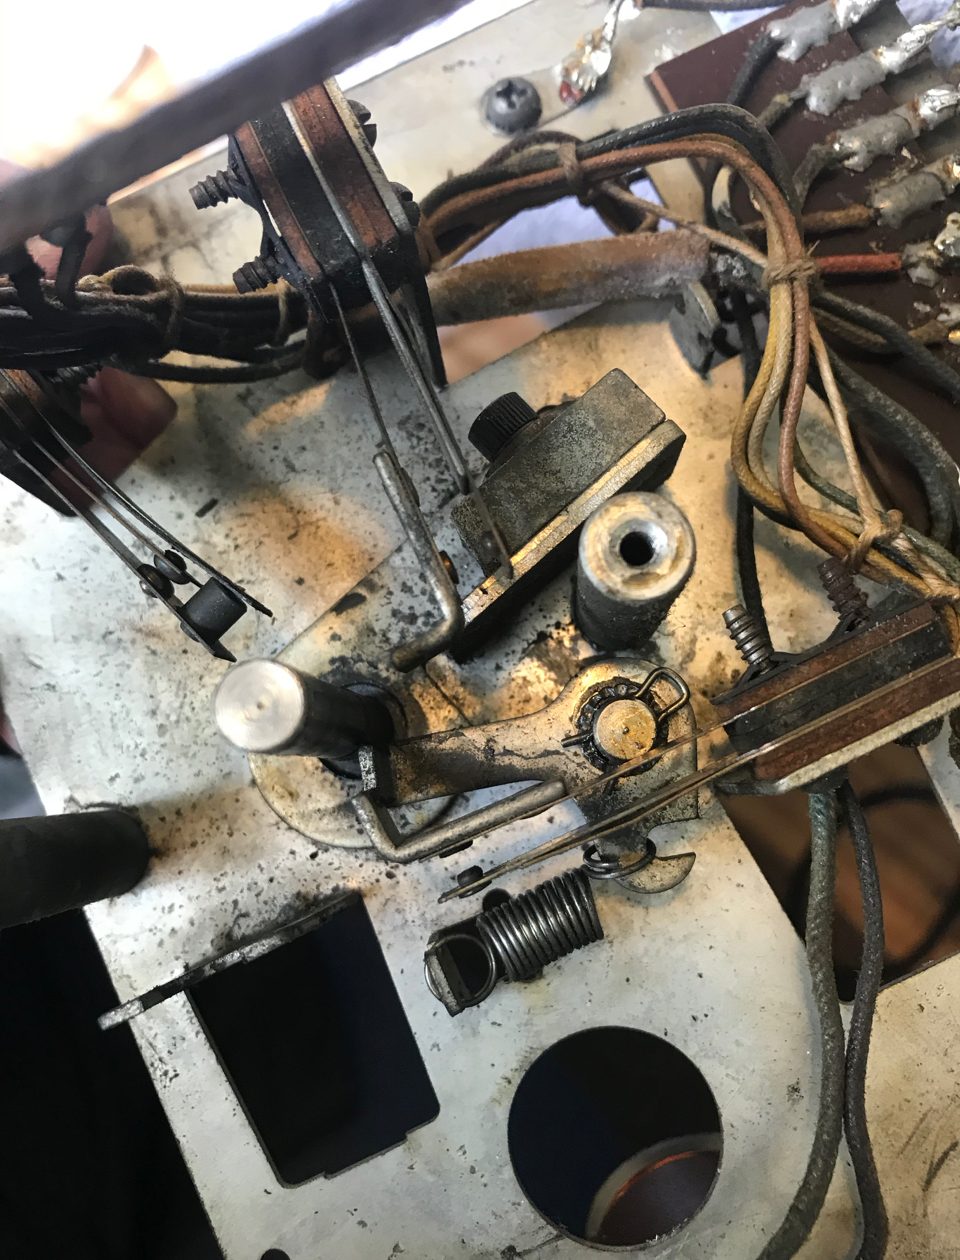
 The switches should be able to be cleaned with a Q-tip and isopropyl alcohol. These should be nice and shiny when cleaned. If not, then pull out your Dremel and clean with the 1/8″ Carbon Steel Brush 443 tip. Be careful when using the Dremel as the action of the Dremel spinning can damage the switches. Generally, we use this carbon brush tip for high current switches only.
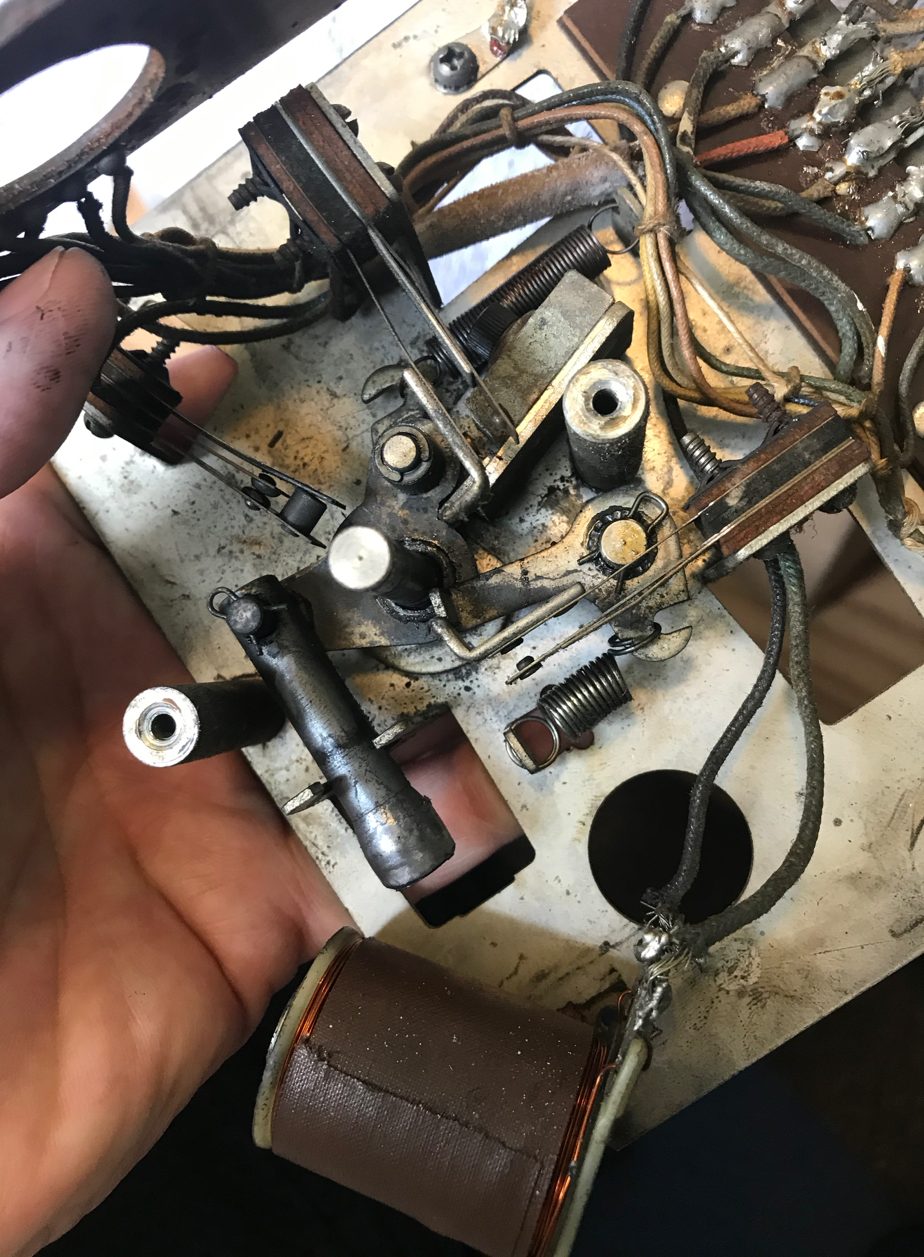
Note: Take a photograph of the positions of the wires. They need to be returned to the approximate location when done. Wires out of place or sticking out might hit the reel or other moving parts. This could result in binding or wearing of the insulation and shorting.
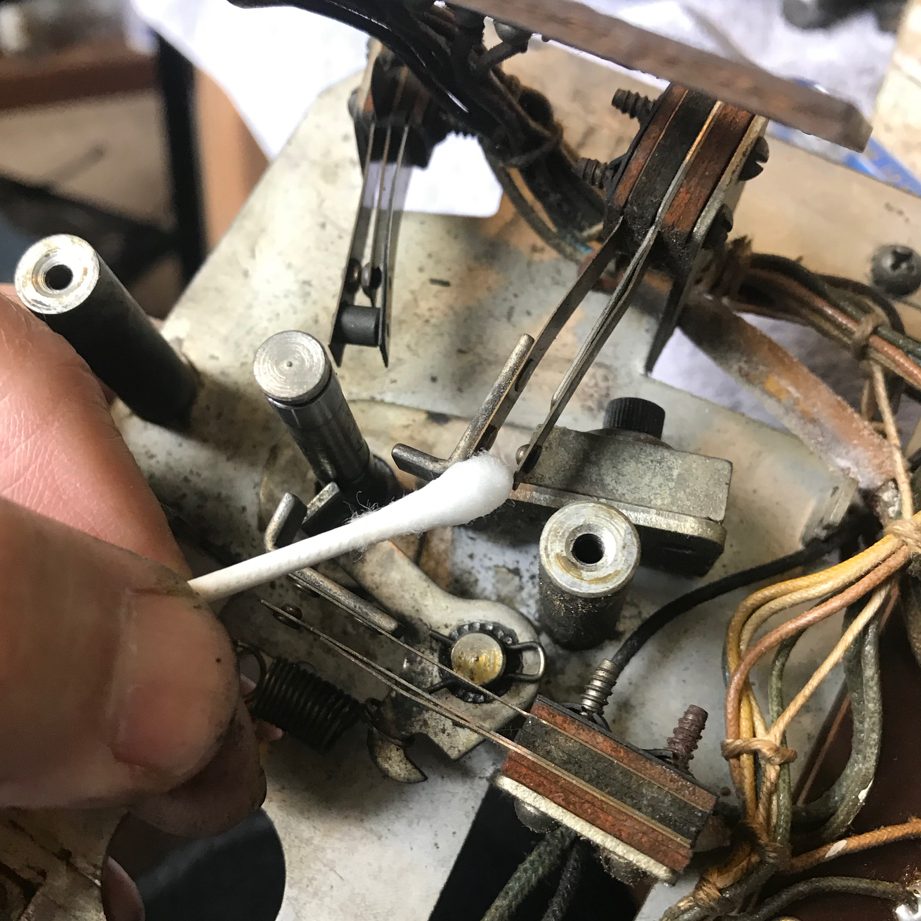
 Note the plunger and associated linkage. This is held in place by a small spring on one end of the linkage. Remove the spring and set it aside. Carefully pull out this linkage off of the shaft. Note that the linkage will have to be in a specific position to clear a switch. When reinstalling, it will be important to position the linkage in the same position to clear that switch.
Clean up the linkage with isopropyl alcohol. Use a rag. Some soaking in alcohol might be needed. Set the linkage aside for now.
 Clean the coil sleeve and coil stop with alcohol. Use a small alcohol soaked cloth and snake it through the coil sleeve. Clean the shafts that the reel and the plunger mechanism rotate on with alcohol. Snake an alcohol soaked rag through the shaft on the reel. Do not lubricate the main shaft. The center piece is nylon. With a metal shaft, then a nylon piece over the shaft, then the reel over the nylon, there is no metal to metal contact.
Lubricate any metal to metal moving parts. Use light amounts of Teflon grease or sewing machine oil. Be very careful to not get lube on the plunger or into the coil sleeve.
Reassembly of the Score Reel
Slide the linkage back into position. Connect the spring to the linkage but do not connect the other end to the bracket. Slide the coil with its sleeve in place over the end of the plunger and reconnect the coil stop. Install the nuts on the back later. Insure that these parts move easily (with the spring not connected).
 Insure that the wires in the back of the reel housing are back in their proper positions. Re-attach the small circuit board into position with the two screws. Check the position of the wires going to this board.
Lightly lubricate the gear and the wafers on the back of the reel.
Note: Getting this reel back into position can be tricky. If it does not slide into position, do not force it as you will break or damage switches or linkage.
There is a second linkage held in place by a spring. Move that in the direction that the spring is stretched out and carefully slide the reel all the way down the shaft into position. This may also take carefully pulling back a switch or two. Be patient. Once the reel is down far enough to get the retainer into position, hold it down. It may try to pop up.
 Slide the clip into place. Your reel is reassembled. Check its operation by pulling in the plunger mechanism into the coil with a ‘snap’, then let go. The reel should effortlessly rotate.
Be sure to install the nuts on the back of the coil stop screws.
Check the proper operation of the switches. One switch should close each time the plunger is pulled in. The other switches will open and close depending on where the reel is located. They will move when the reel moves from ‘9’ to ‘0’ and ‘1’. Adjust the switches with a switch adjusting tool if needed.
Comments
Comments, including suggestions, improvements, errors, etc. are welcome (see below).
If you have a specific question about your game that does not directly apply to fixing Williams EM Score Reels, please see our FAQ section.
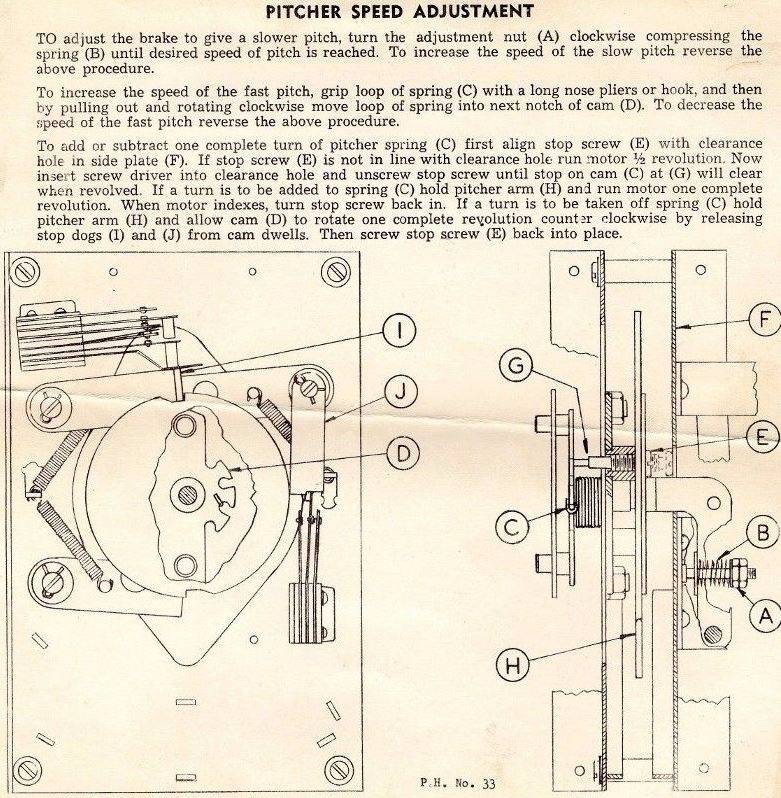
These are photos for one of the questions listed below.
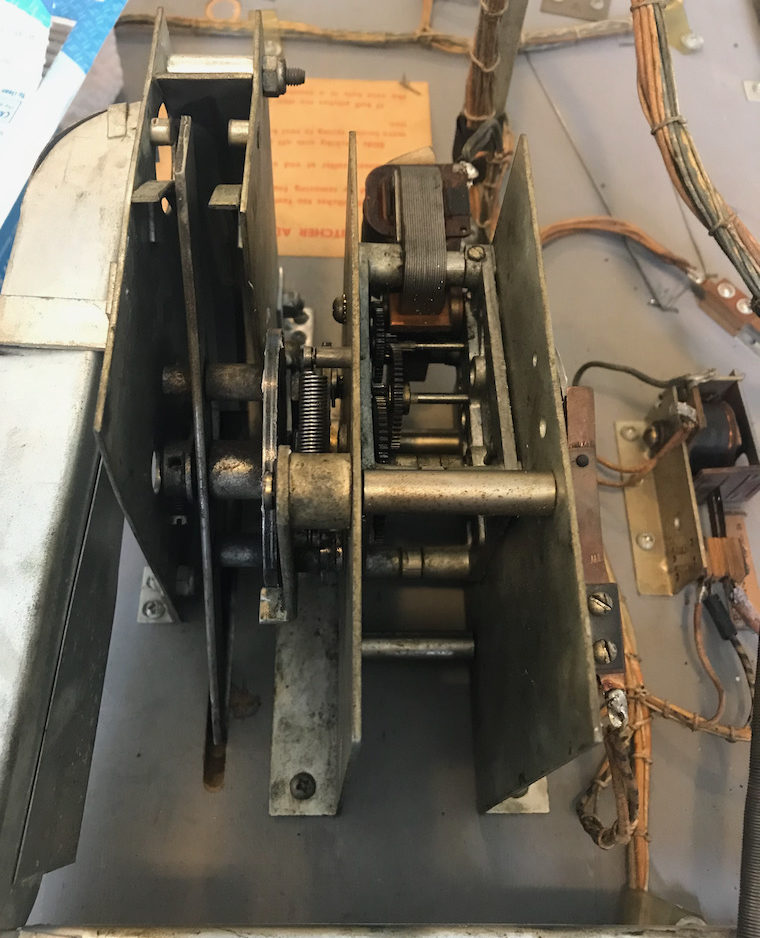
I have a 1960 williams offical baseball machine whose pitcher does not throw the ball straight but off to the right side….kind of weak like. I’ve adjusted the pitching speed to no avail. Could it be the solenoid B29 1600? Any help would be appreciated as I live remotely and have no one within 500 miles to come and look at it. Thanks.
We have restored a 1957 Williams Baseball game. In that one, the coil is 120 V AC. But we think that after ’57, the coil went the standard 50V solenoid voltage. The ball pitch mechanism stayed approximately the same, though. Later games, perhaps yours, introduced different pitches (curve, fast, etc.).
The biggest problem we had was with the bat mech which was completely beat up. Our pitch mech had to be adjusted and the adjustment instructions were on the bottom of the playfield.
And the bad news is that we no longer have access to that game to check for it.
We do have a few pictures and will link to them as soon as we can upload them. For some reason, we cannot load pictures into this conversation, so we loaded them into the page above this conversation.
You may have to remove and completely clean this mechanism – remove all of the grease, then regrease with silicon grease any point where metal meets metal.
I have a 1957 Baseball machine that has these same score reels and I cleaned them as they were pretty dirty. Now I have an issue with the reels advancing more than 1 number. They turn just over 1 number and some times they advance 2 numbers. Seems like now they are so clean they advance too much. Any idea how to make sure the reel only advances 1 number?
“Seems like now they are so clean they advance too much.”
No, that should not happen. If you pull out a reel and can advance it to higher numbers, spinning it by hand, then the mechanism is not working properly. There is a tick-tock like mechanism in there that latches the reel so that it advances one at a time. While it has been a while since we had a 1957 Williams Baseball apart, we recall that there was a trick to reloading the spring loaded ‘arms’ back into the reel. We think the issue is there.
https://homepinballrepair.com/wp-content/uploads/2020/06/IMG_8761-e1592152571276.jpg
I am having a similar problem with a 1961 Skill Ball, I cleaned the four score reels and one of the score reels now over rotates past the next number and stops between two numbers. Did you figure out what the problem was? Thanks, Dale
I am also restoring my 1957 Williams baseball pinball machine. When I removed the left runs wheel a part fell out. Since it would be hard for me to describe it, does anybody know where I could find parts like this and a parts list thanks
Parts list is pretty tough. There are a few places that provide manuals online. They are on our ‘links’ page.
https://homepinballrepair.com/external-links-the-most-complete-list-of-pinball-links/
Here is one of the better ones, but there are others on our links page.
https://homepinballrepair.com/external-links-the-most-complete-list-of-pinball-links/
As to parts, the best source of EM parts is The Pinball Resource. Steve Young is amazing.
Best regards,
The HomePinballRepair Team
I have a 1963 williams big daddy pinball and the previous owner took apart the score reels and there are two different contractors for the circuit board..and one reel that doesn’t have the circuit board or disc shaped contactor…how do I know what goes where?…is one contactor for 0-9 and another 10 to 99?
This varies a little bit from pin to pin – looking at the schematic will tell you what is right. But usually the lowest reel is the match reel. The other reel(s) can be setup for an extra ball.
If you are not interested in the match – at home that is superficial, and for pay machines is a mixed bag for the operator, then you can skip the smallest denomination reel. The others are to reward the player who scores high with an extra ball and even for home machines, they are nice to have work.
“how do I know what goes where?”
That is a pretty general question. The schematic is the quick answer.
Those contact ‘arms’ can be a problem. We have a machine right now that gives a match when the display says it should not. So those ‘arms’ are in the wrong position. We are ignoring that for the moment with bigger issues to solve, but it is on our list. We are hoping that moving it 180 degrees will solve the problem.
But when disassembling, we carefully mark everything to know how to reassemble the parts in the correct orientation. If you are inheriting a machine where that was not done, we can only suggest trial and error. Move it 180 degrees and hope that solves the issue.
Not sure if this answers your question or not.
Hi. This has been a great guide. I’m doing this for the first time for a 62 Trade winds. A question: my 100 score reel has no washer under the cotter pin. But there is a washer under the nylon ratchet and cam unit, between that and the drive crank assembly. I can’t tell from your pictures, but is this right? Or did a former owner misplace this washer? Because on my reel, it doesn’t “click” into the cam well, and I’m wondering if it’s because the spacing on the shaft is messed up with the washer there (ie it’s actually the washer that’s supposed to be under the cotter pin).
Making an ‘always’ statement will get someone in trouble, but we have never seen a washer anywhere other than under the cotter pin. Yet those with retaining rings seem to not have a washer at all. But the Gottlieb with the circuit board and the retaining ring have a washer underneath.
I suspect that someone will be able to say that this varies from manufacturer to manufacturer.
https://homepinballrepair.com/wp-content/uploads/2020/06/IMG_8753-e1592152453290.jpg